
Despicable Me 2: The Indestructible Evil CATminion (Full Crochet Tutorial)
Written by Riri (@lillyums)
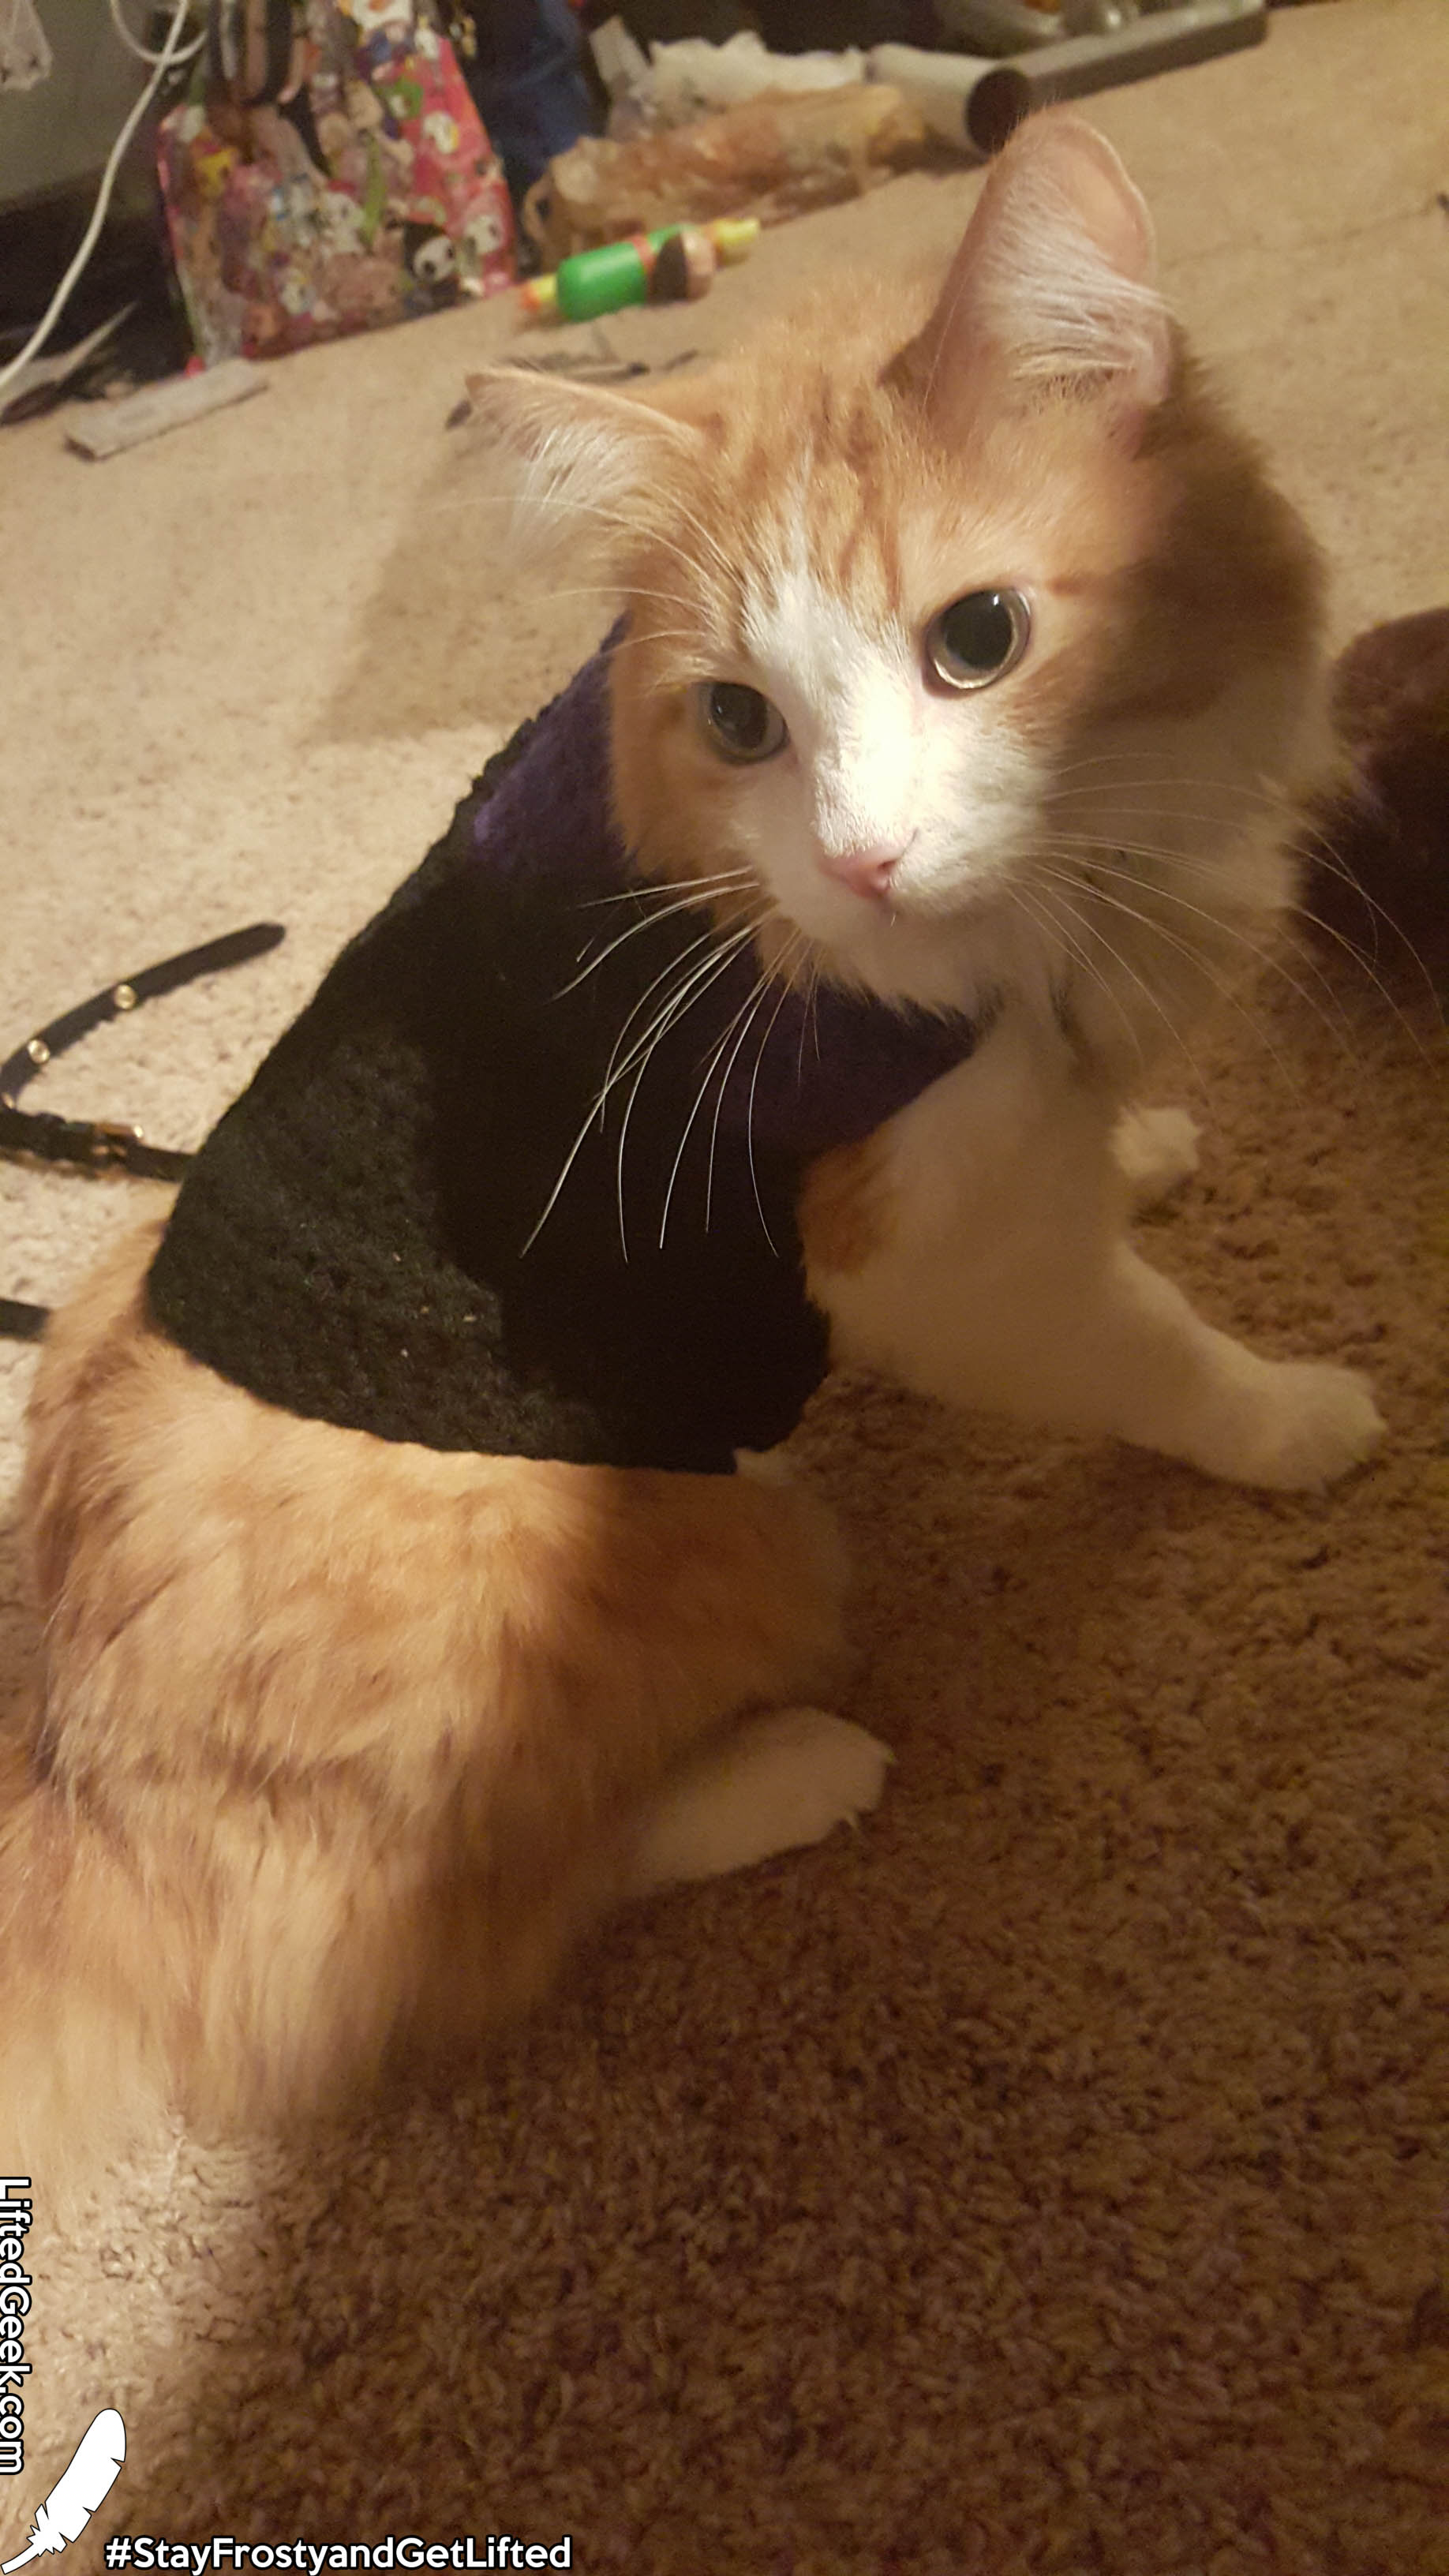
It's about that time my kitty, Fibby, is due for a costume. After all, Halloween is just around the corner. Unlike many of my previous crochet work, this time I have actually recorded all crochet steps for the head piece. Many followers have inquired about the pattern for kitty head pieces and I usually wing those and lose track of the steps. But now, not only do I have a BASE head pattern, I have provided the actual pattern for this WHOLE costume.
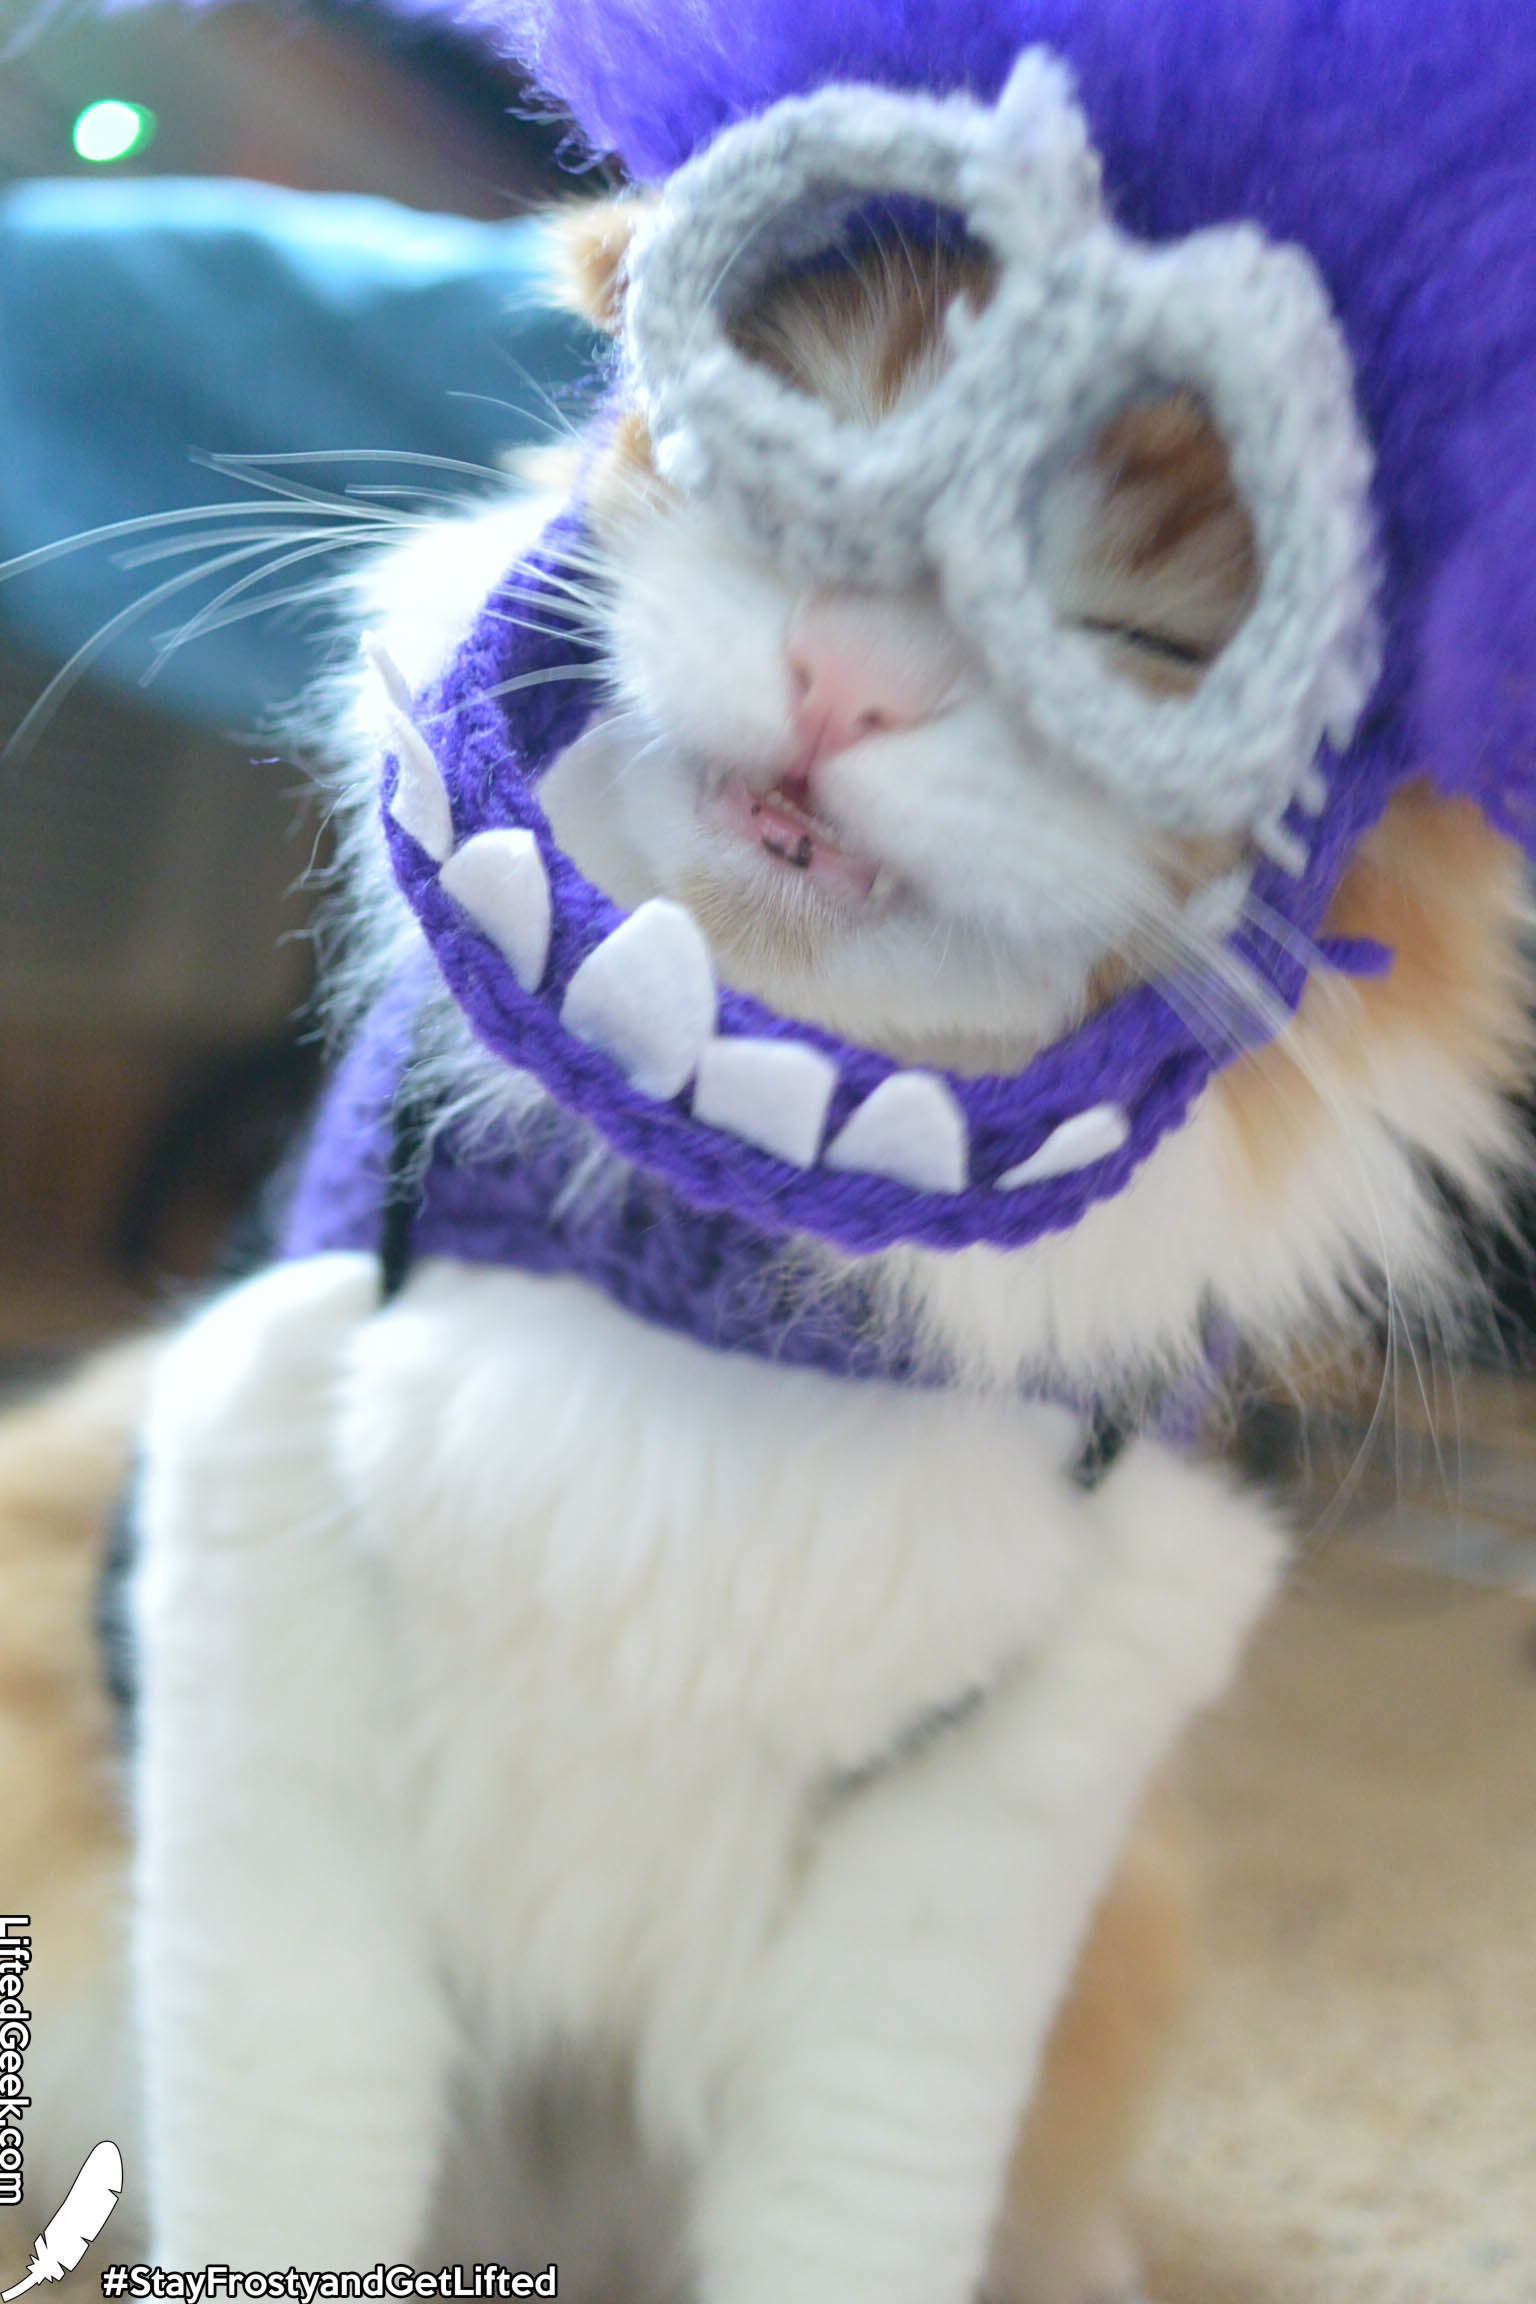
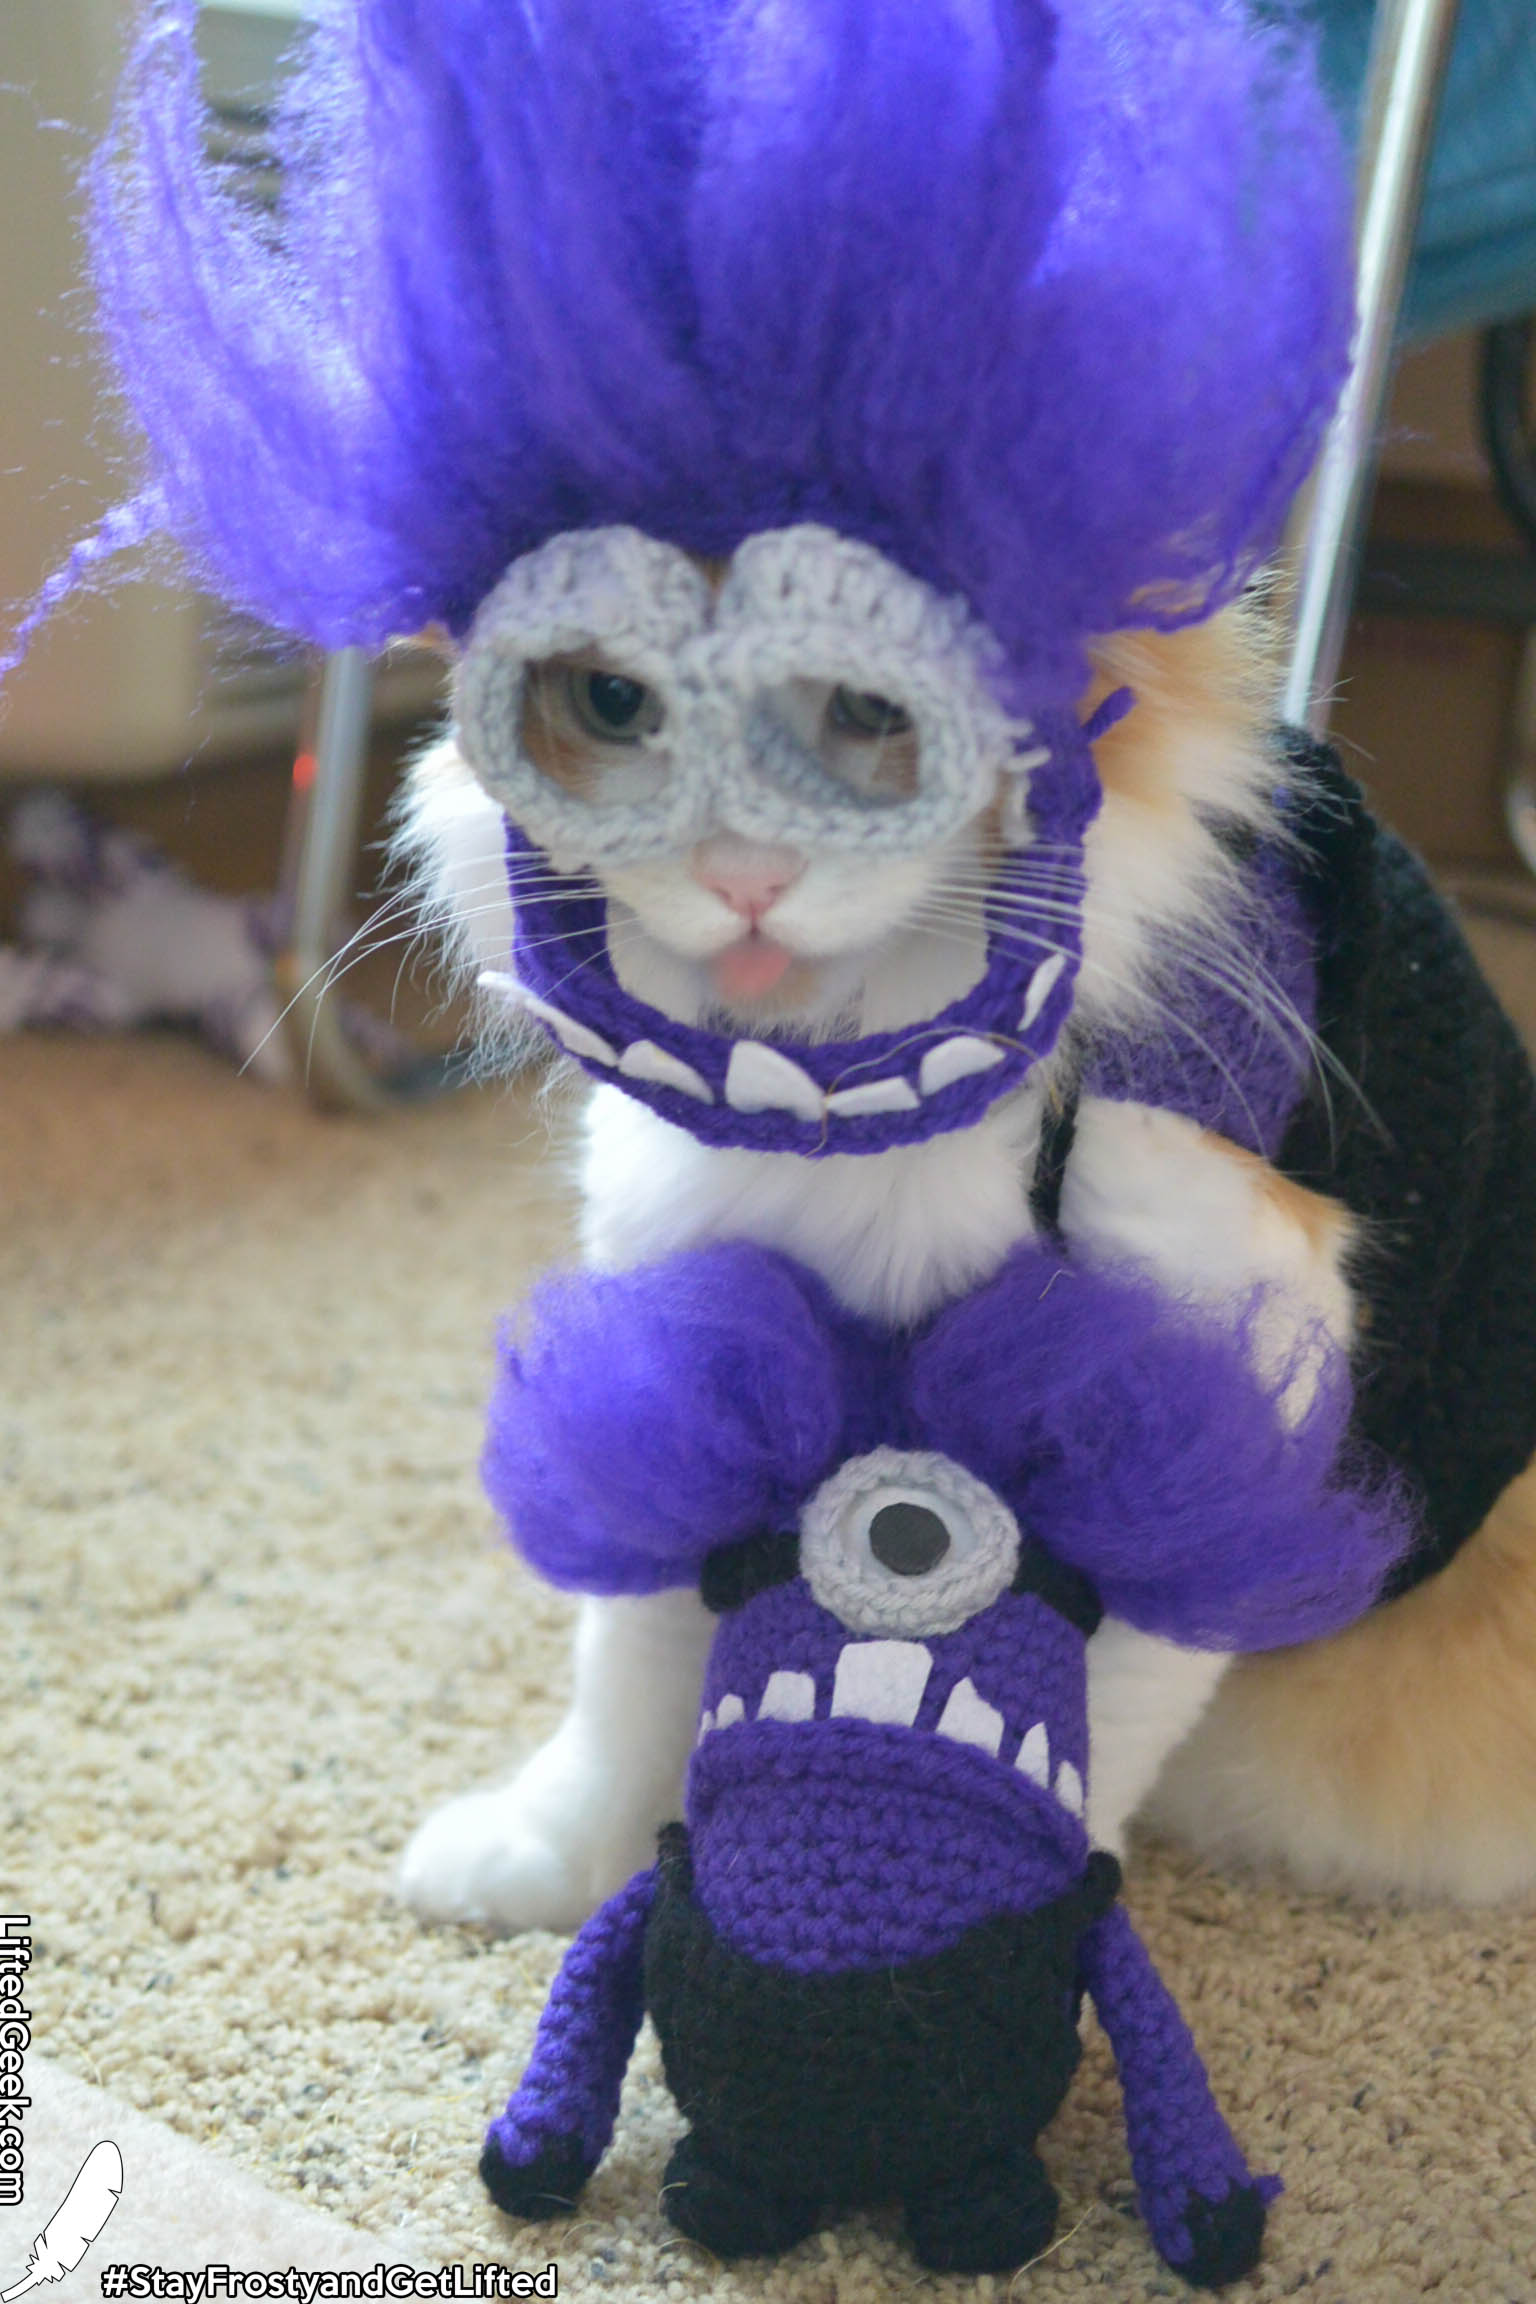
This Halloween, I have made my cat into an Evil Minion.
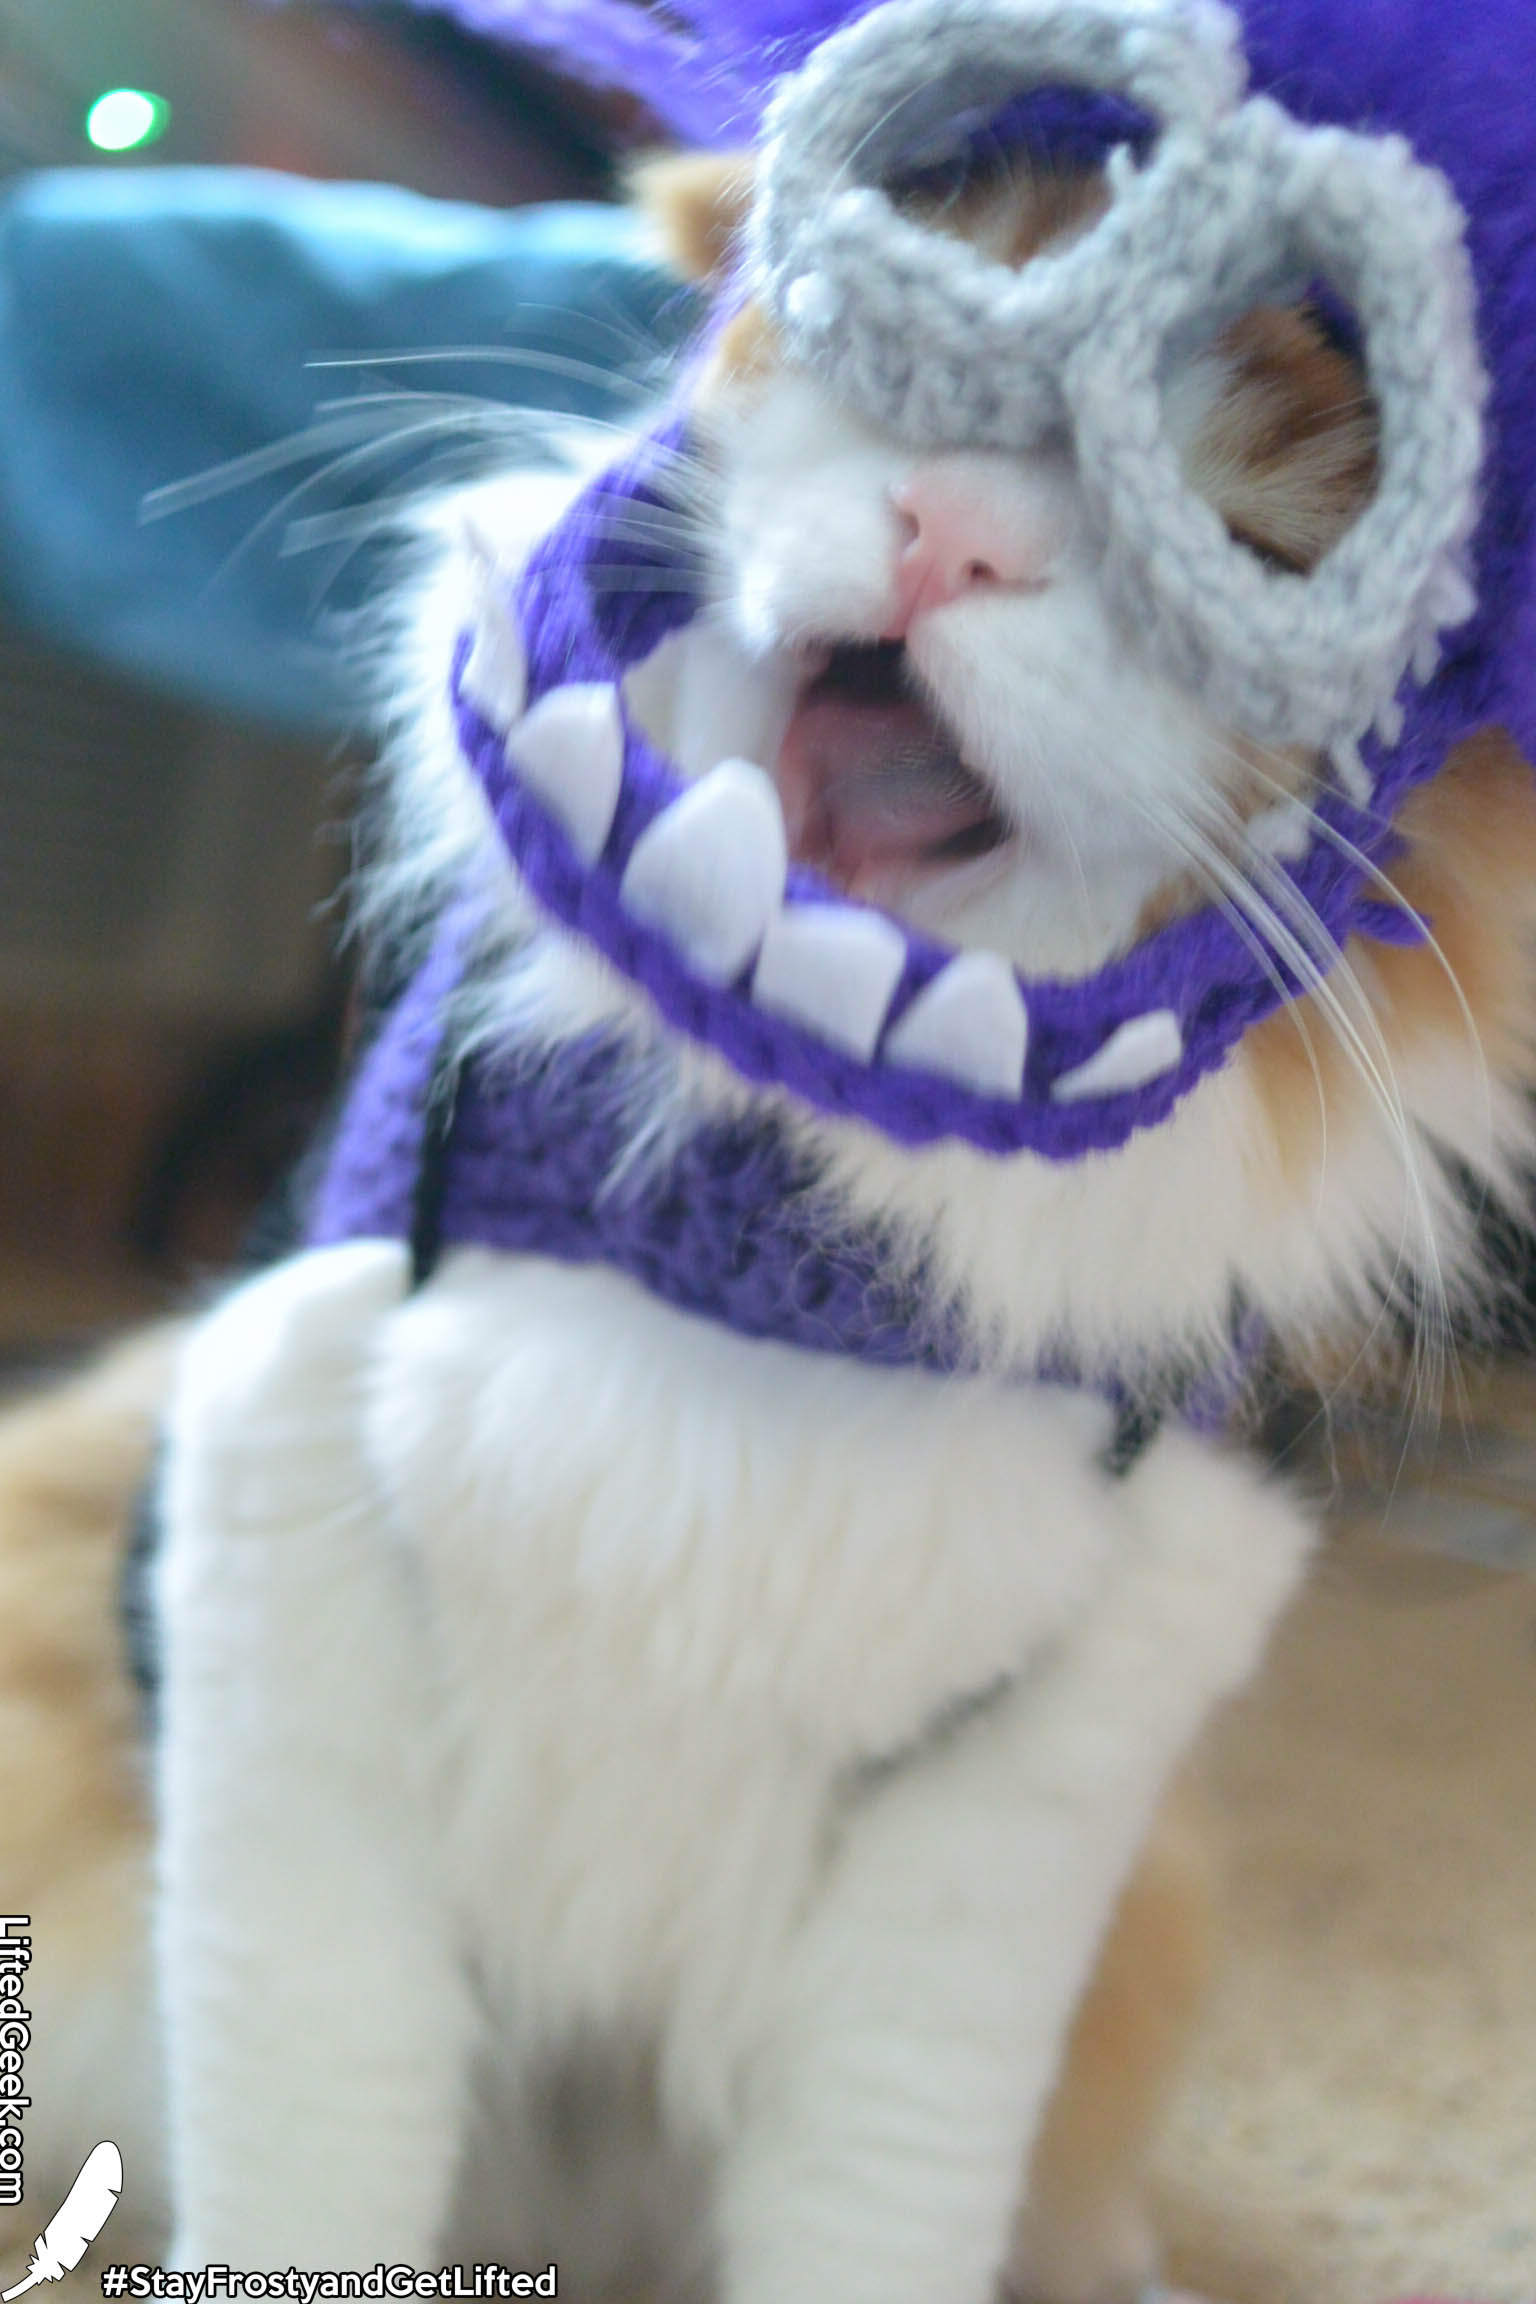
It's perfect. Their evil gazes. Their silly tongues. Their wide open mouths. Their growling, snarling, screaming behavior. Sounds cat like huh? Sometimes.
So pretty much, at the end of my day, I made my cat into an Evil CATminion using yarn drenched in PX-41 serum. Something like that.
Mastering the Evil Minion blank stare
The complete outfit contains the sweater and the headpiece with goggles and crooked Evil Minion teeth. Total time... probably a good 3-4 hours, unless you're fast at detangling 4 ply yarn.
This section will be divided into multiple sections. The tutorial and assembly of the head piece will start, then followed by the sweater. If you're interested in seeing more pictures of the cat in this Evil outfit, scroll to the very end.
Materials
- H hook (adjust as needed depending on size of pet. My cat is 10 lbs)
- Purple yarn, worsted weight
- Grey yarn, worsted weight
- Black yarn, worsted weight
- Pet slicker brush (see Evil Minion hair tutorial article)
- Yarn needle
- Lot of cat treats
This is the first time I'm providing a head piece pattern, so I'm doing my best with visuals to help with this process.
Head Piece
This section here can also serve as a base head piece for all your cat helmet/head piece needs!
- Row 1: 16 dc into a magic circle.
- Row 2: chain 2 or do a faux dc. 2 dc next stitch. *1 dc in next dc, 2 dc in the next* repeat around, join. (24)
You should now just have two rows of a circle.
Now to make the ear holes!
- Chain 16. Skip 5 dcs, join on 6th dc.
- sc next 6 stitches.
- Chain 16. Skip 5, join on 6th.
- sc next 6 stitches, slip stitch into next stitch, the start of the ear.
You should have this now
Now we're going to dc around the ears:
- Ch 2 (or faux dc), 2 dc next stitch, *1 dc next stitch, 2 dc in the next* repeat through the chain to where chain is joined.
- Dc in the next 6 sc
- Ch 2 (or faux dc), 2 dc next stitch, *1 dc next stitch, 2 dc in the next* repeat through the chain to where chain is joined. Join to 1st dc.
You should now have this:
Next we're just going to slip stitch til we get to the middle of the ear to create a "chin strap." Alternatively, you could tie off and start at the middle of the ear, but if you're like me, I don't like to cut the yarn til I'm done...
- Slip stitch the next 6 dc to the other start of the ear.
- Slip stitch the next 11 dc to the middle of the ear
- Ch 10
- Join to the middle (~11th dc) of the other ear.
- Slip stitch the remaining ear towards the beginning of the first slip stitch.
Now you should have a chin strap, and it'll look like this.
This is the end of the basic head piece that you can use for ANY design. Now we'll move forward with the actual evil minion details.
Mouth
Using purple yarn:
- Chain 27
- dc in each chain.
- Turn, and do a front post sc in each dc.
This will create the "lip" protrusion the evil minions have, and a fold like this:
Now cut out pieces of teeth to your liking - preferably find an adhesive white felt, but if you don't have that, you can hot glue them. Place them in that fold. Here's how I did mine:
Attach to the hat right at where the chin strap meets.
Goggles
For this section, I would probably recommend making the goggles following this procedure. My goggles were actually done with dc stitches and i think that was just too wide for the kitty. All photos here are shown with the dc goggles - if you like how it looks, replace the below steps with dc stitches instead of sc.
Starting with grey yarn:
- Chain 18, join
- sc around, join, slip stitch into sc, tie off.
Make two. Attach two together. First step can be adjusted smaller or larger but a few chains if you prefer.
Attach to the head piece. I did it like this and secured it along the sides above the chin strap:
Hair
This is the best part (not). The most important part that defines the Evil Minion. You'll need to cut a lot of pieces of string now - I'm sorry I lost count. Cut about 12 inches of string, and start by getting about 50, 12" strings.
Fold the string in half. Using a yarn needle, take the loop end of the half, and thread through the yarn needle like so:
Now you'll take this piece and pull the loop through a crochet stitch on top of the head piece, and then take the end pieces of the string and pull them through the loop - then tighten.
Pull loop through a dc stitch
Take end pieces of string and pull through the loop
I started in the magic ring so there are 16 strings that you need there, and then I worked in the 2nd row of the circle, which is 24 dc = 24 more strings. Then I worked along the ears in the front and the back. Basically - add strings wherever you want hair to be. This is how it looked in the end, on the cat. He'll look like Bob Marley for now...
Once you are done with adding all the strands you want, now you need to detangle each and every piece of yarn so that the individual 4 ply yarn is un-plyed.
Now, using the pet slicker brush, you will brush this all out - and keep in mind, you will lose a lot, which is why the string is as long as I made it. In the end, this is what I made got:
OK NOW TEST IT ON THE KITTY:
"Yes Human, it fits."
You'll see much better how and where I placed the strings around the ears so that his ear appears hidden in the hair but still peaks out.
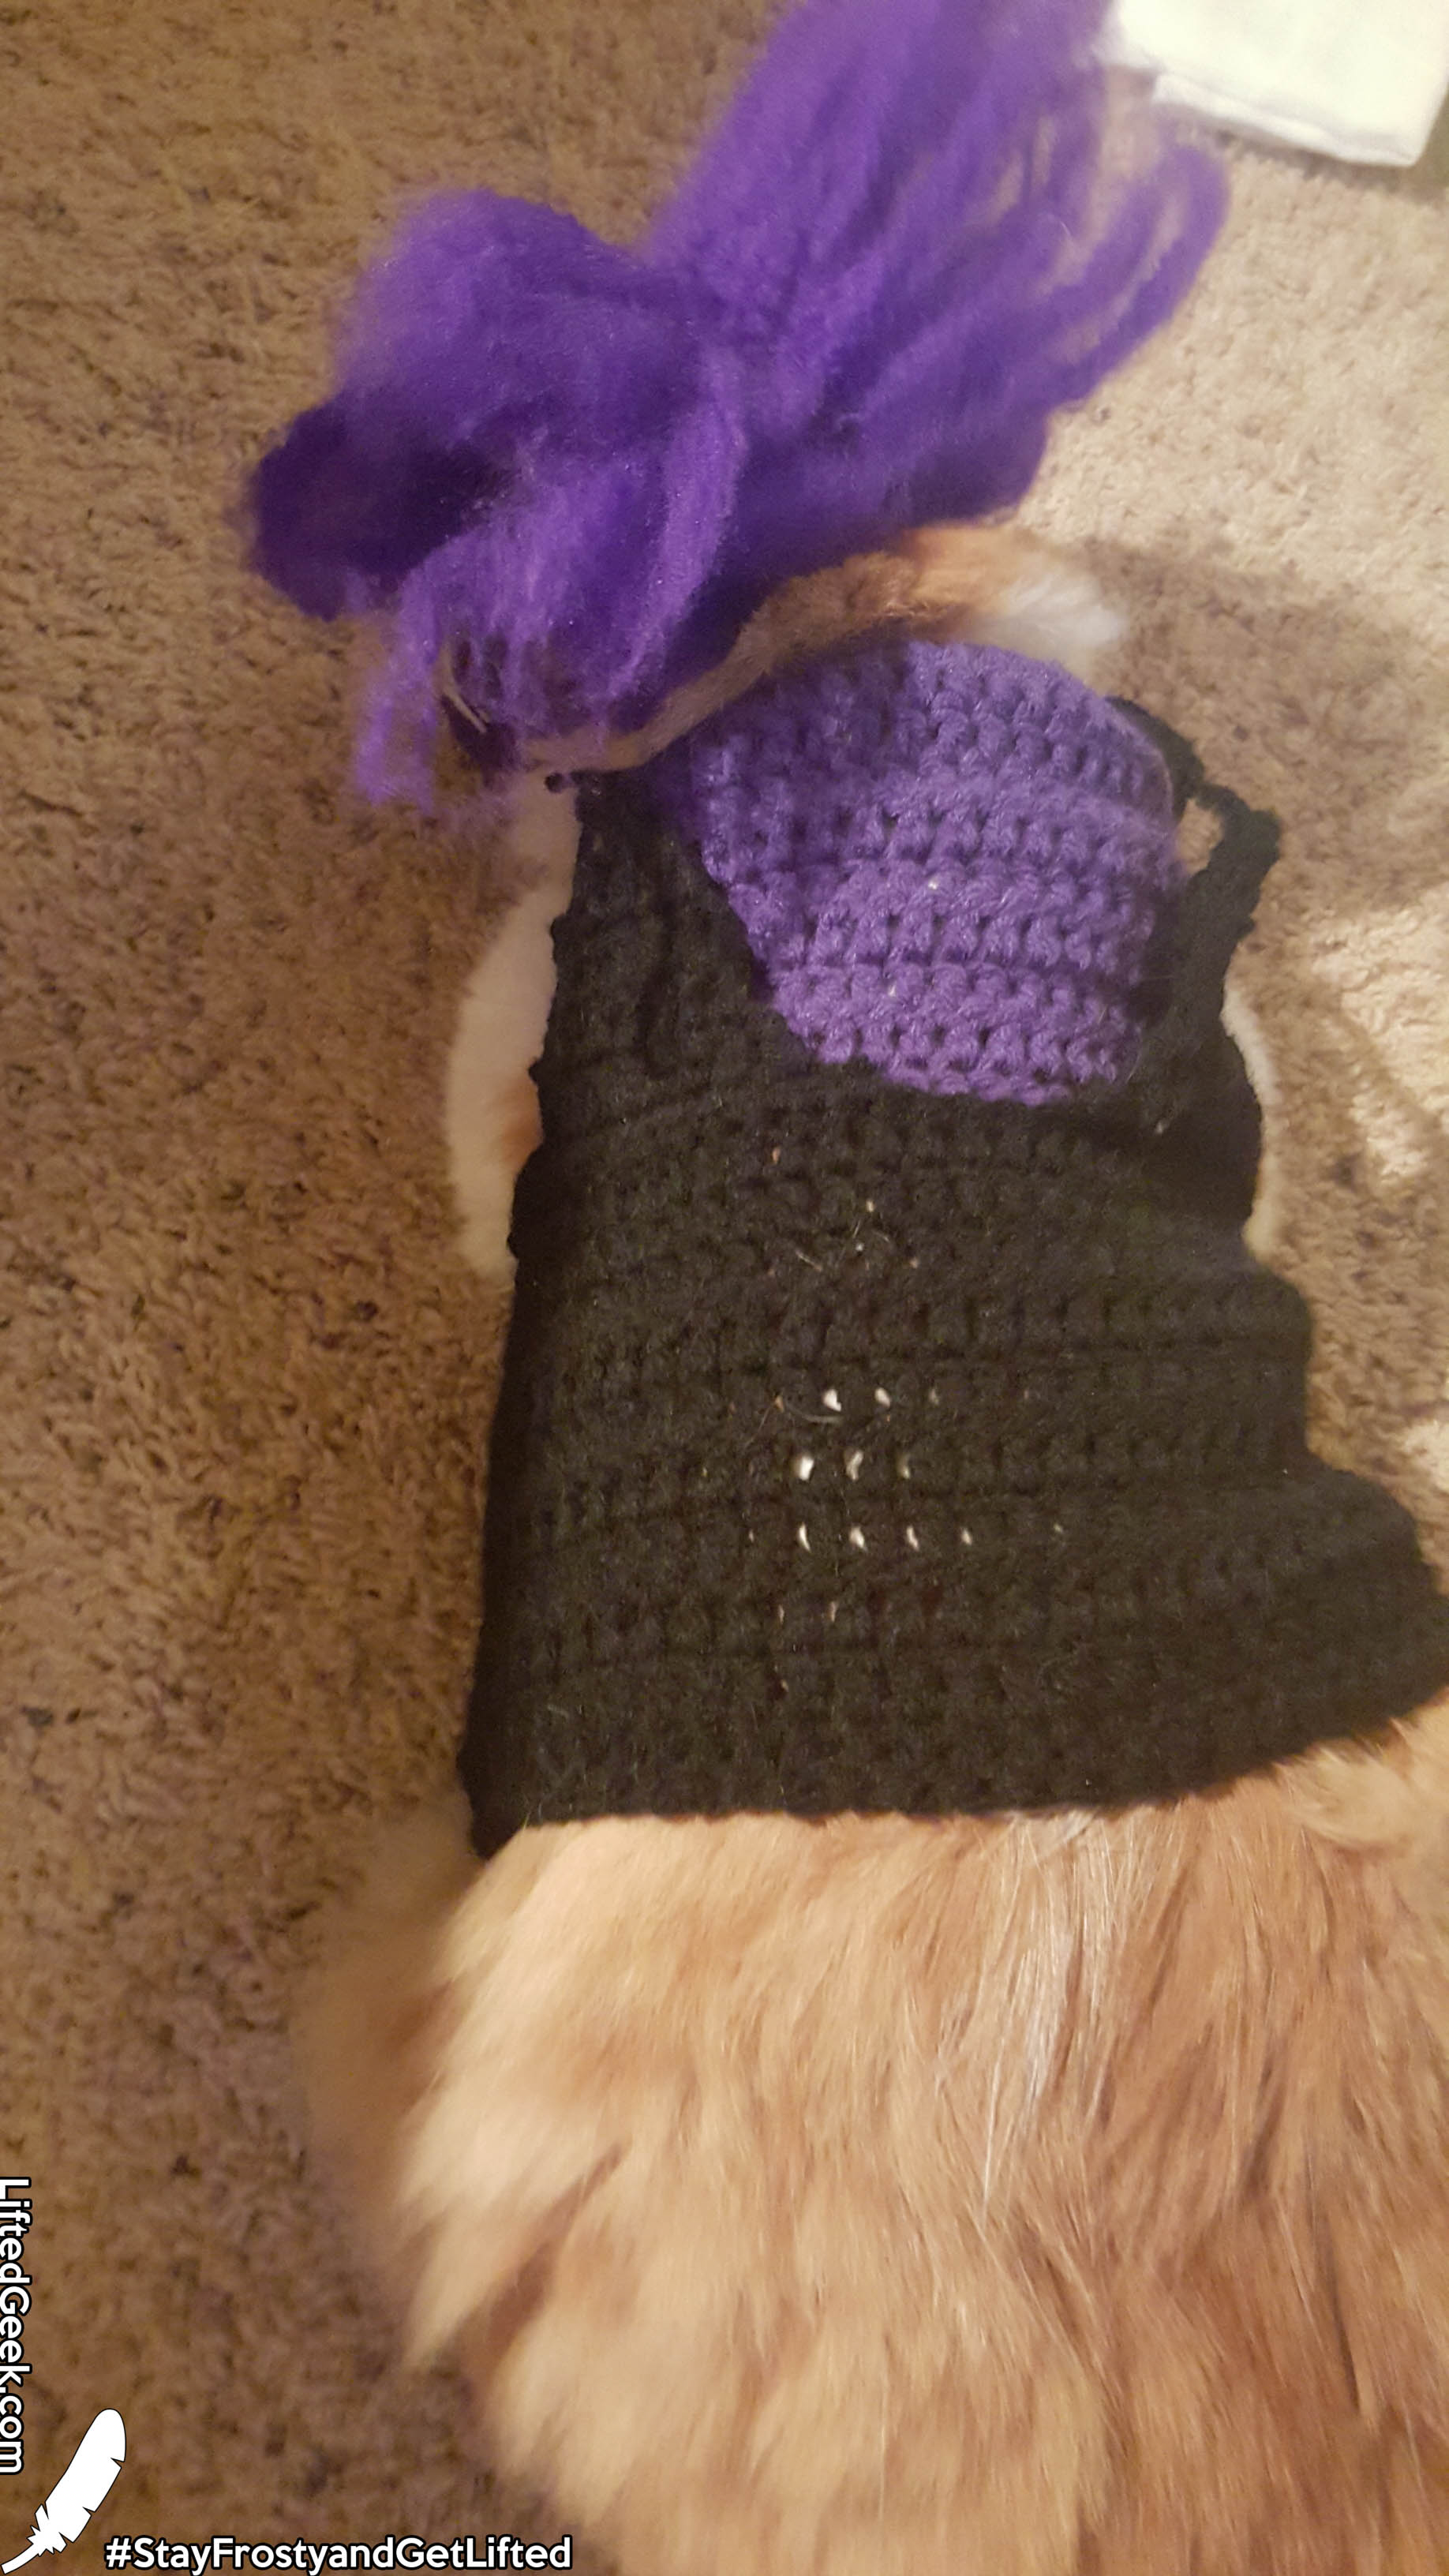
Sweater
OK NOW THE SWEATER.
I've always referenced the Candy Corn Sweater by DIY Maven, because it's a great base sweater and you can modify it anyway you'd like with different colors, etc. In this case, we're doing an Evil Minion sweater so it obviously has to be way modified.
Start with black yarn
- ch 54, join to form a loop.
- Row 1: ch 2 (or faux dc), dc in each ch around, join.
- Row 2: TURN, ch 2 (or faux dc) and dc each dc around, join.
- Row 3-8 Repeat Row 2 step 8 more times for a total of 10 black dc rows
Switch to purple yarn
- Row 9: ch 2 (or faux dc). dc in the back loop only, go around and join.
- Row 10: Turn, ch 2 (or faux dc), dc in the next 33 dc.
- Row 11: Turn, ch 2 (or faux dc), dc in the next 33 dc.
- Row 12-15: repeat row 11 four more times.
- Row 15: at the end of row 15, chain 6. Join to opposite side with slip stitch.
- Row 16: dc all the way around, through the chains, and join.
- Row 17-18: repeat Row 16.
- Row 19: slip stitch around the way around. join, tie off.
The Black Tank Top
Go back to the black yarn row where you crocheted in the back rows, so it should be clear where the front loops are exposed. By the way - if you don't see your front loops, you probably have the sweater inside out.
What we're going to do next is mark the locations of where the black straps will start. Starting on the back of the sweater, lay it as flat and centered as you can get it. I counted 13 stitches in from each side and marked it with a piece of yarn. Here's what it looks like:
I should have two empty stitches in between. Flip to the other side of the sweater and do the same.
Stay on this side of the sweater; I started working on the strap on the left middle:
- in the remaining front loops exposed, sc in the direction all the way around to the other side of the sweater til you reach the first marked location.
- Turn, slip stitch in the next two sc, and sc in the next *20 sc back to the side of the sweater where you started.
- *This should leave one sc remaining at the end. if not, either remove a sc or add a sc to meet this
- Turn, slip stitch in the next sc, ch 2 (or faux dc) in the same stitch. 5 dc in the next sc. This should leave one remaining sc in the end. We are still on the same side of the sweater where we first started. (6)
- Turn, slip stitch in the next dc, ch 2 (or faux dc) in the same dc, 3 dc in the next sc. (4)
- Turn, ch 2 (or faux dc) in same dc, and 3 dc in the next dc (4)
- Turn, slip stitch into the next dc, ch 2 (or faux dc) in the same dc, dc in the next. (2)
- Turn, ch 2 (or faux dc) in same dc, 1 dc in the next. (2)
- There should be two dcs left, and you should be in the left dc. If not, just slip stitch over. Chain 12, and tie off.
So the idea is to create a triangle for the strap. It should look like this:
Let’s finish the other strap. Sweater will need to be upside down so that you can work from right to left (unless you are left handed). The instructions are similar to the previous but just backwards.
- ch 1, and sc until you reach the other side of the sweater to the marking.
- Turn, slip stitch in the next two, sc in the next 20, or til you are leaving one stitch remaining in the end. You will be back on the side of the sweater where you started.
- Turn, slip stitch in the next sc, ch 2 (or faux dc) in the same stitch, 5 dc in the next sc. (6)
- Turn, slip stitch in the next dc, ch 2 or (faux dc) in the same stitch, 3 dc in the next sc. (4)
- Turn, ch 2 (or faux dc) in same dc, 3 dc in the next dc (4)
- Turn, slip stitch into the next dc, ch 2 (or faux dc) in the same dc, dc in the next. (2)
- Turn, ch 2 (faux dc) in same dc, 1 dc in the next. (2)
- There should be two dcs left, and you should be on the right dc. If not, just slip stitch over. Chain 12, and tie off.
It now should look like this:
OPTIONALLY.......
You may repeat this same thing on the other side of the sweater where the hole is. it's a little bit more of a hassle to put this sweater on because you have to put the kitty arms through the strap. If you decide you want to do the same, then continue on to this section, otherwise, secure the chains by the neckline and call it good.
- Tie the straps together from the front to the back.
- Using the remaining string, secure the strap to the neck and tie it there. Weave in the extra string
Try to adjust it in such a way that the front of the sweater (the front of cat) is intentionally loose in the straps so that it does not restrict the cat’s movements.
and TA DA....
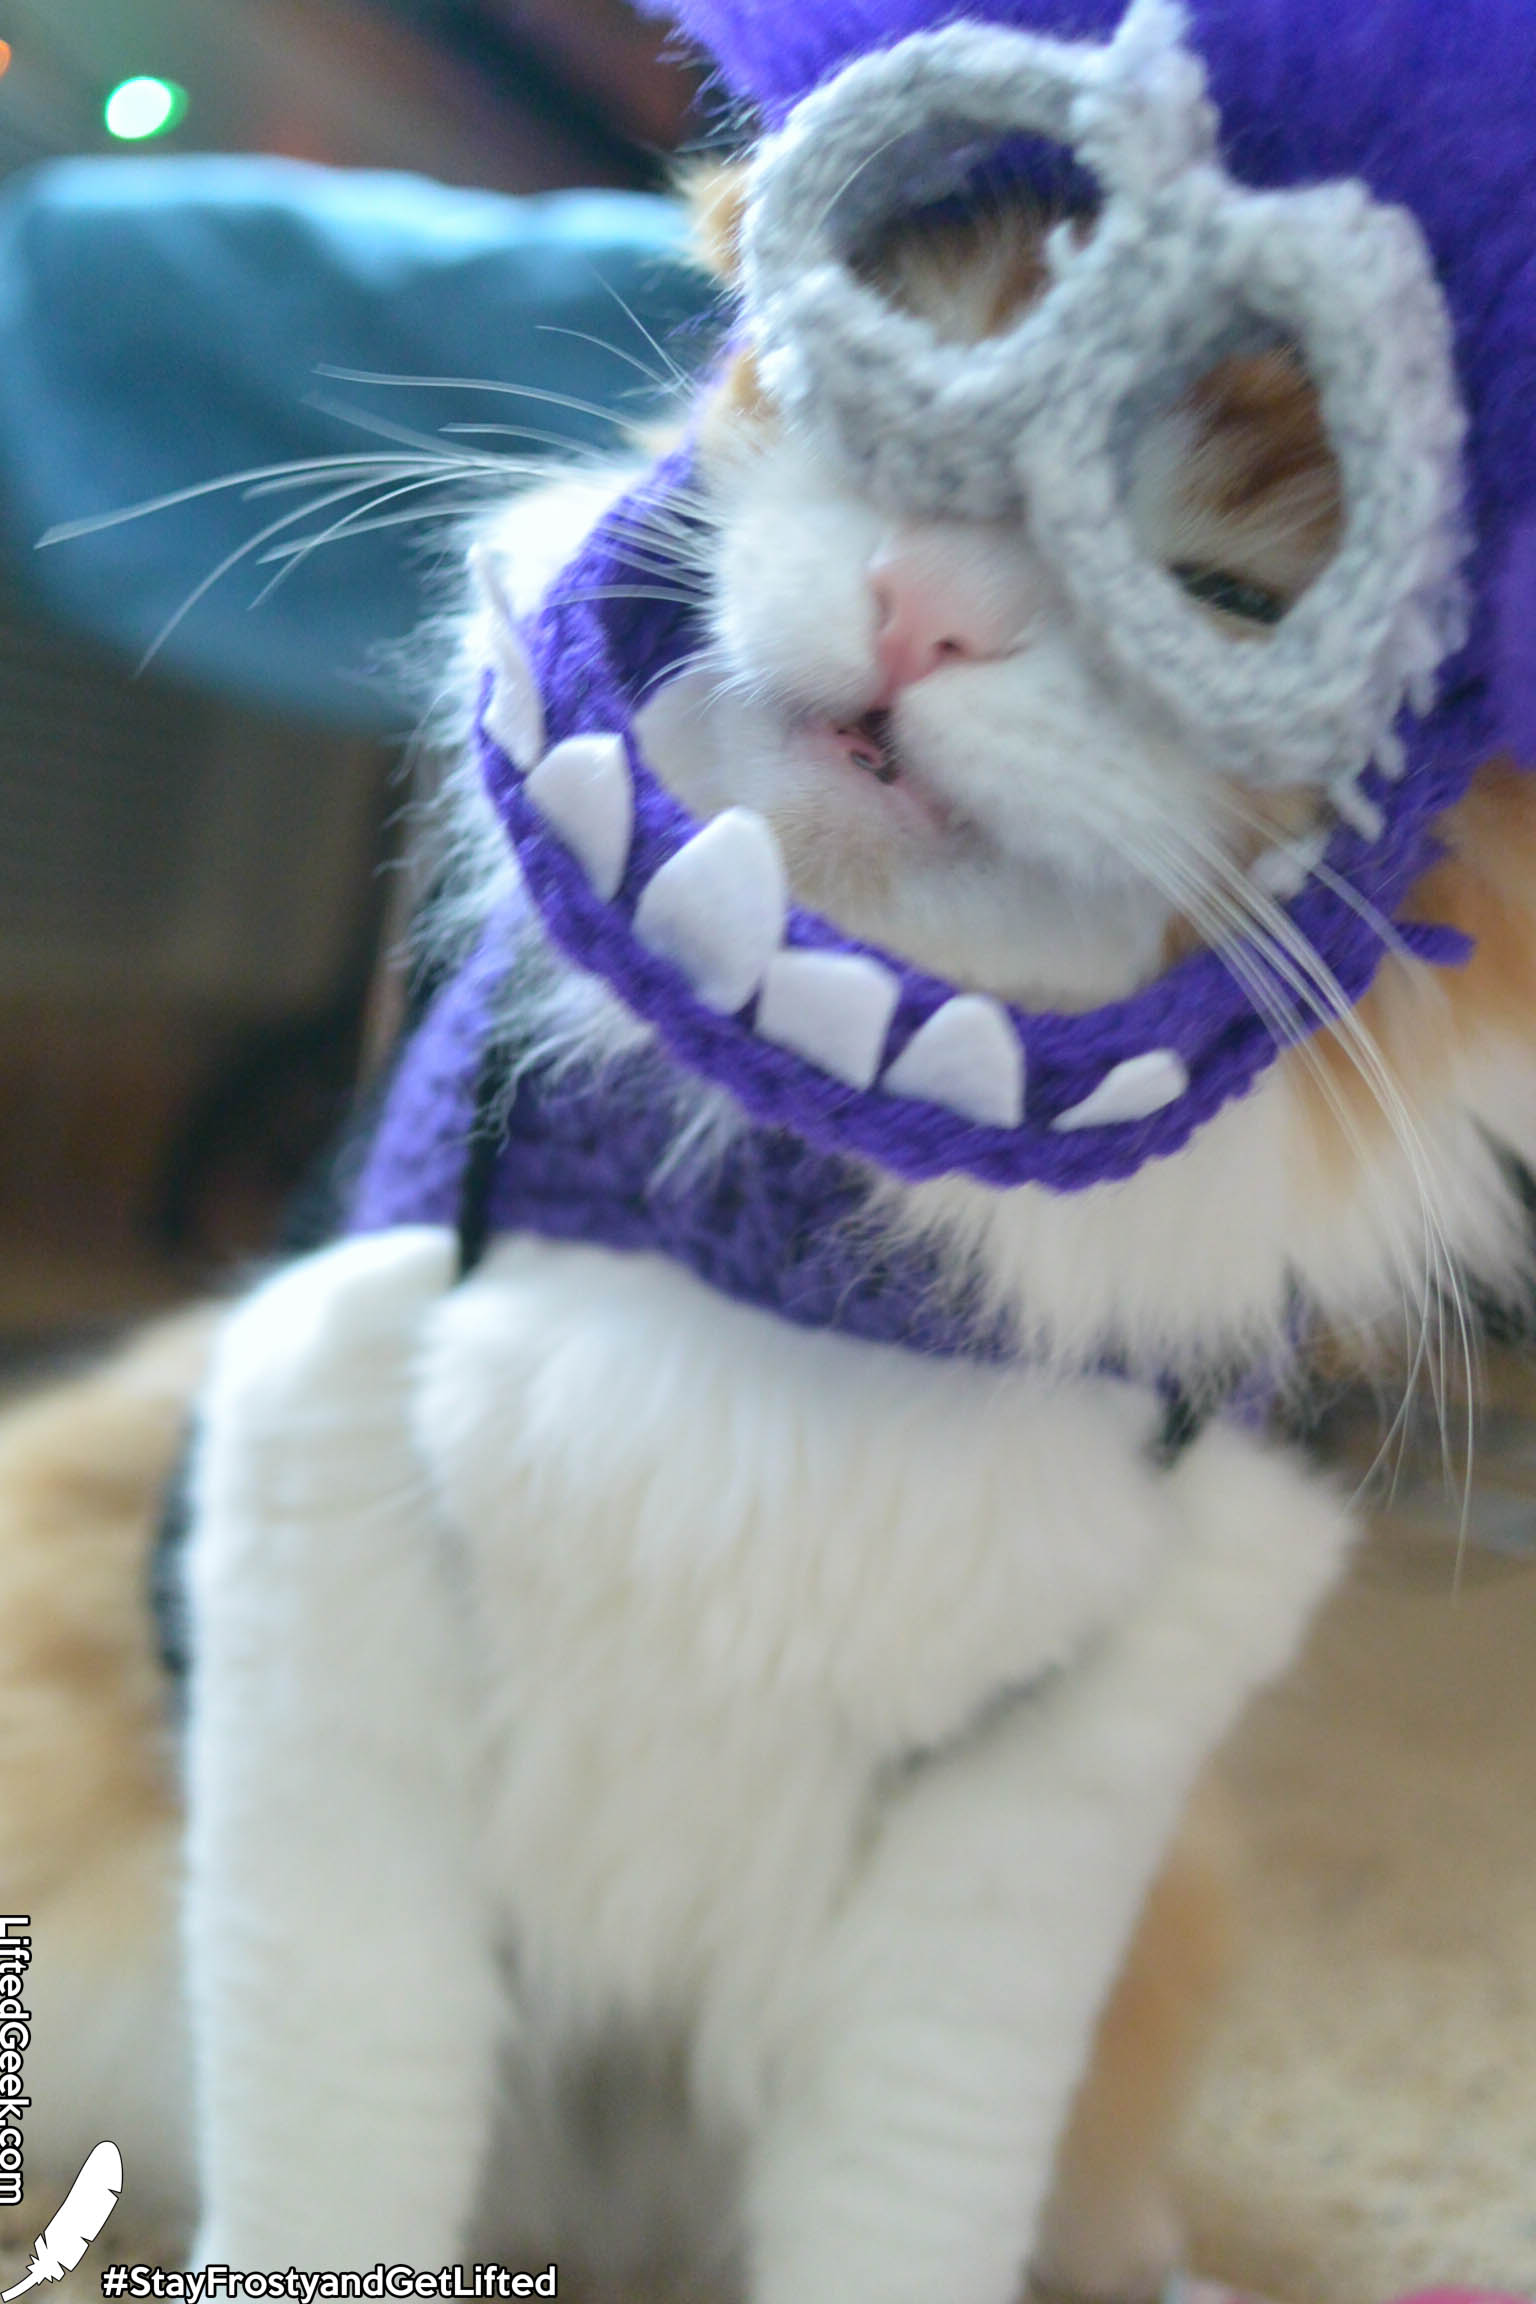
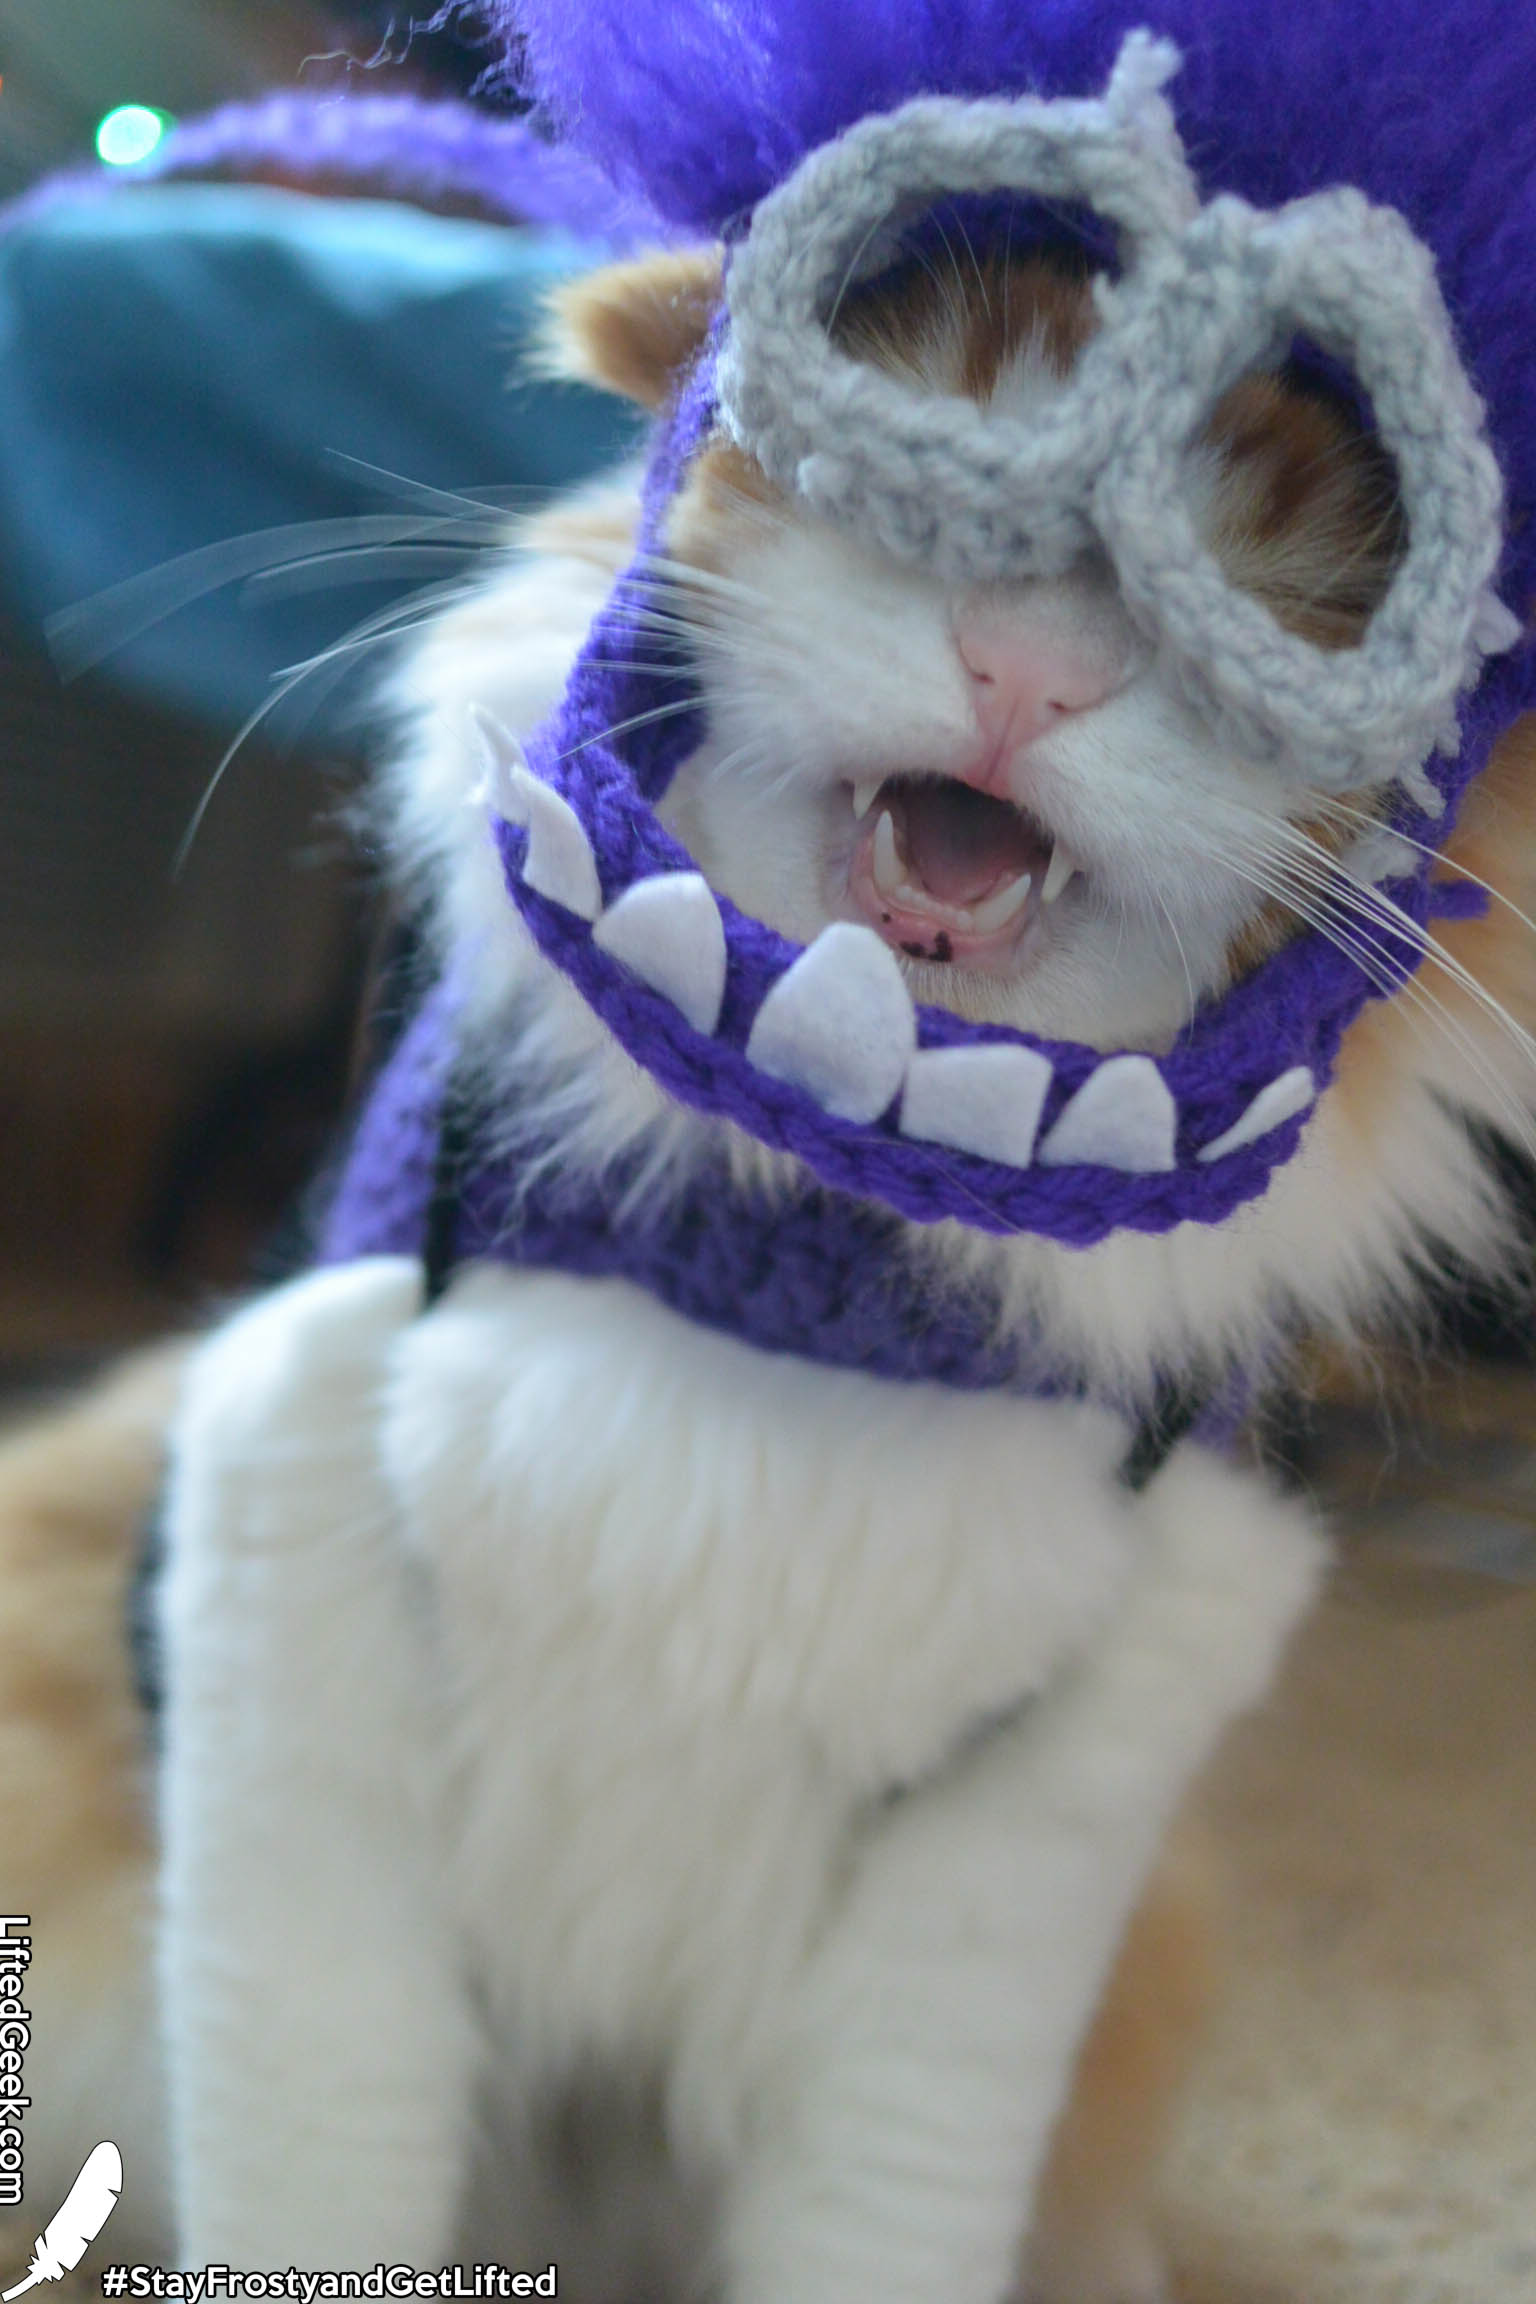
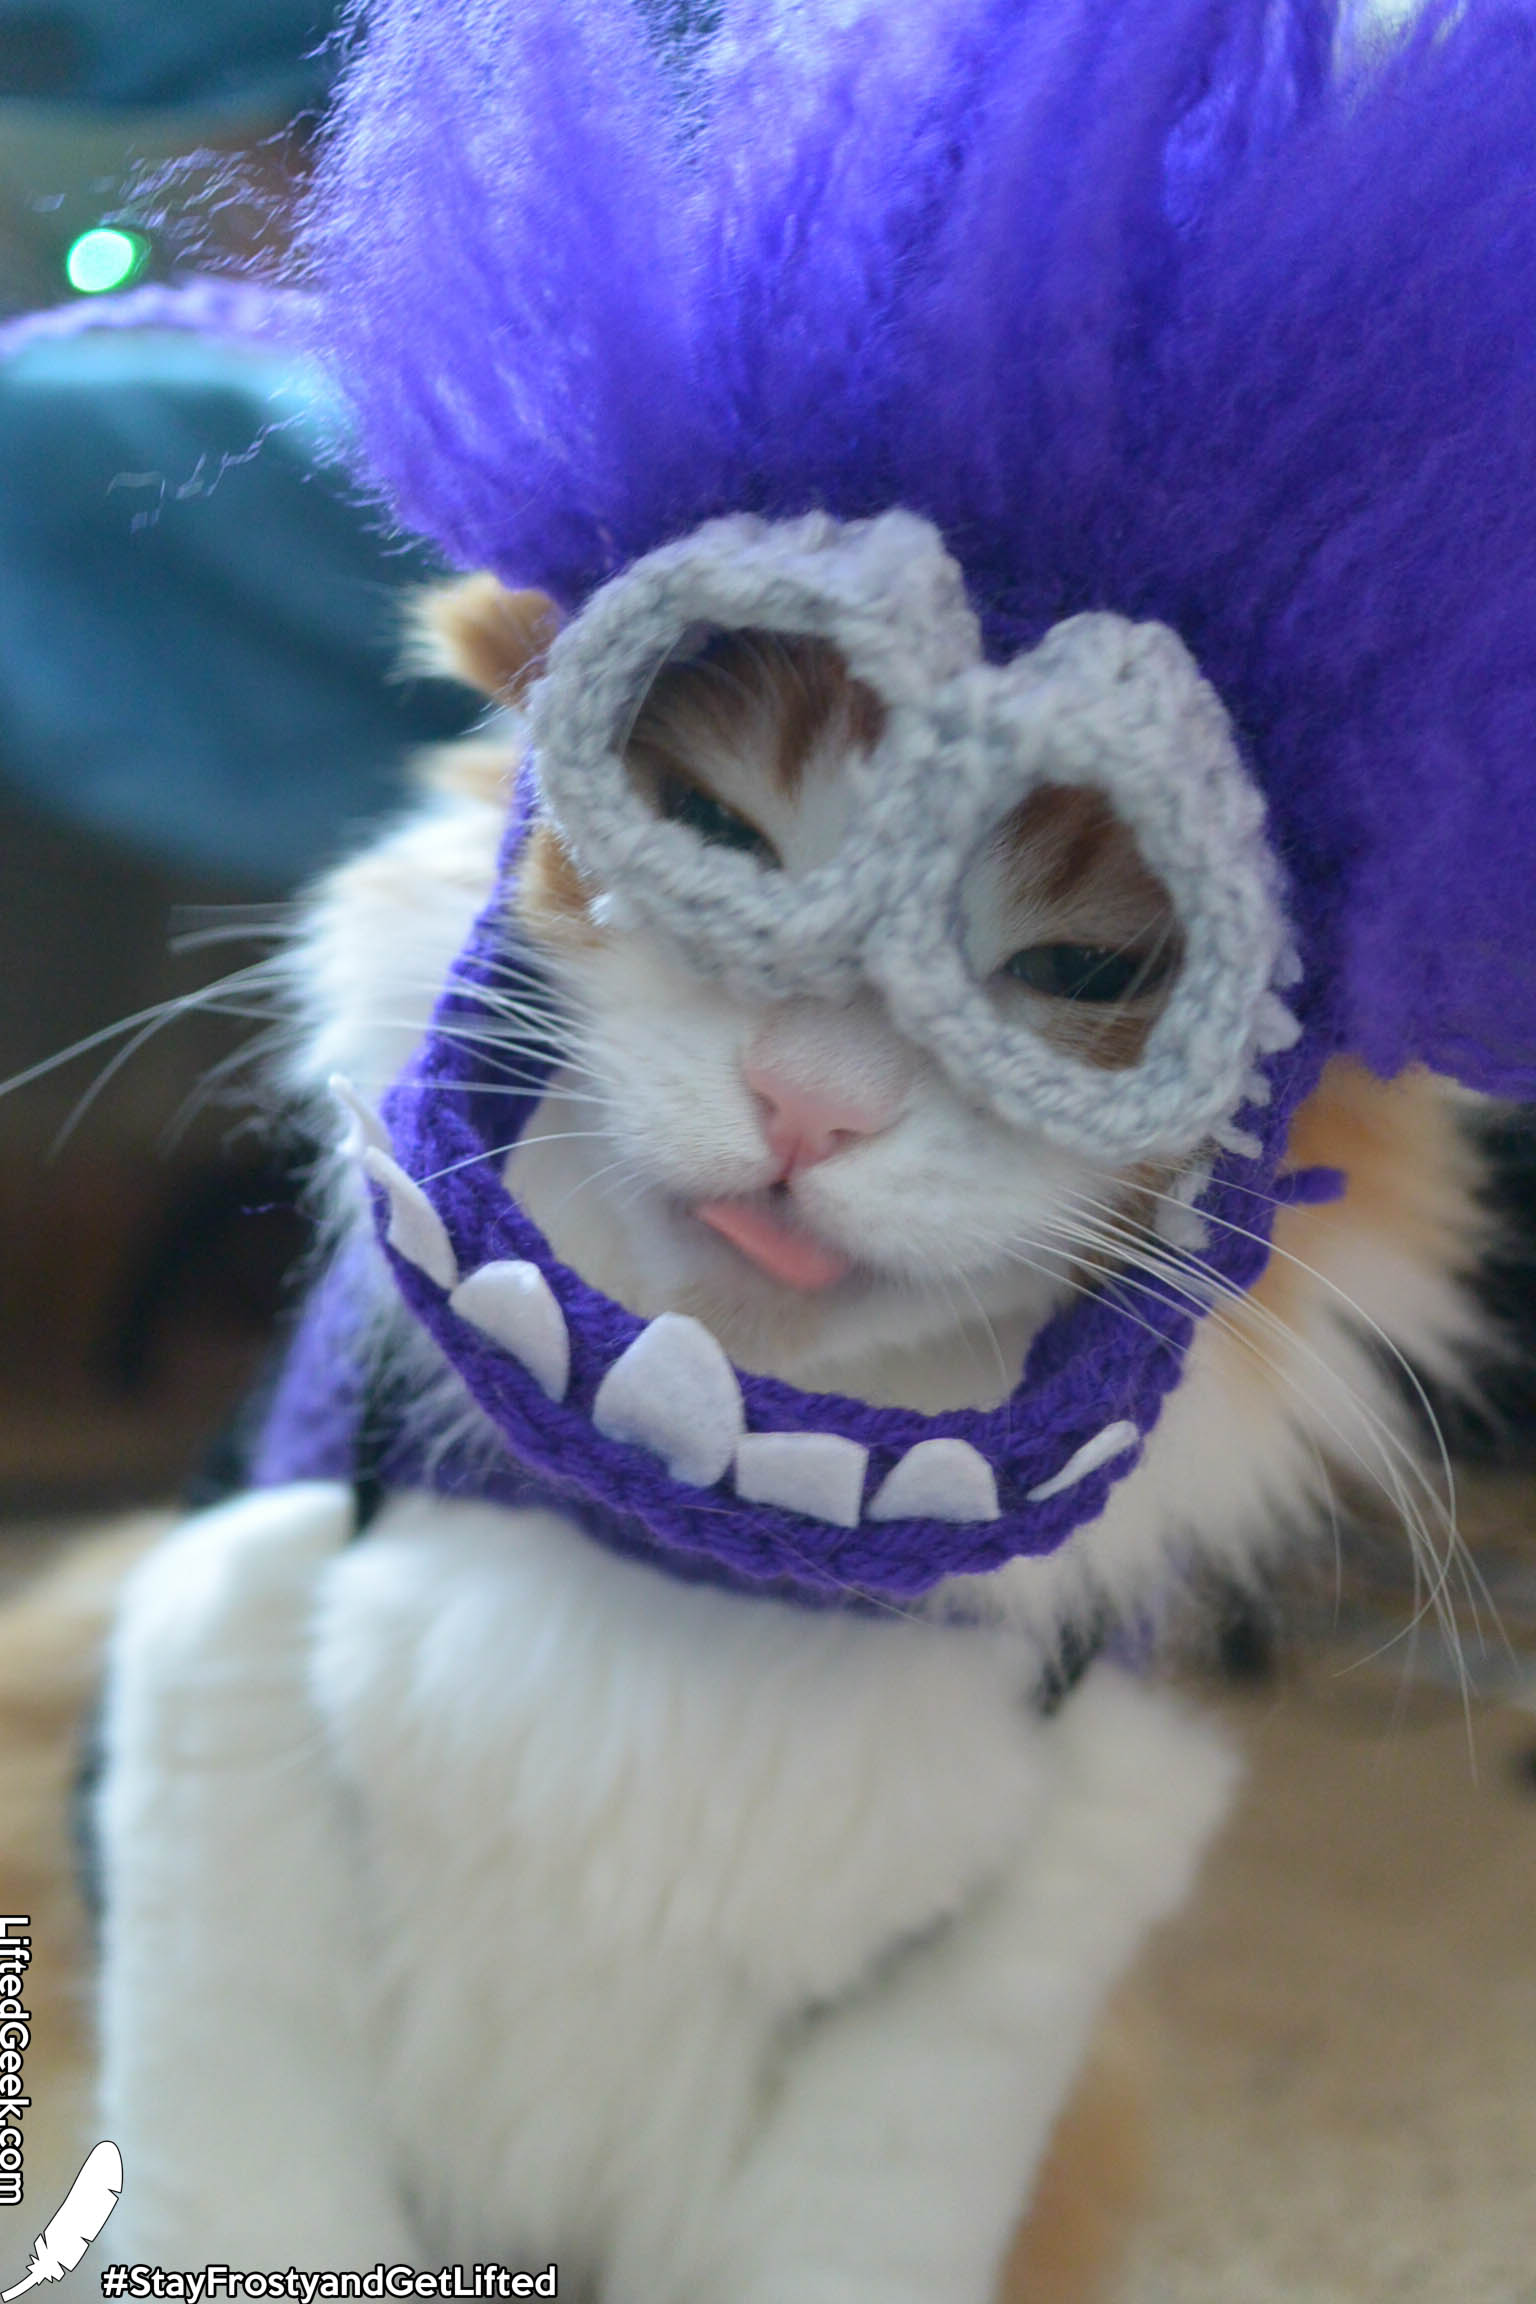
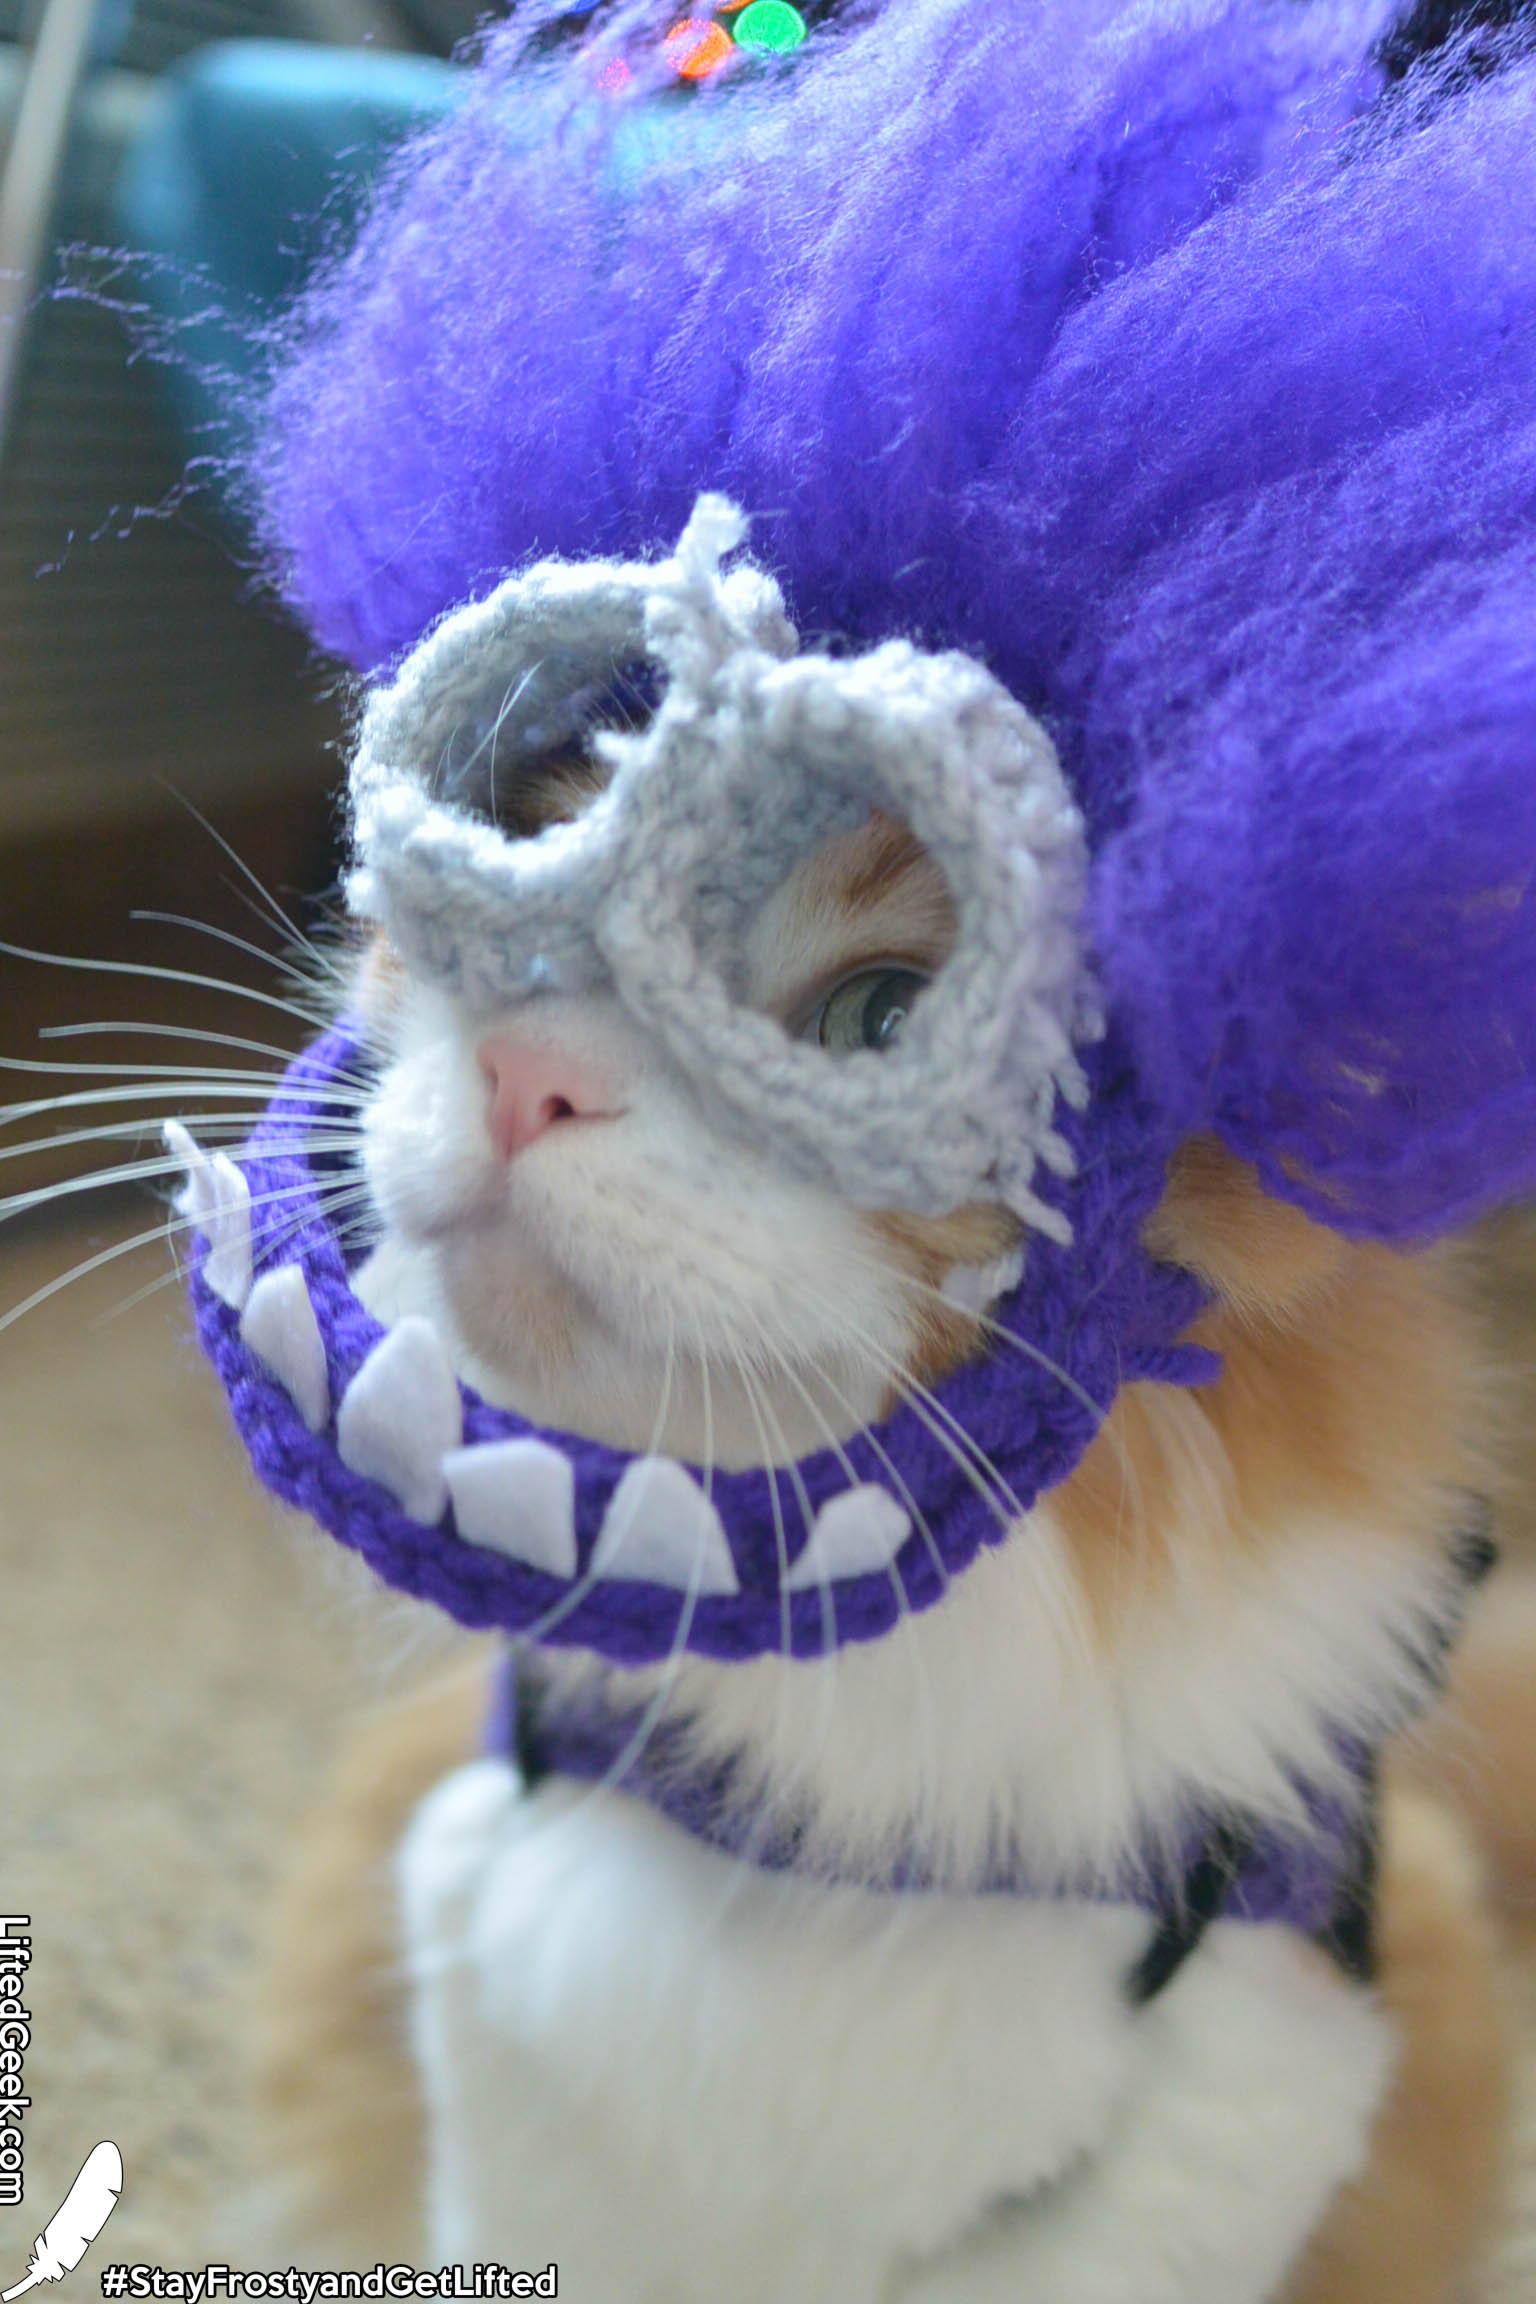
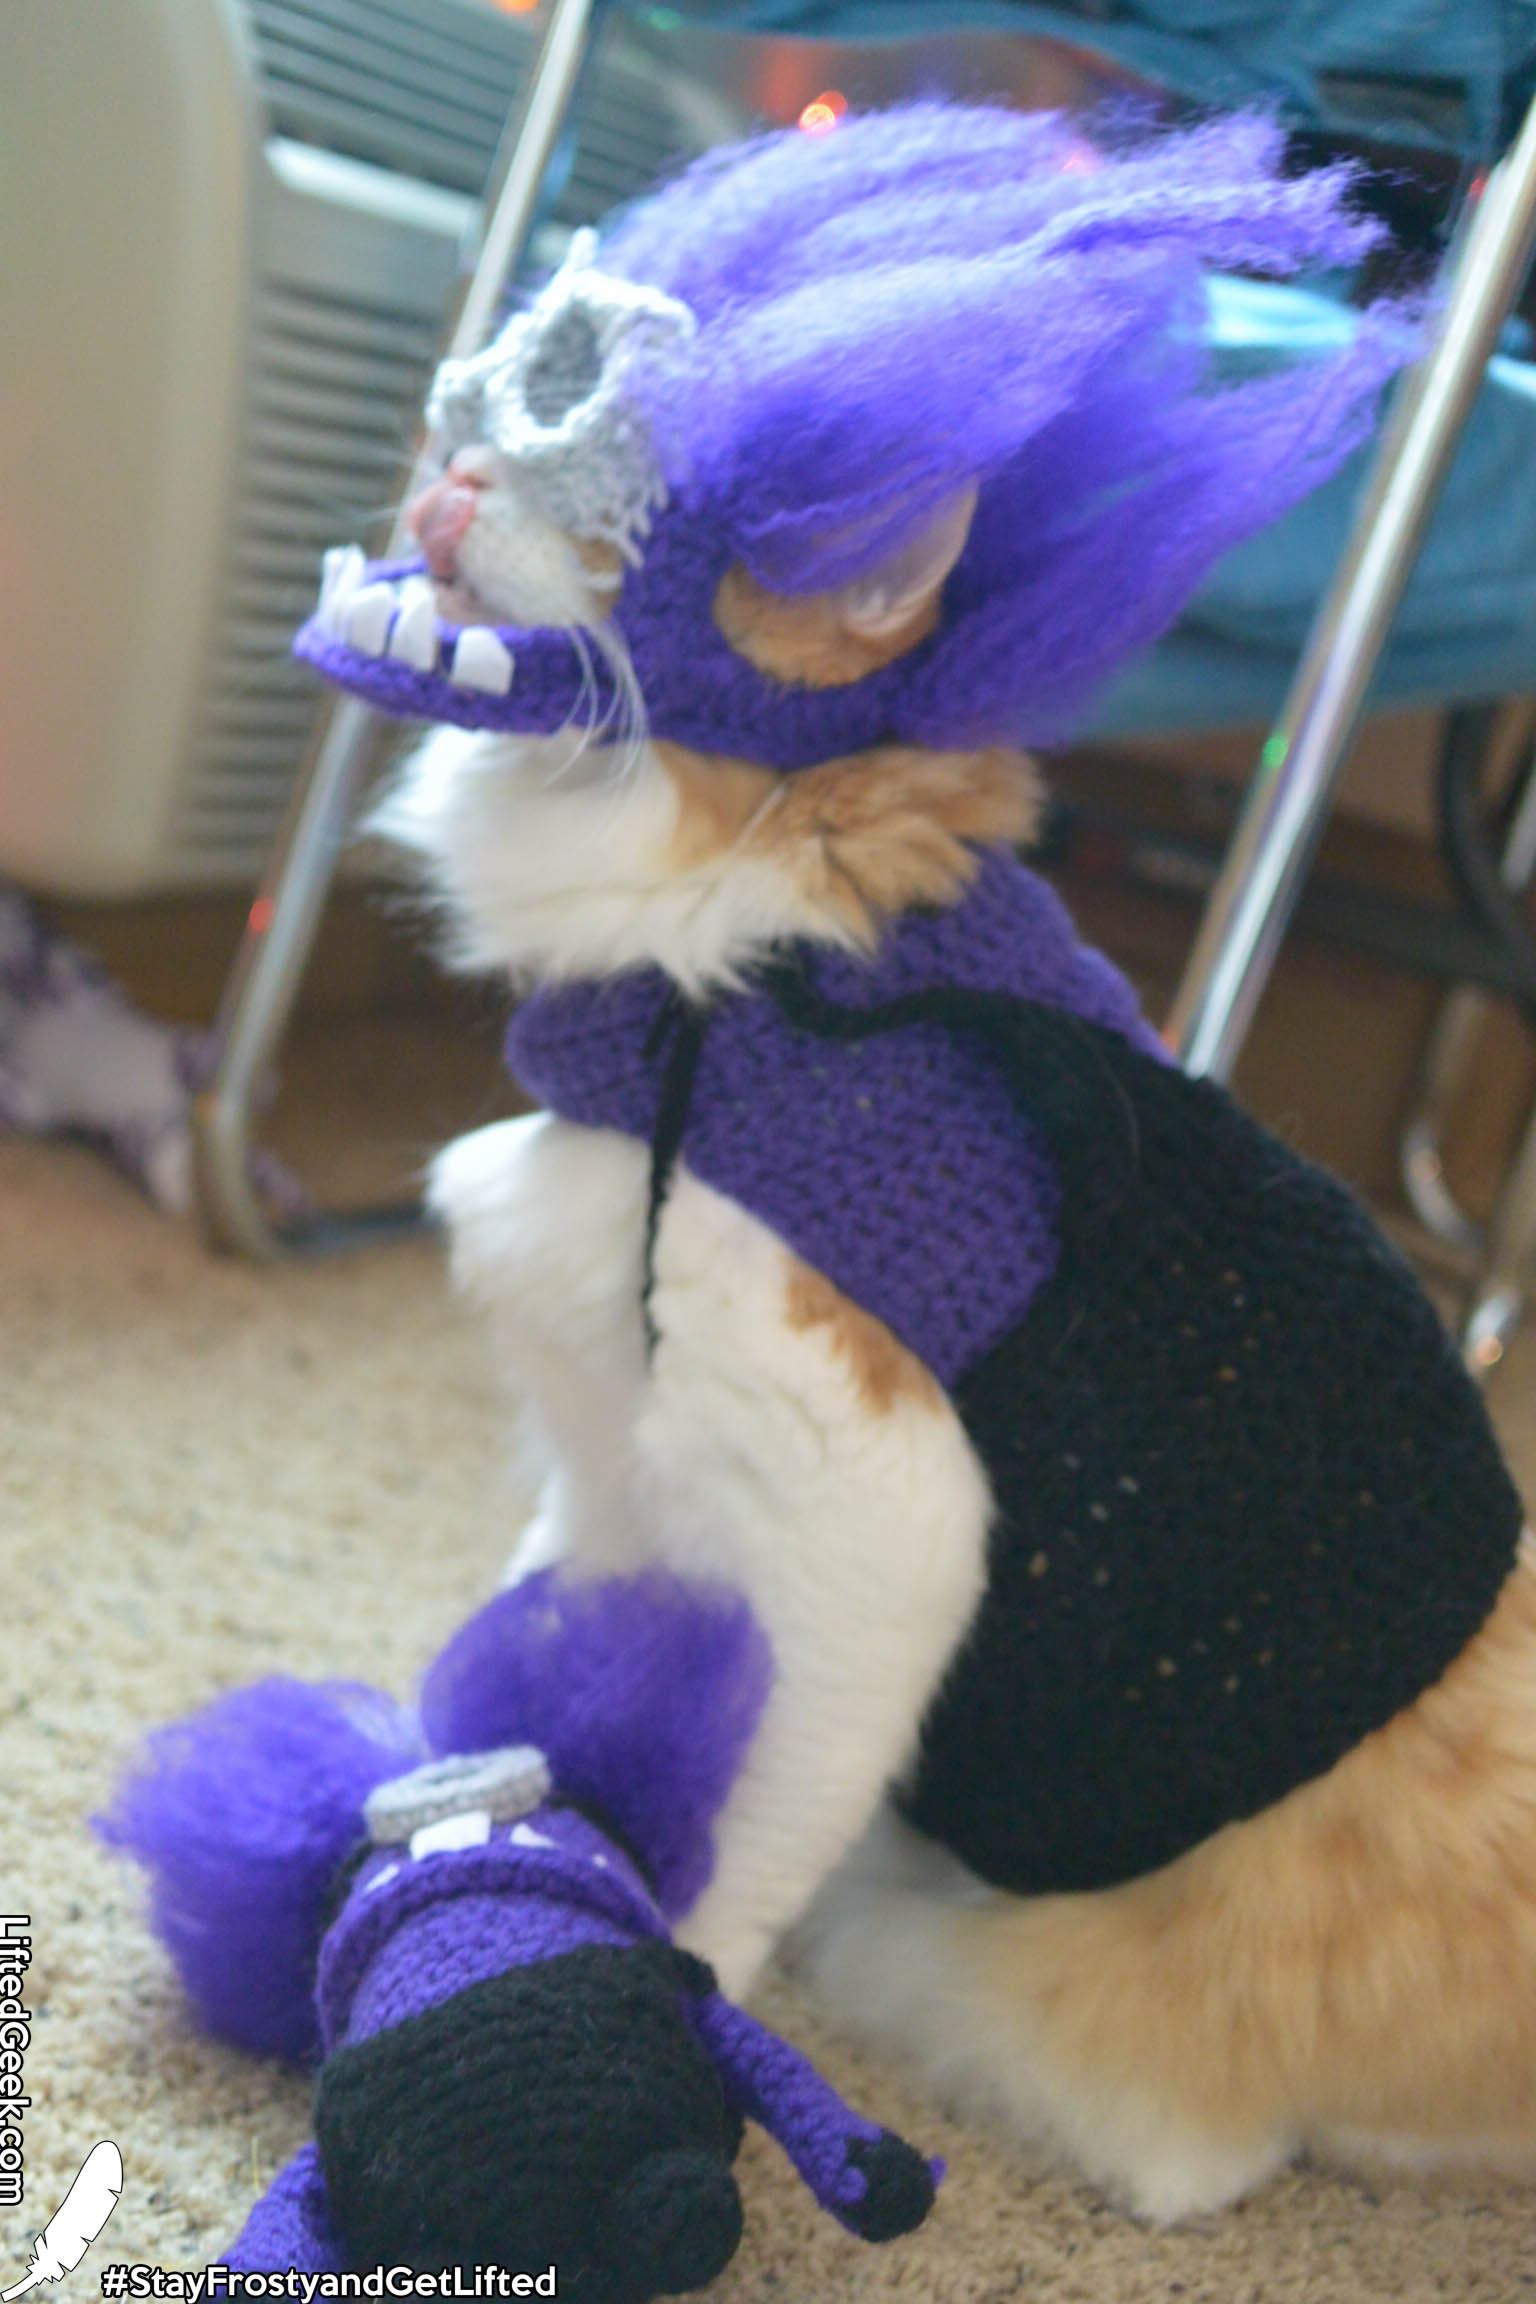
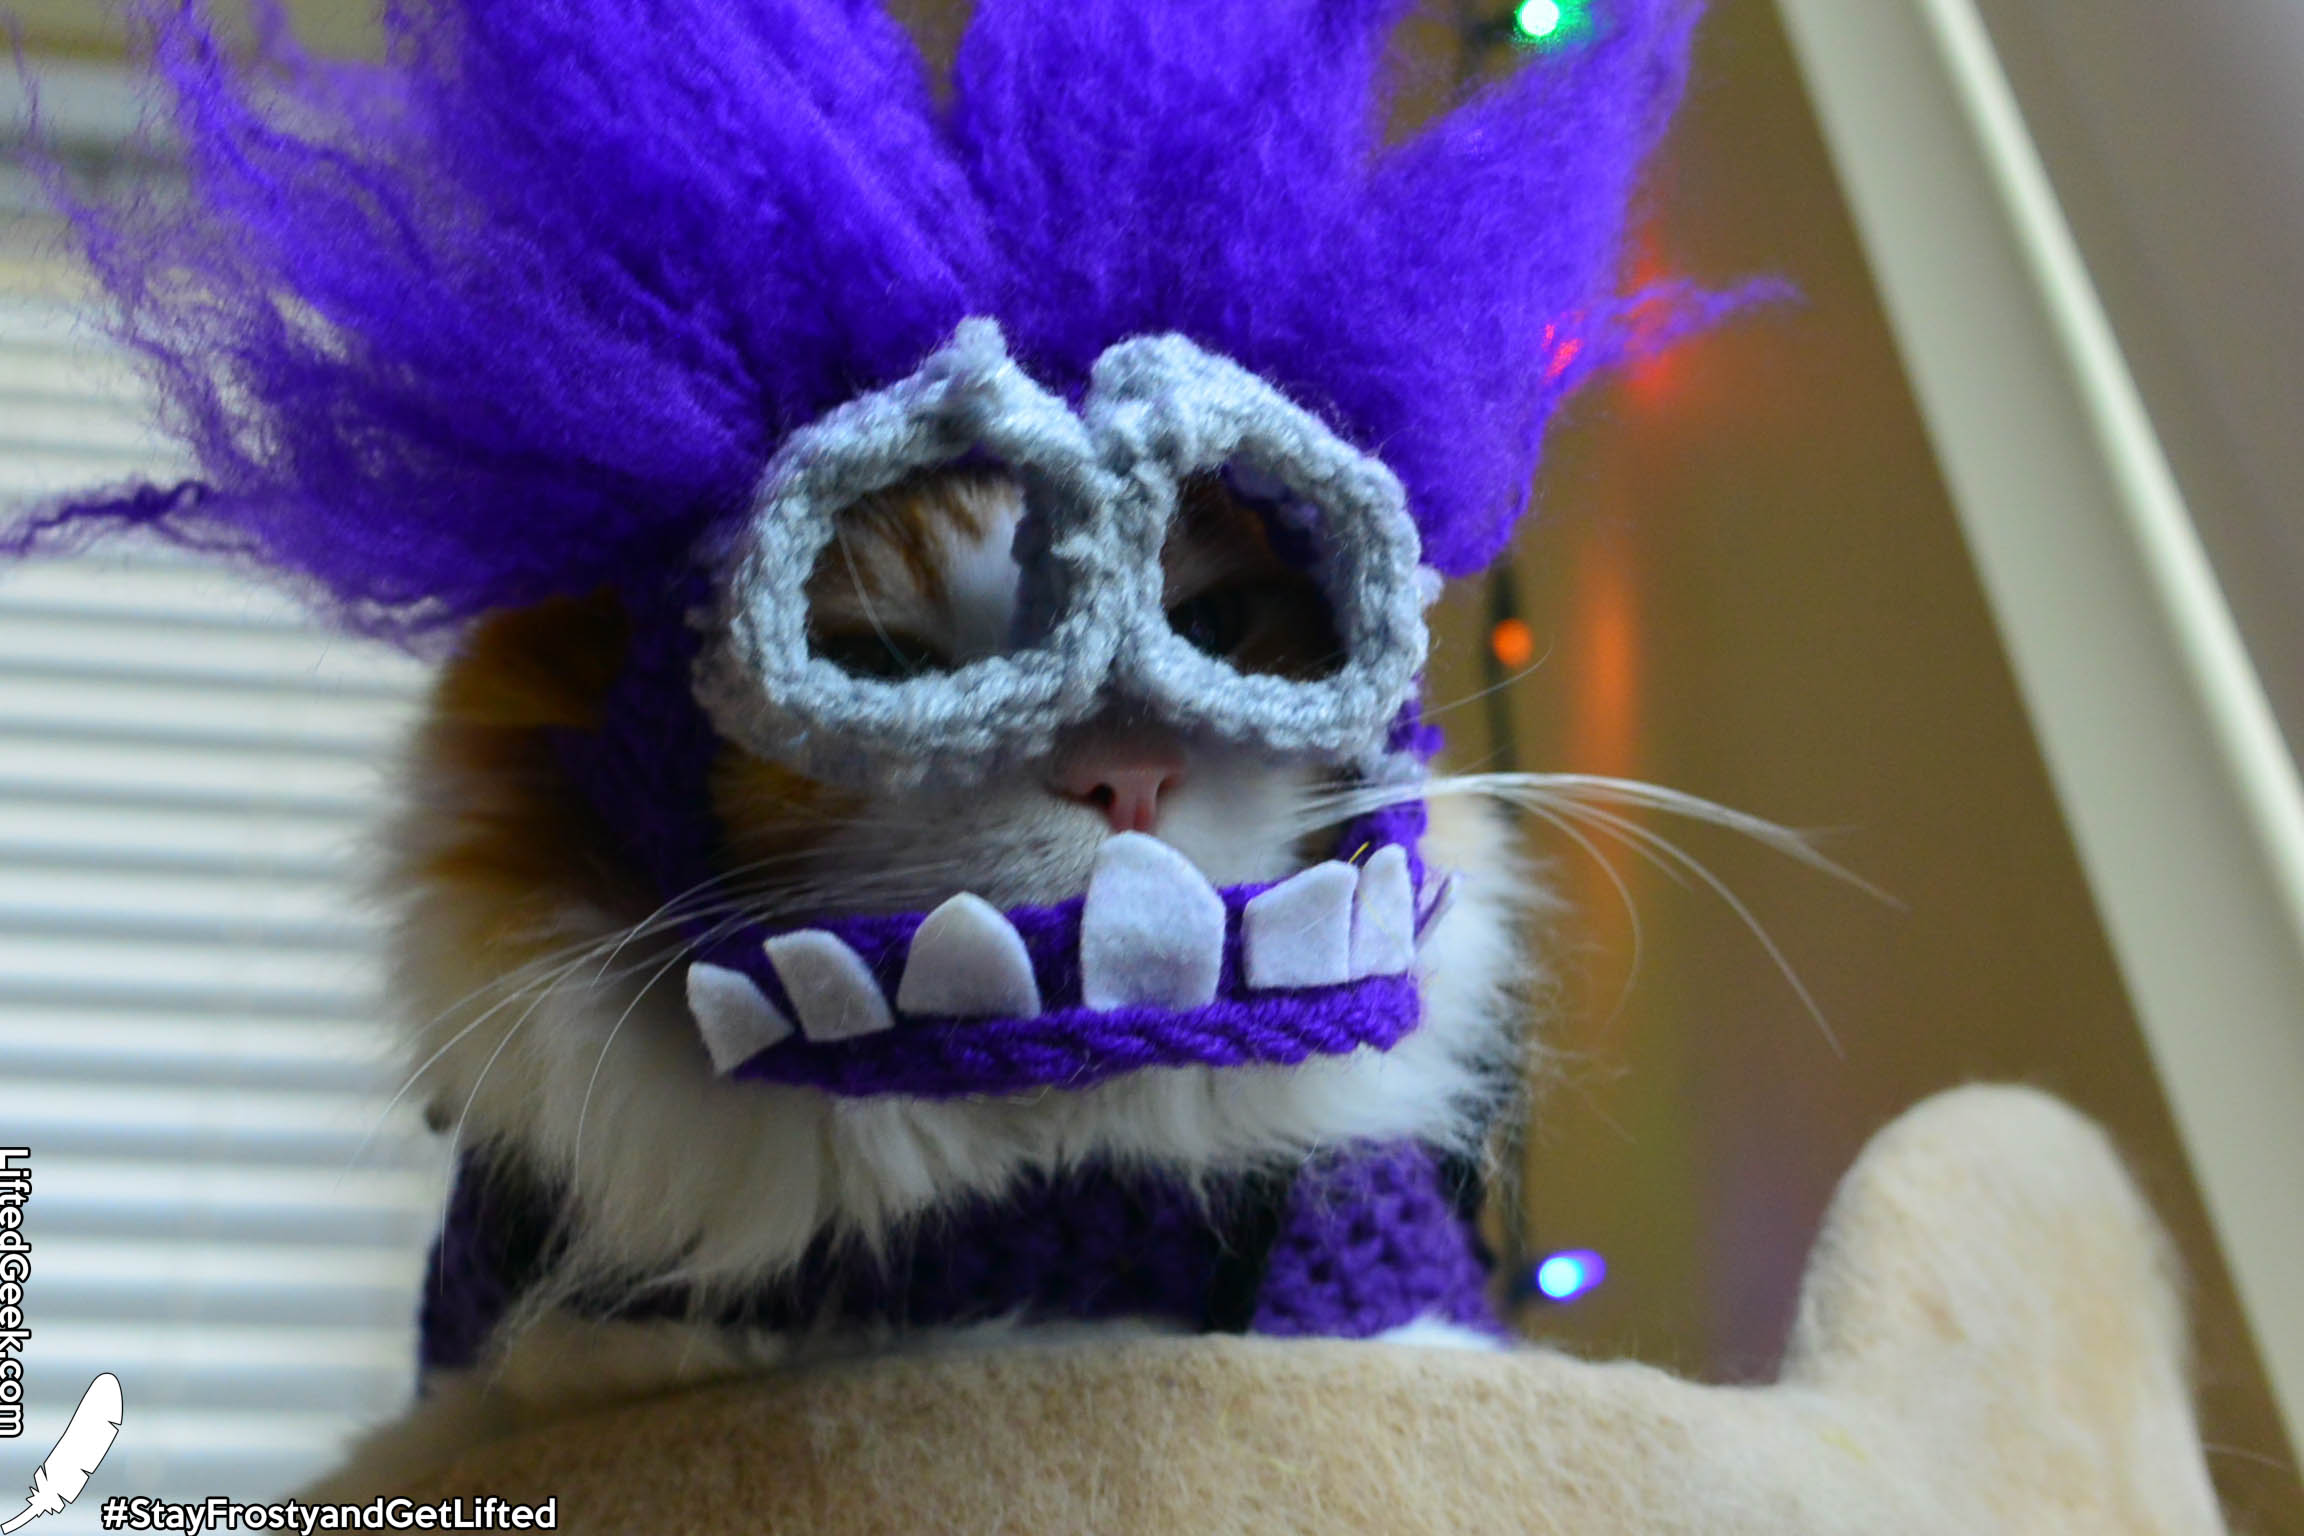
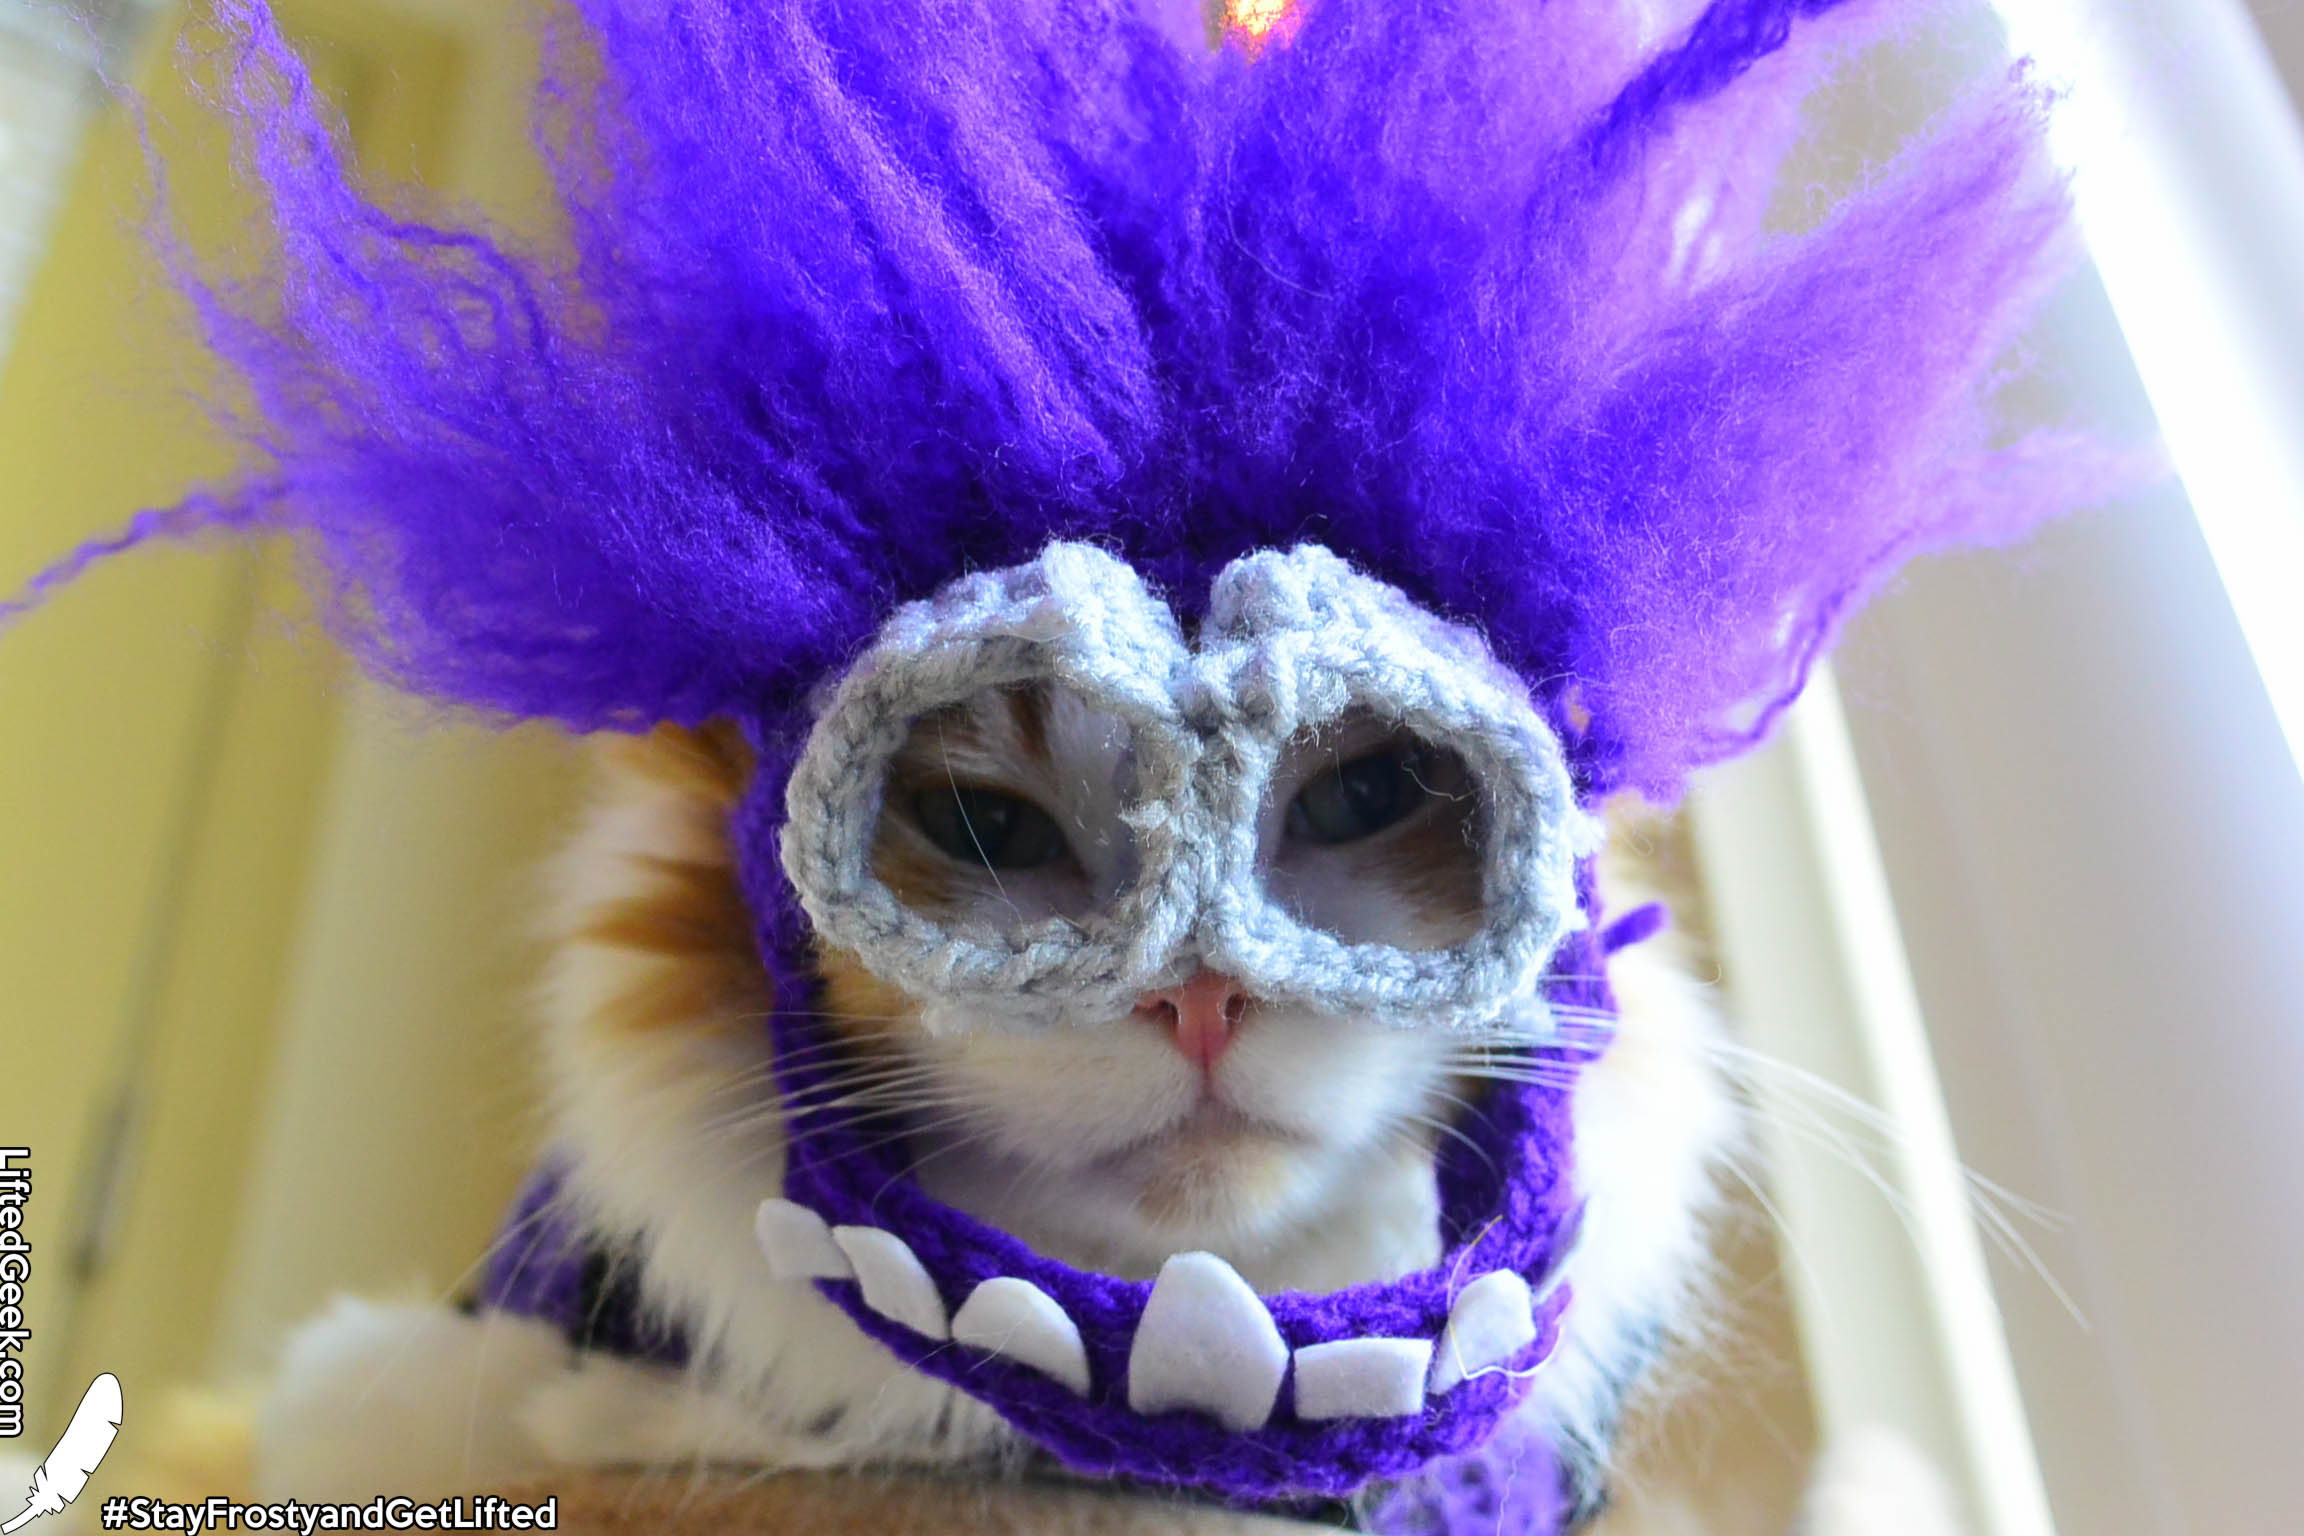
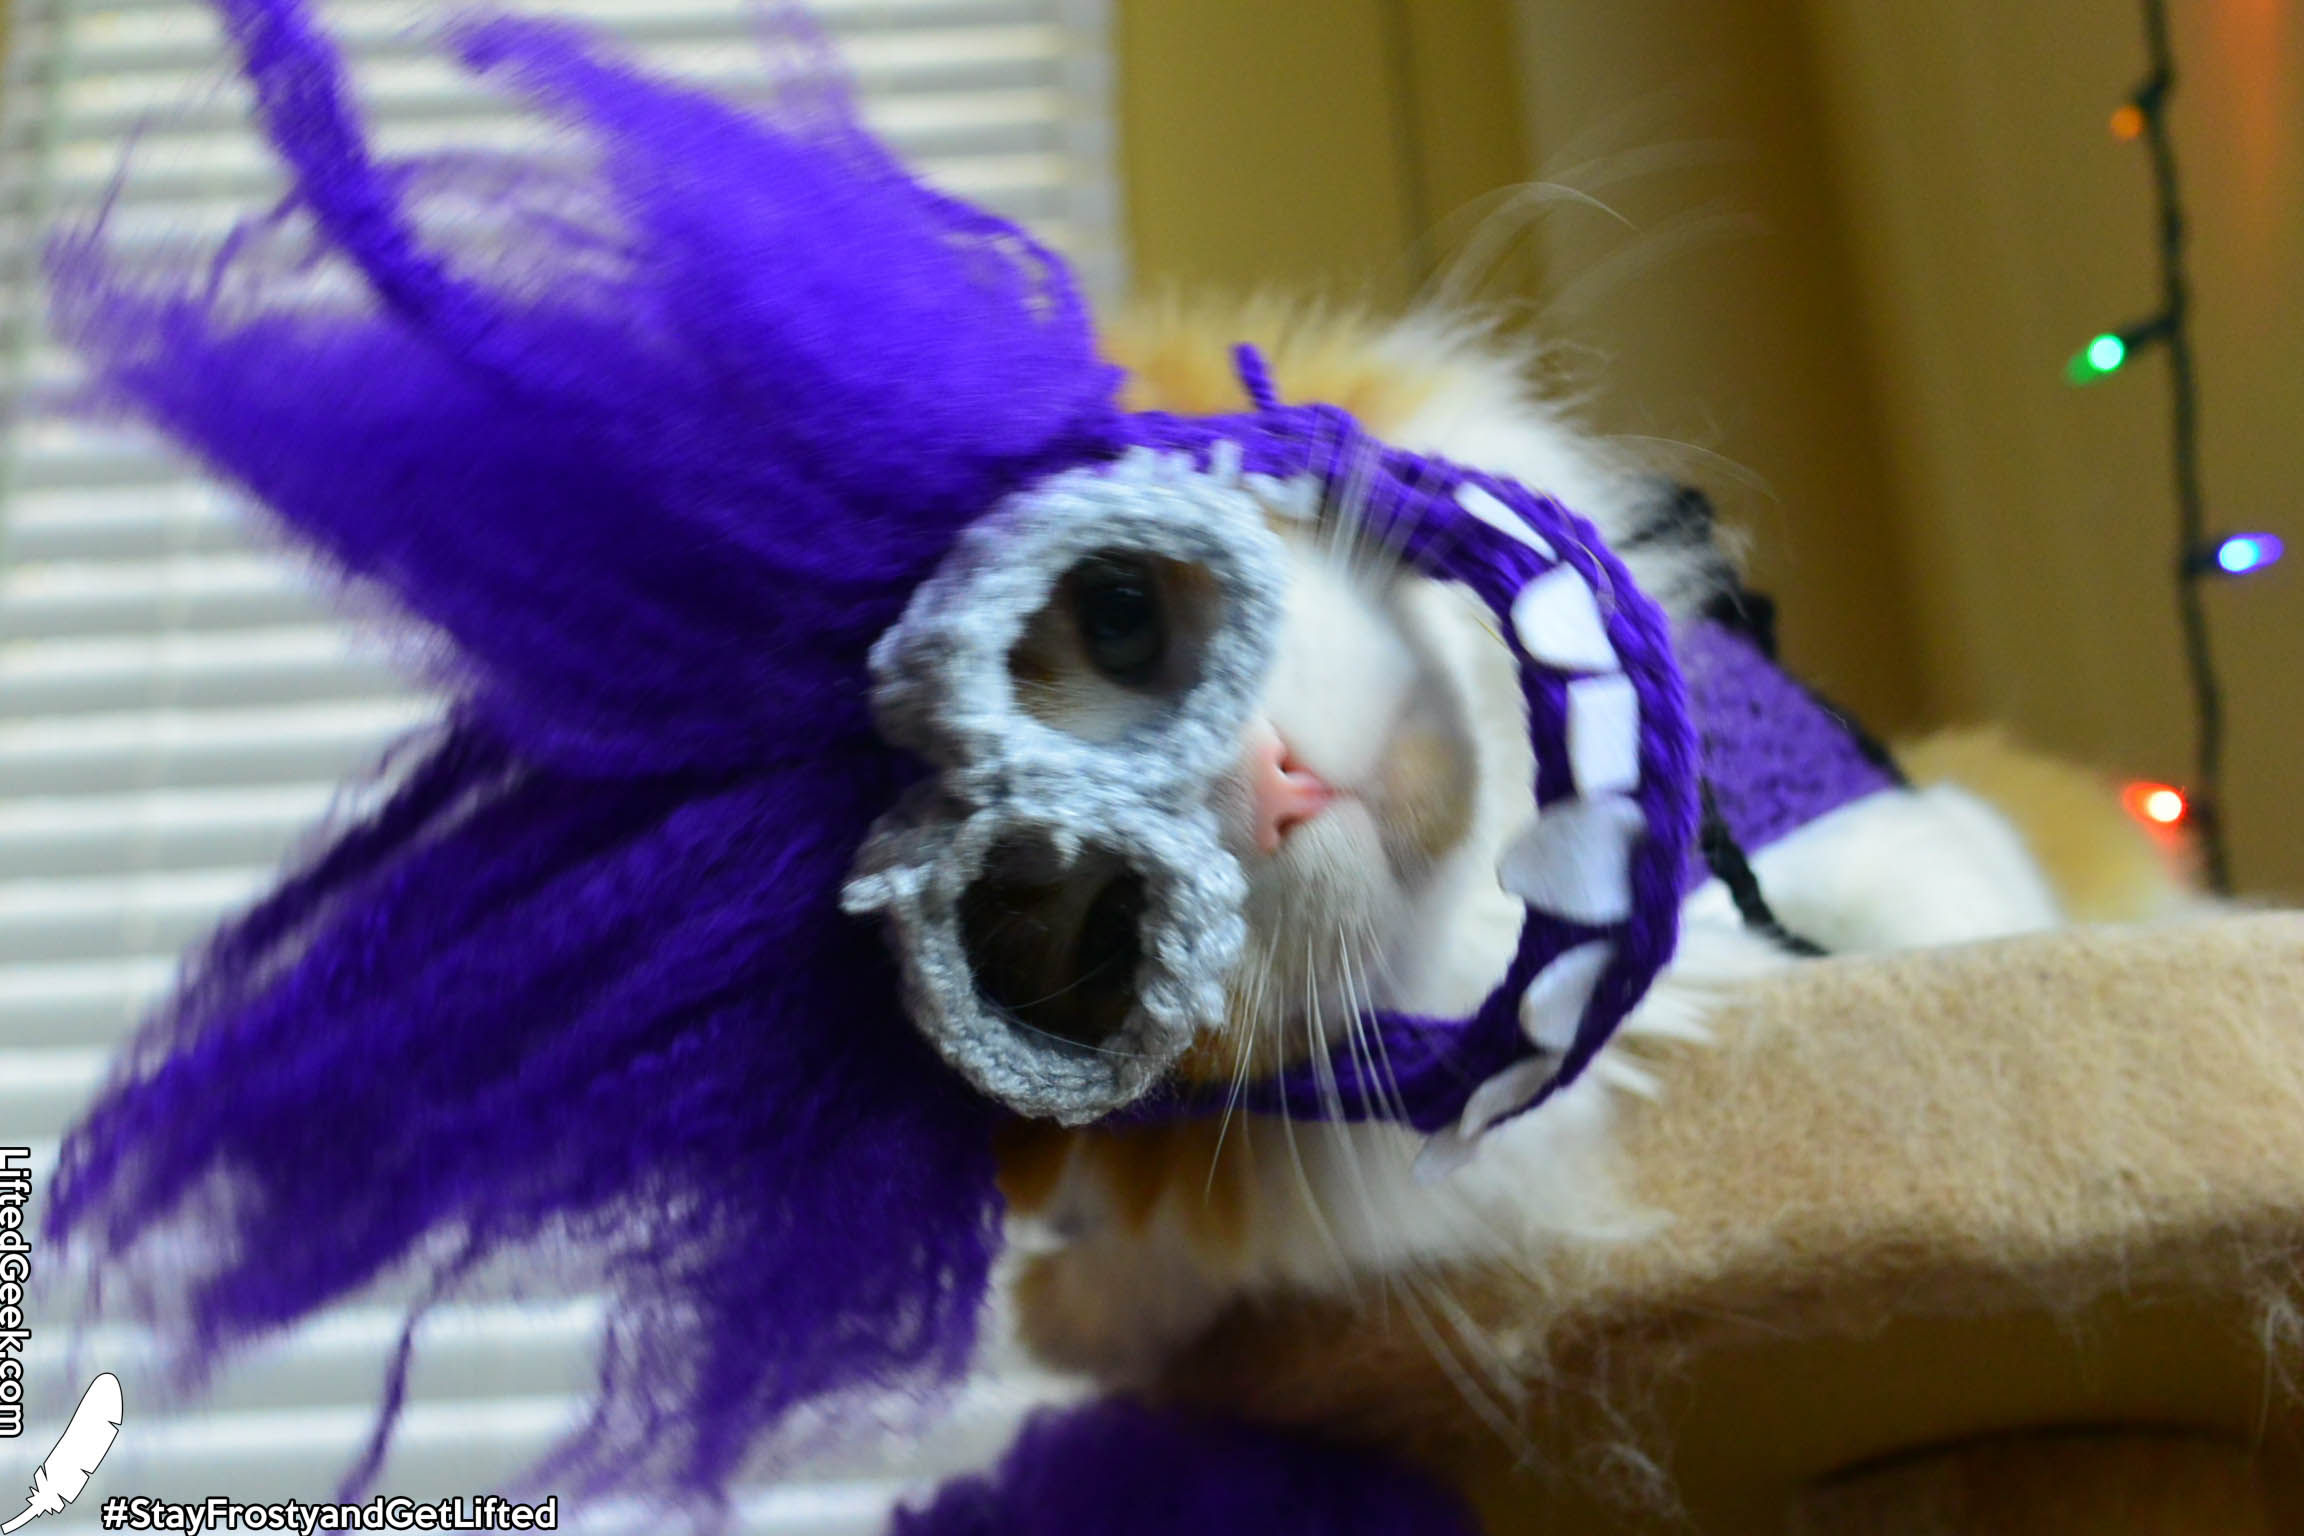
And there you have it! AN EVIL CATMINION!
Feed him all the treats and start taking pictures while he chews, because that's where it's funnier and it looks more Evil Miniony, especially the part where I caught him with his tongue out. Except for the last picture, where he was done chewing, and waited for more treats...
There you have it! I hope you all enjoyed this tutorial!
Check out the remaining photos I took of Fibby as the Evil CatMinion!


NOW FOR MY DISCLAIMER...
**DISCLAIMER**
No kitteh was harmed in the making of this article
No kitteh was unhappy.
Kitteh wore outfit for duration of photoshoot.
Kitteh happy purr purr purr.


