
Under the Needle: Elizabeth from Bioshock Infinite
Written by Riri (@lillyums)
OK SO! Clearly this post is going to be all about my Bioshock Shock: Elizabeth cosplay and the documentation of my work in progress along the way. We'll skip to the chase - why did I pick this? Long story short, last summer I played Bioshock Infinite, loved it, loved Elizabeth, and finished the costume in a month and a half's time. This is actually one of my most favorite costumes AND I got a lot of mileage out of this too for the amount of work I put in. I've worn it to several conventions and... now it is stinky poo and I need to clean it. No, kidding, I don't sweat.
If you're interested in just seeing the result of my costume, go ahead and scroll all the way down! Otherwise, you can read all about my secrets below.
Overall I was happy with the result of this costume. There are a few things I would change, such as the fit of the corset around the bewbs... but whatever, nobody will notice.
To begin, I started with a few reference photos from the internet to get me started on materials.
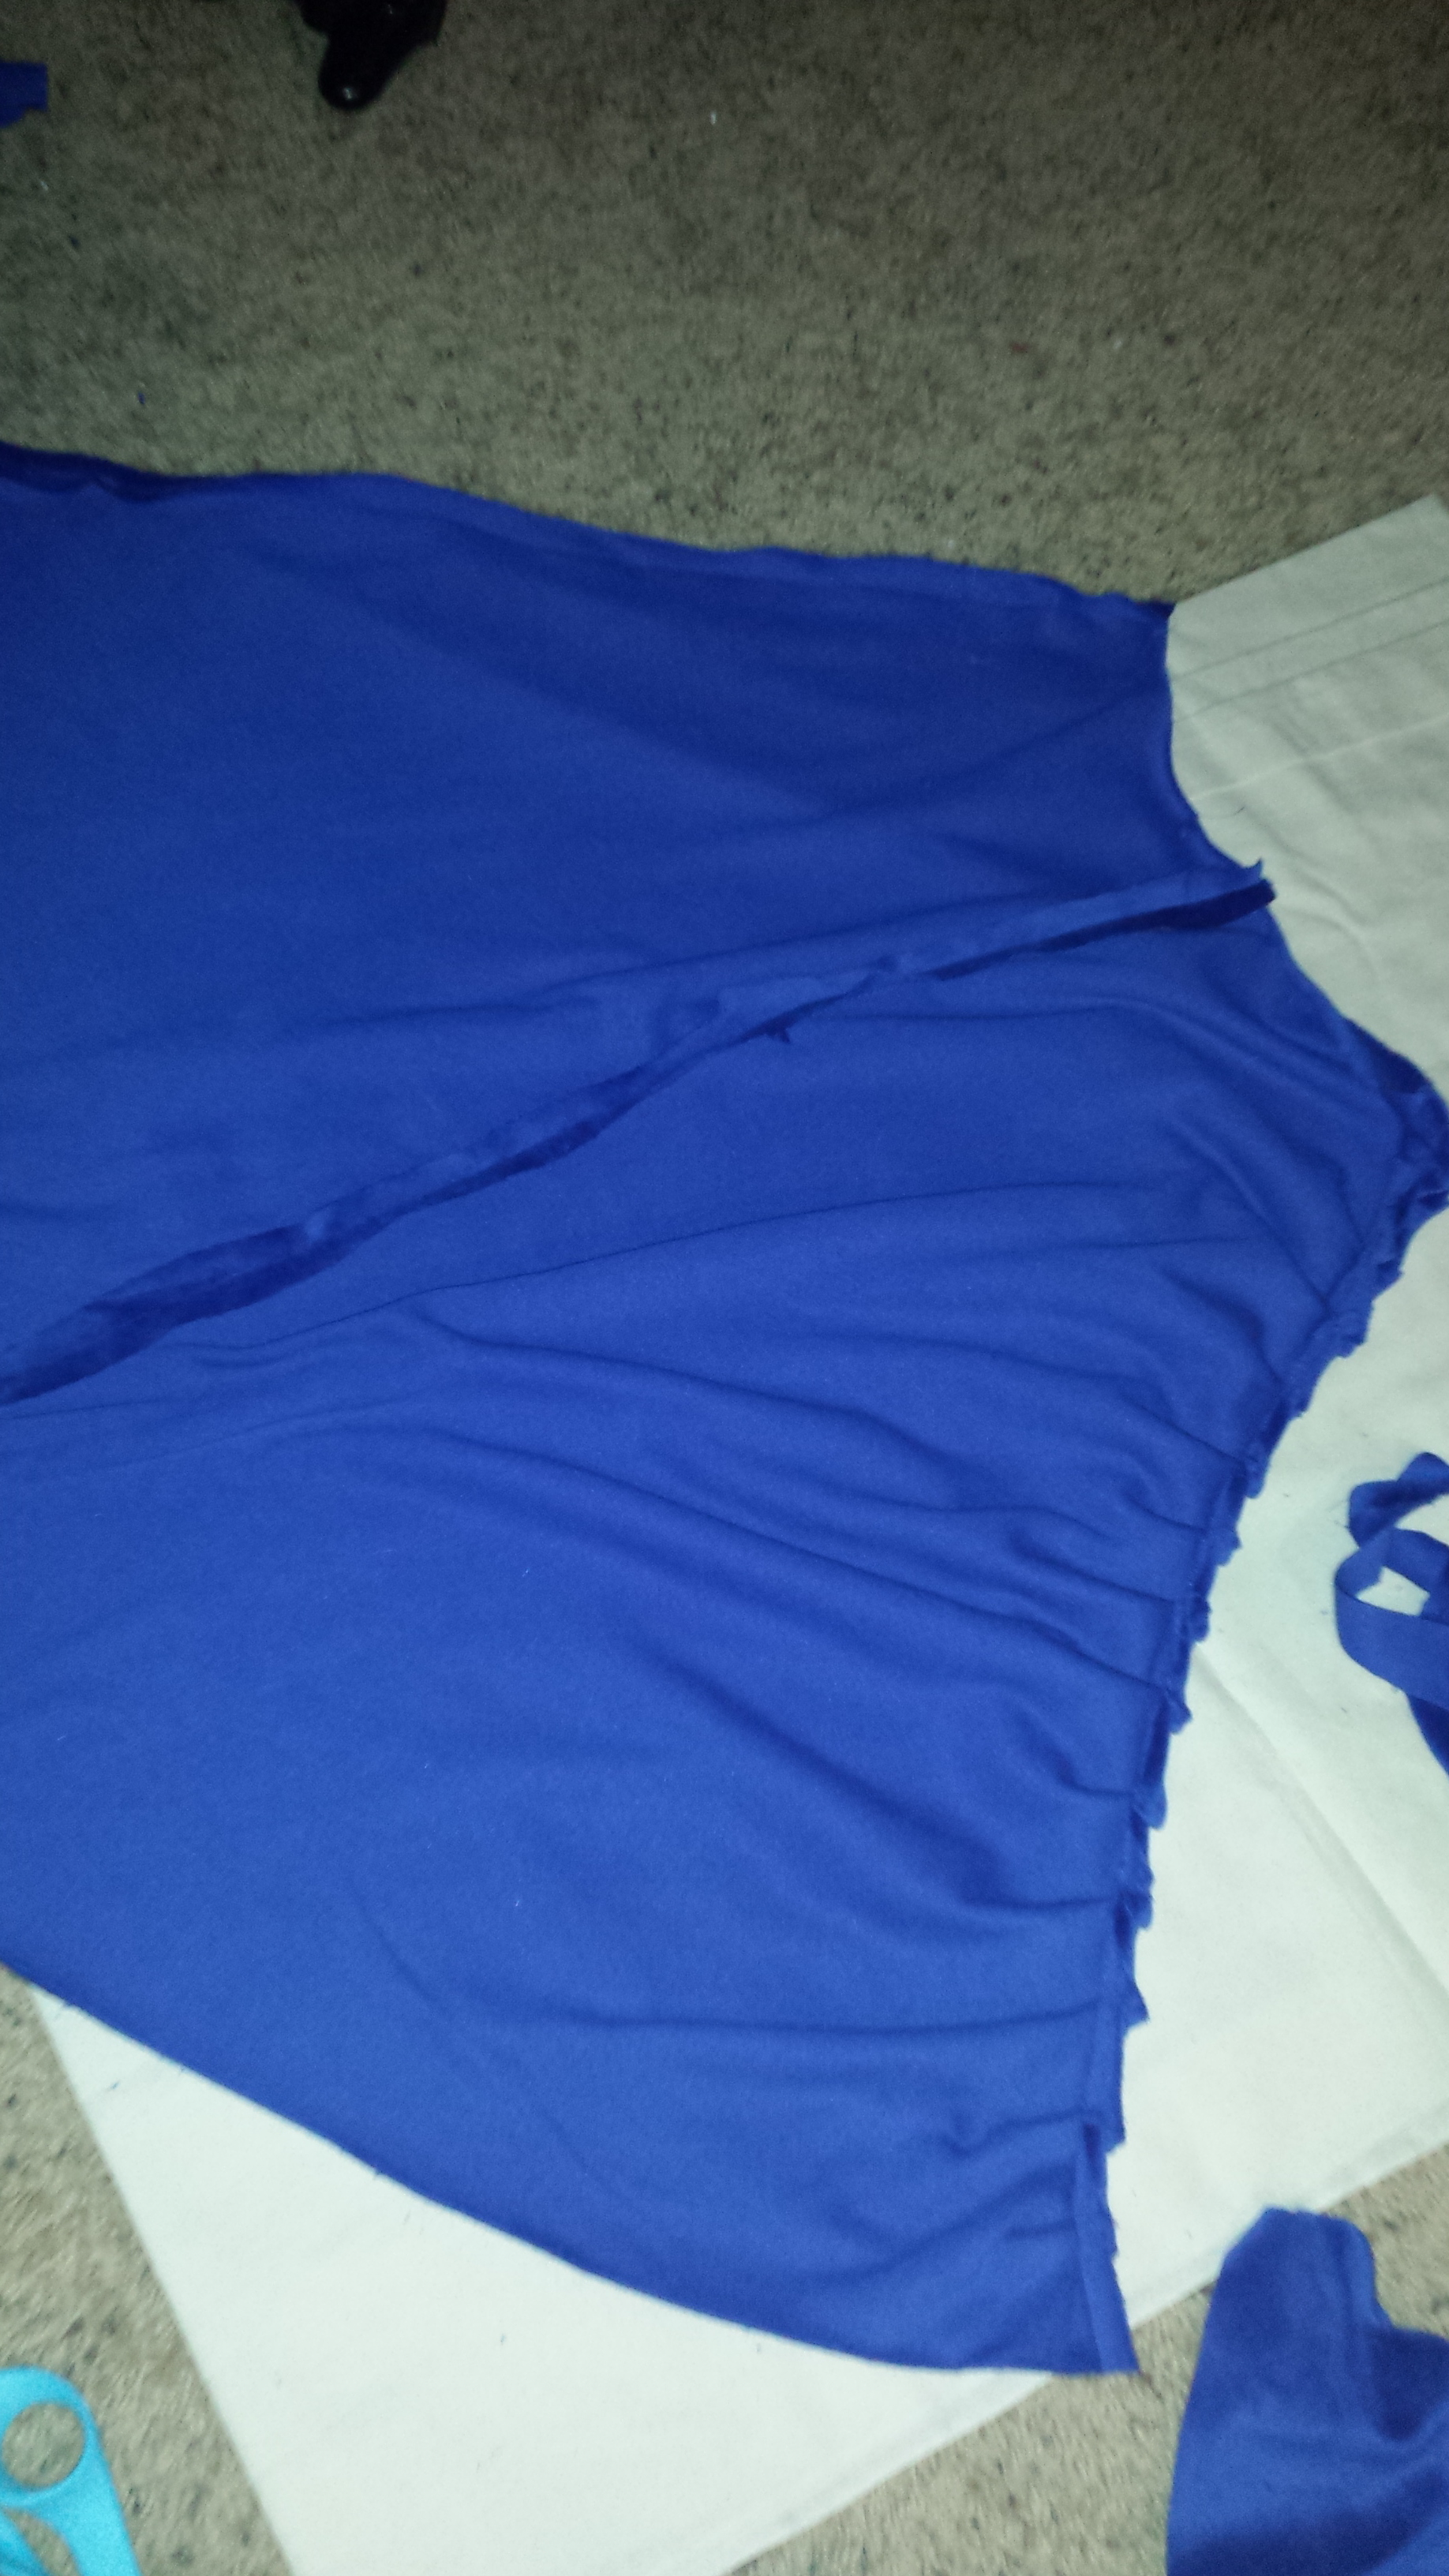
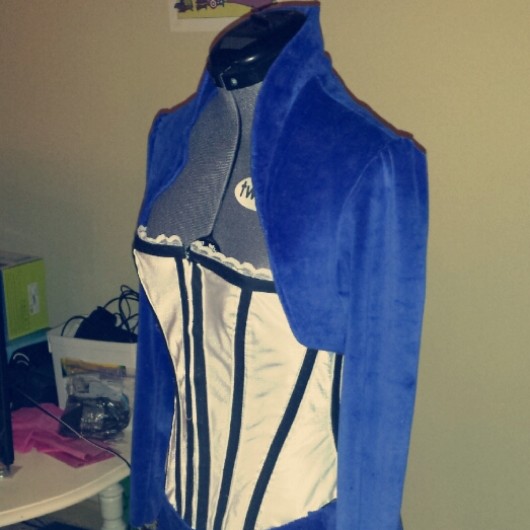
Immediately I knew which fabric I wanted for the main dress and shrug - a royal blue colored velvet fabric. The corset, I wanted a non-stretch sturdy fabric, with a breathable cotton for the lining. Why non-stretch? I wanted to make a real corset that can retain its shape! AND make me look skinny. What what. Or something.
CORSET
I started on the corset first, since this part was the most difficult piece, in my opinion. It was my first time making one too! I actually used a base corset pattern from Simplicity 5006 (Misses Lingerie) and modified it to match Elizabeth's corset stye. I did do a test corset pattern on some pretty awesome Wonder Bread-like fabric, and I almost wished it could be a real corset so that I could make up a Wonder Bread Girl costume.
After I transferred my changes to real fabric, the real work began. I had to think about what kind of boning I wanted to use too, and alls I can recommend for ANY corset work is steel boning, which I purchased from CorsetMaking.com. Steel boning is great in that it really holds its shape. BUT because it holds shape that well, I really had to loosen it up after I ate!! Note to self: Do not eat... a lot in a corset...Anyway, here are some progress photos of this step. I used a cotton, breathable inner lining and a silk/polyester/some-shiny-fabric for the outside.
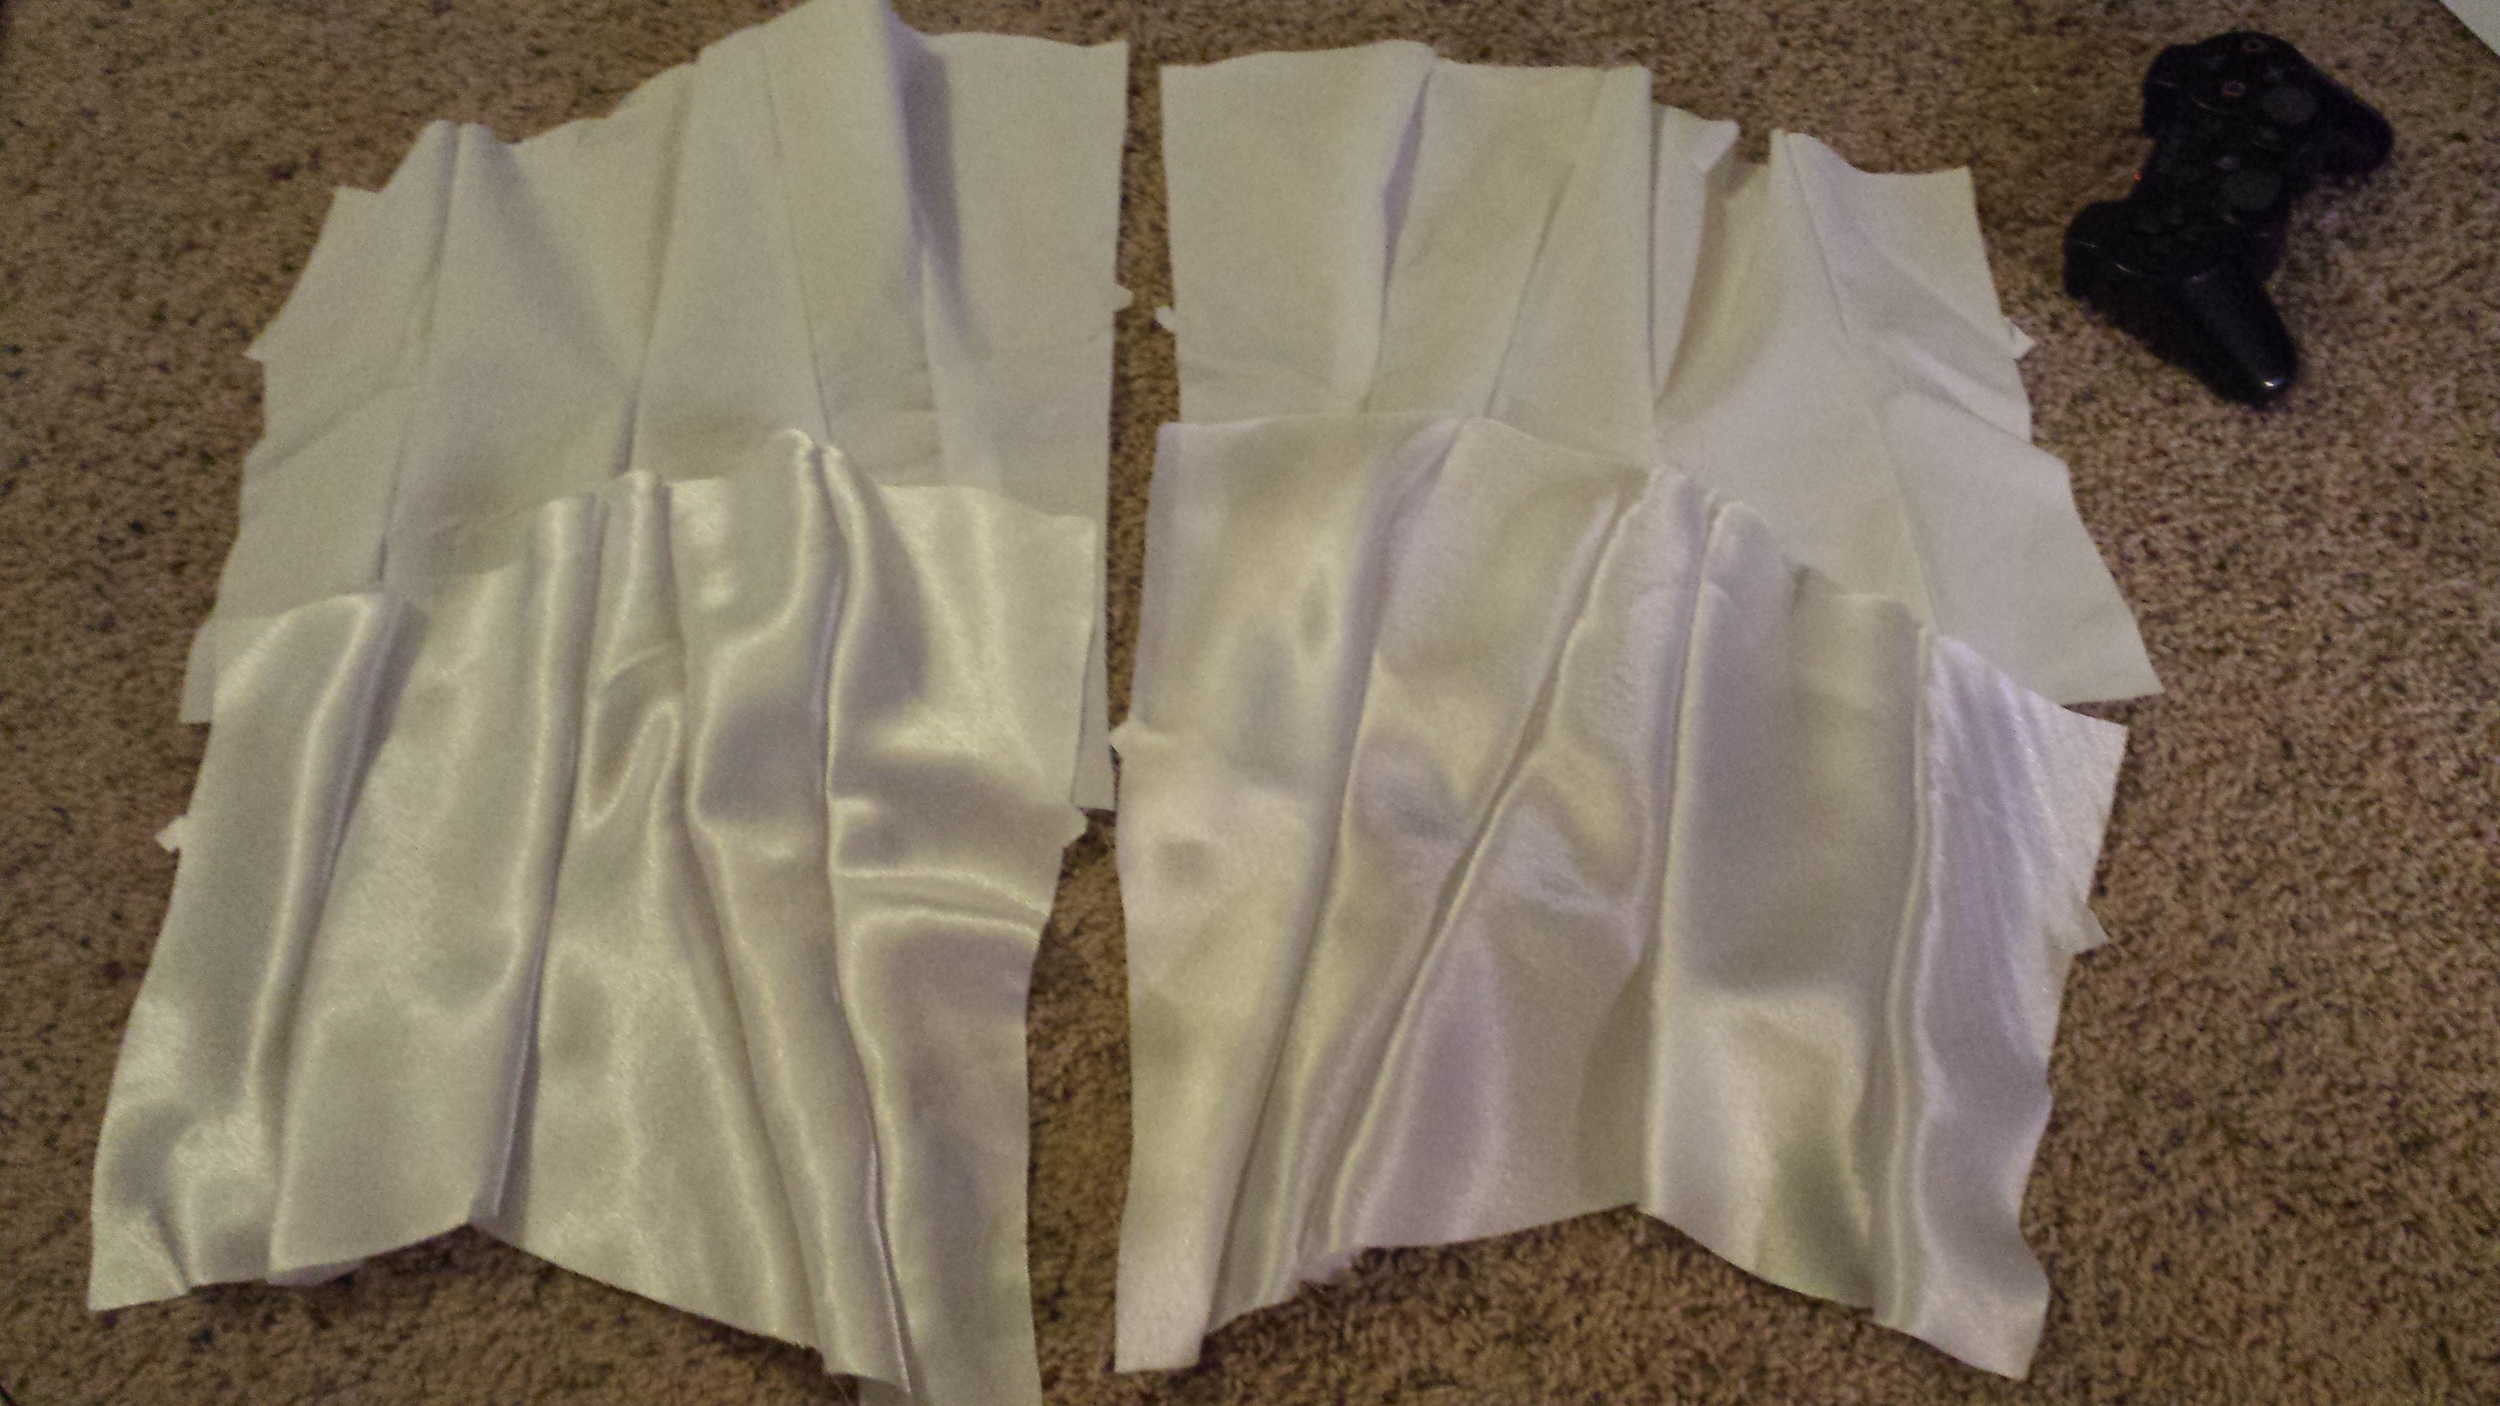


After putting that together, I created channels for the steel boning, inserted the steel boning, added the busks for a front closure, and then added grommets in the back. Once all that was done, I added the details - the black ribbon lining and the lace along the bust. TAA DAAAAA...
SKIRT
The skirt was created from a base skirt pattern from also Simplicity 5006 (Misses Lingerie), which I modified. I created the side scrunching that can be seen on Elizabeth's skirt, and it did take several modifications before I was happy with the result. I created the white ruffles myself seen at the end of her dress, using small zig zag stitch on the edges to prevent fraying, and then bunched a little fabric throughout to create the ruffles.


SHRUG
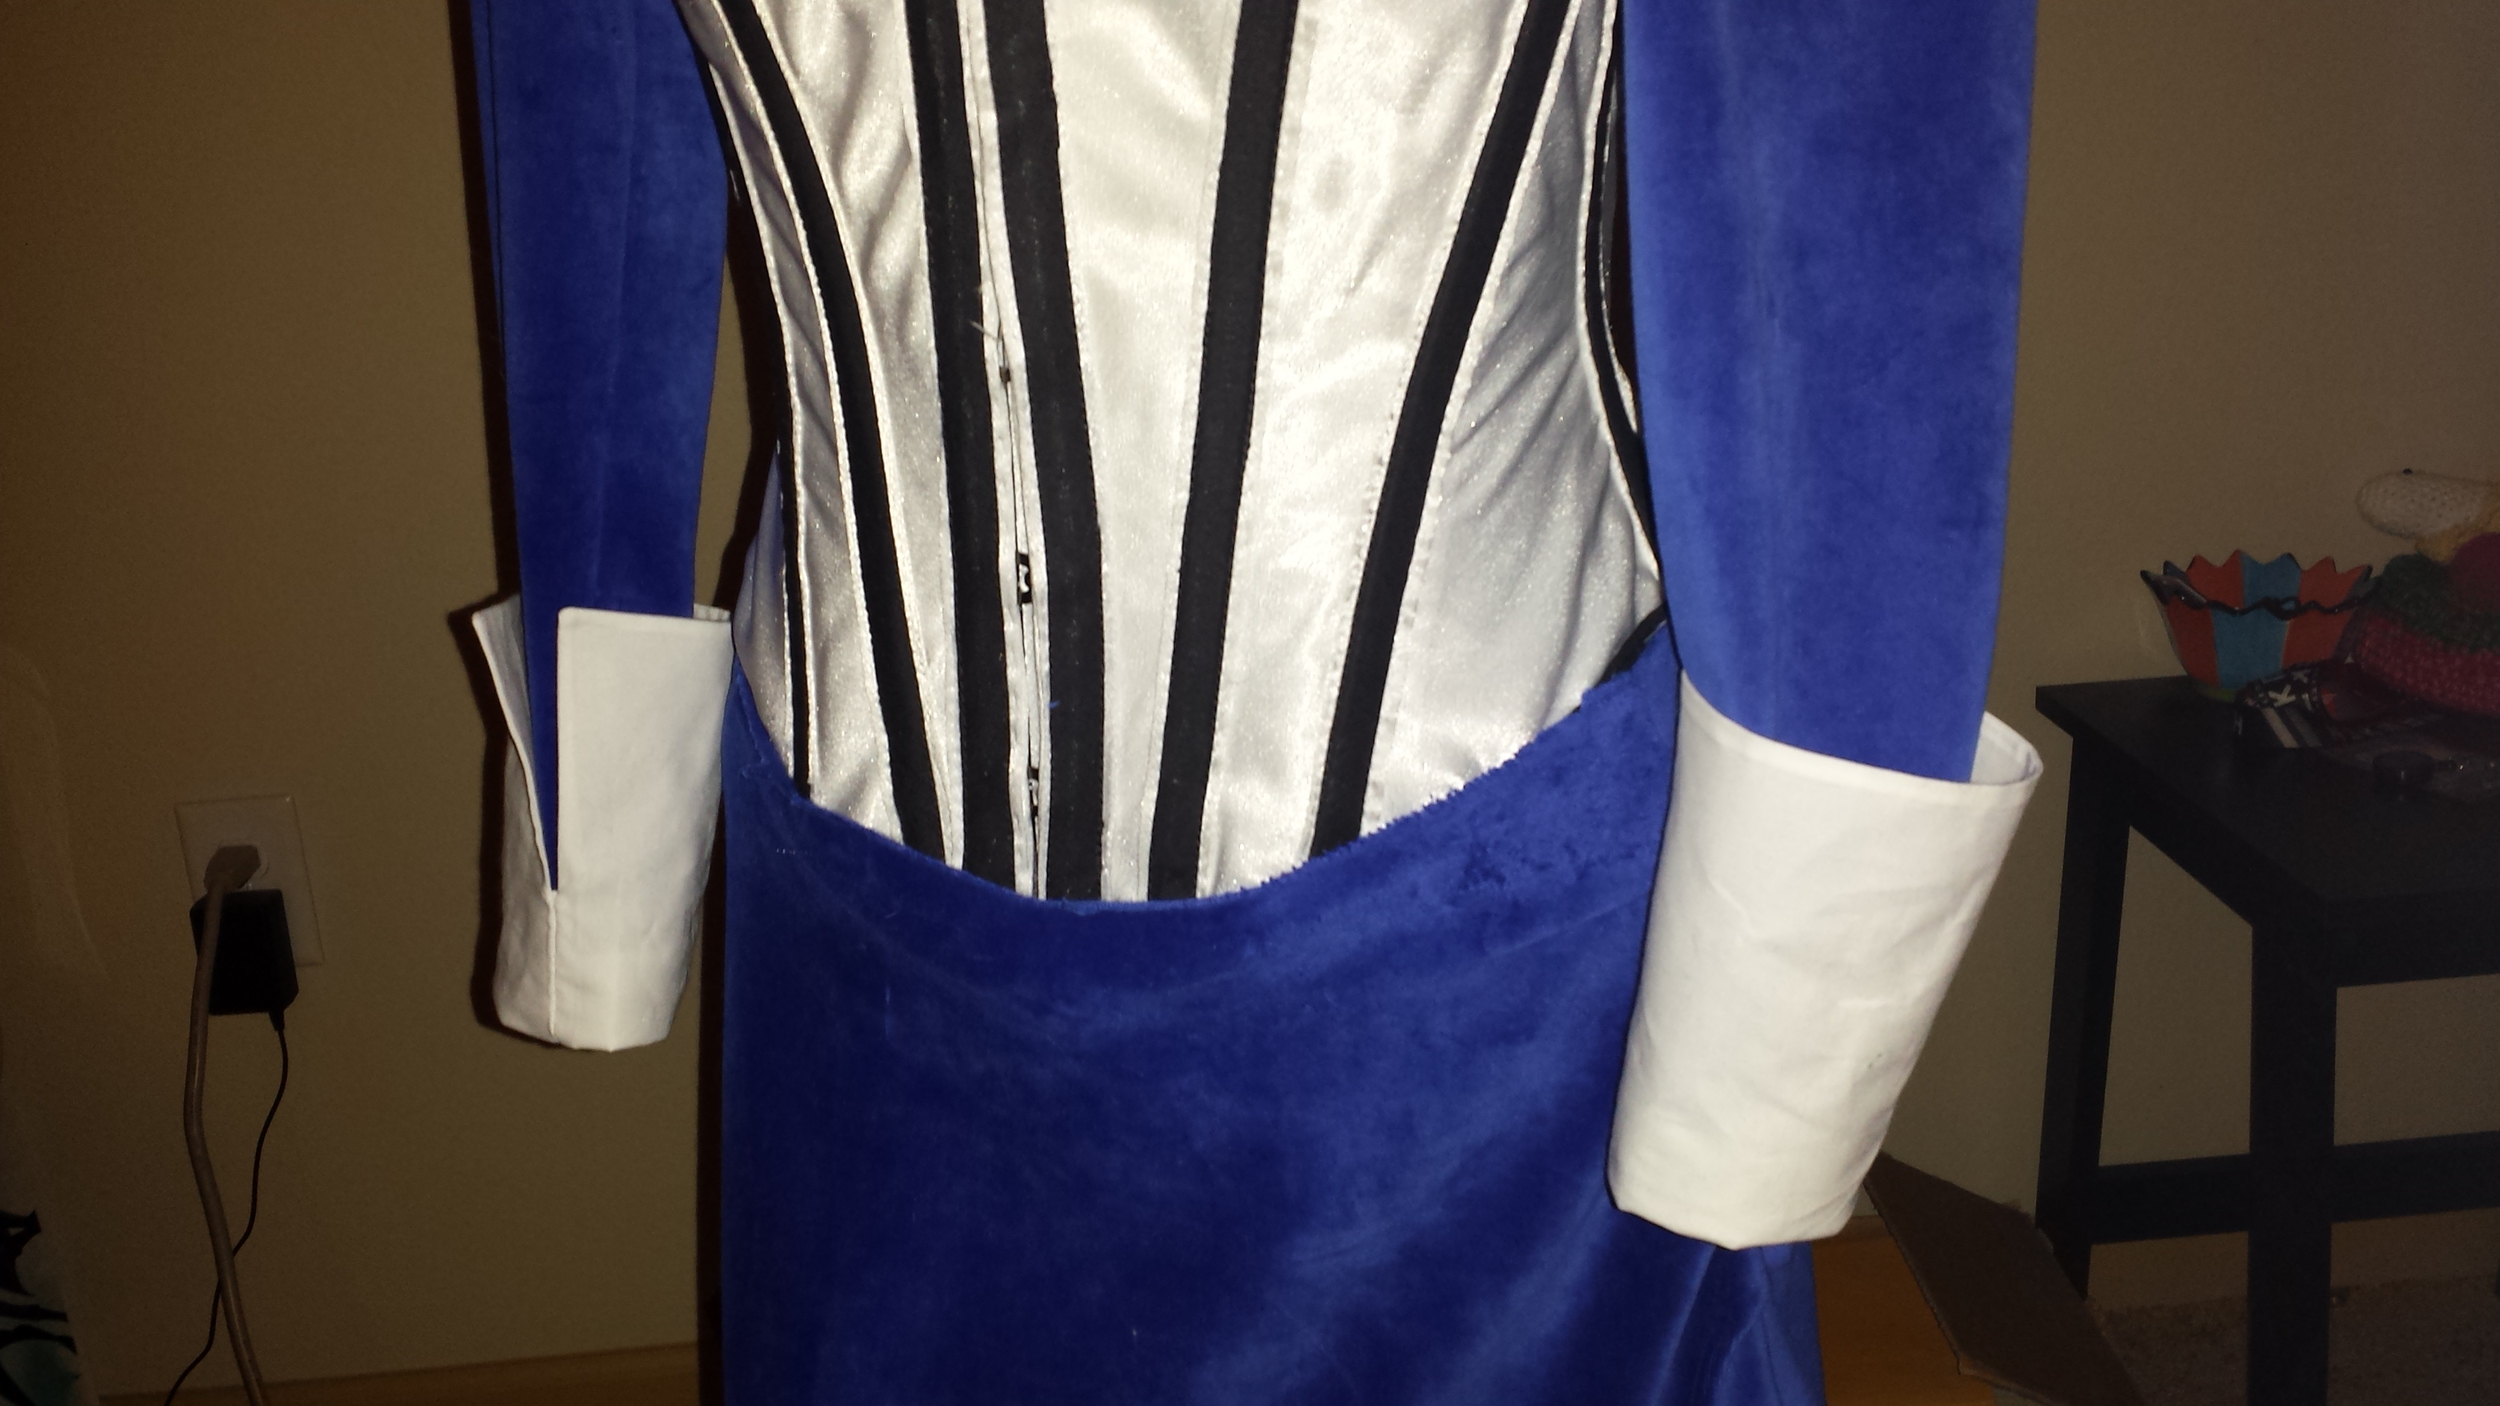
The shrug was also start from a base bolero pattern, but again modified heavily to match the style of Elizabeth's shrug. And again, started with muslin fabric so that I can nail down her collar right! I did have to use some interface and lining to retain the shape of the collar and to maintain the overall shape of the shrug. The white sleeve took me a very long time to do for some reason, since I had never made a split sleeve before. After much trial and error with muslin, I finally got it right! The only thing I wish I had done was used a more medium weight interface; I used some really thick facing that was meant for patches, so the sleeve became too thick. OH WELL! Nobody notices right?
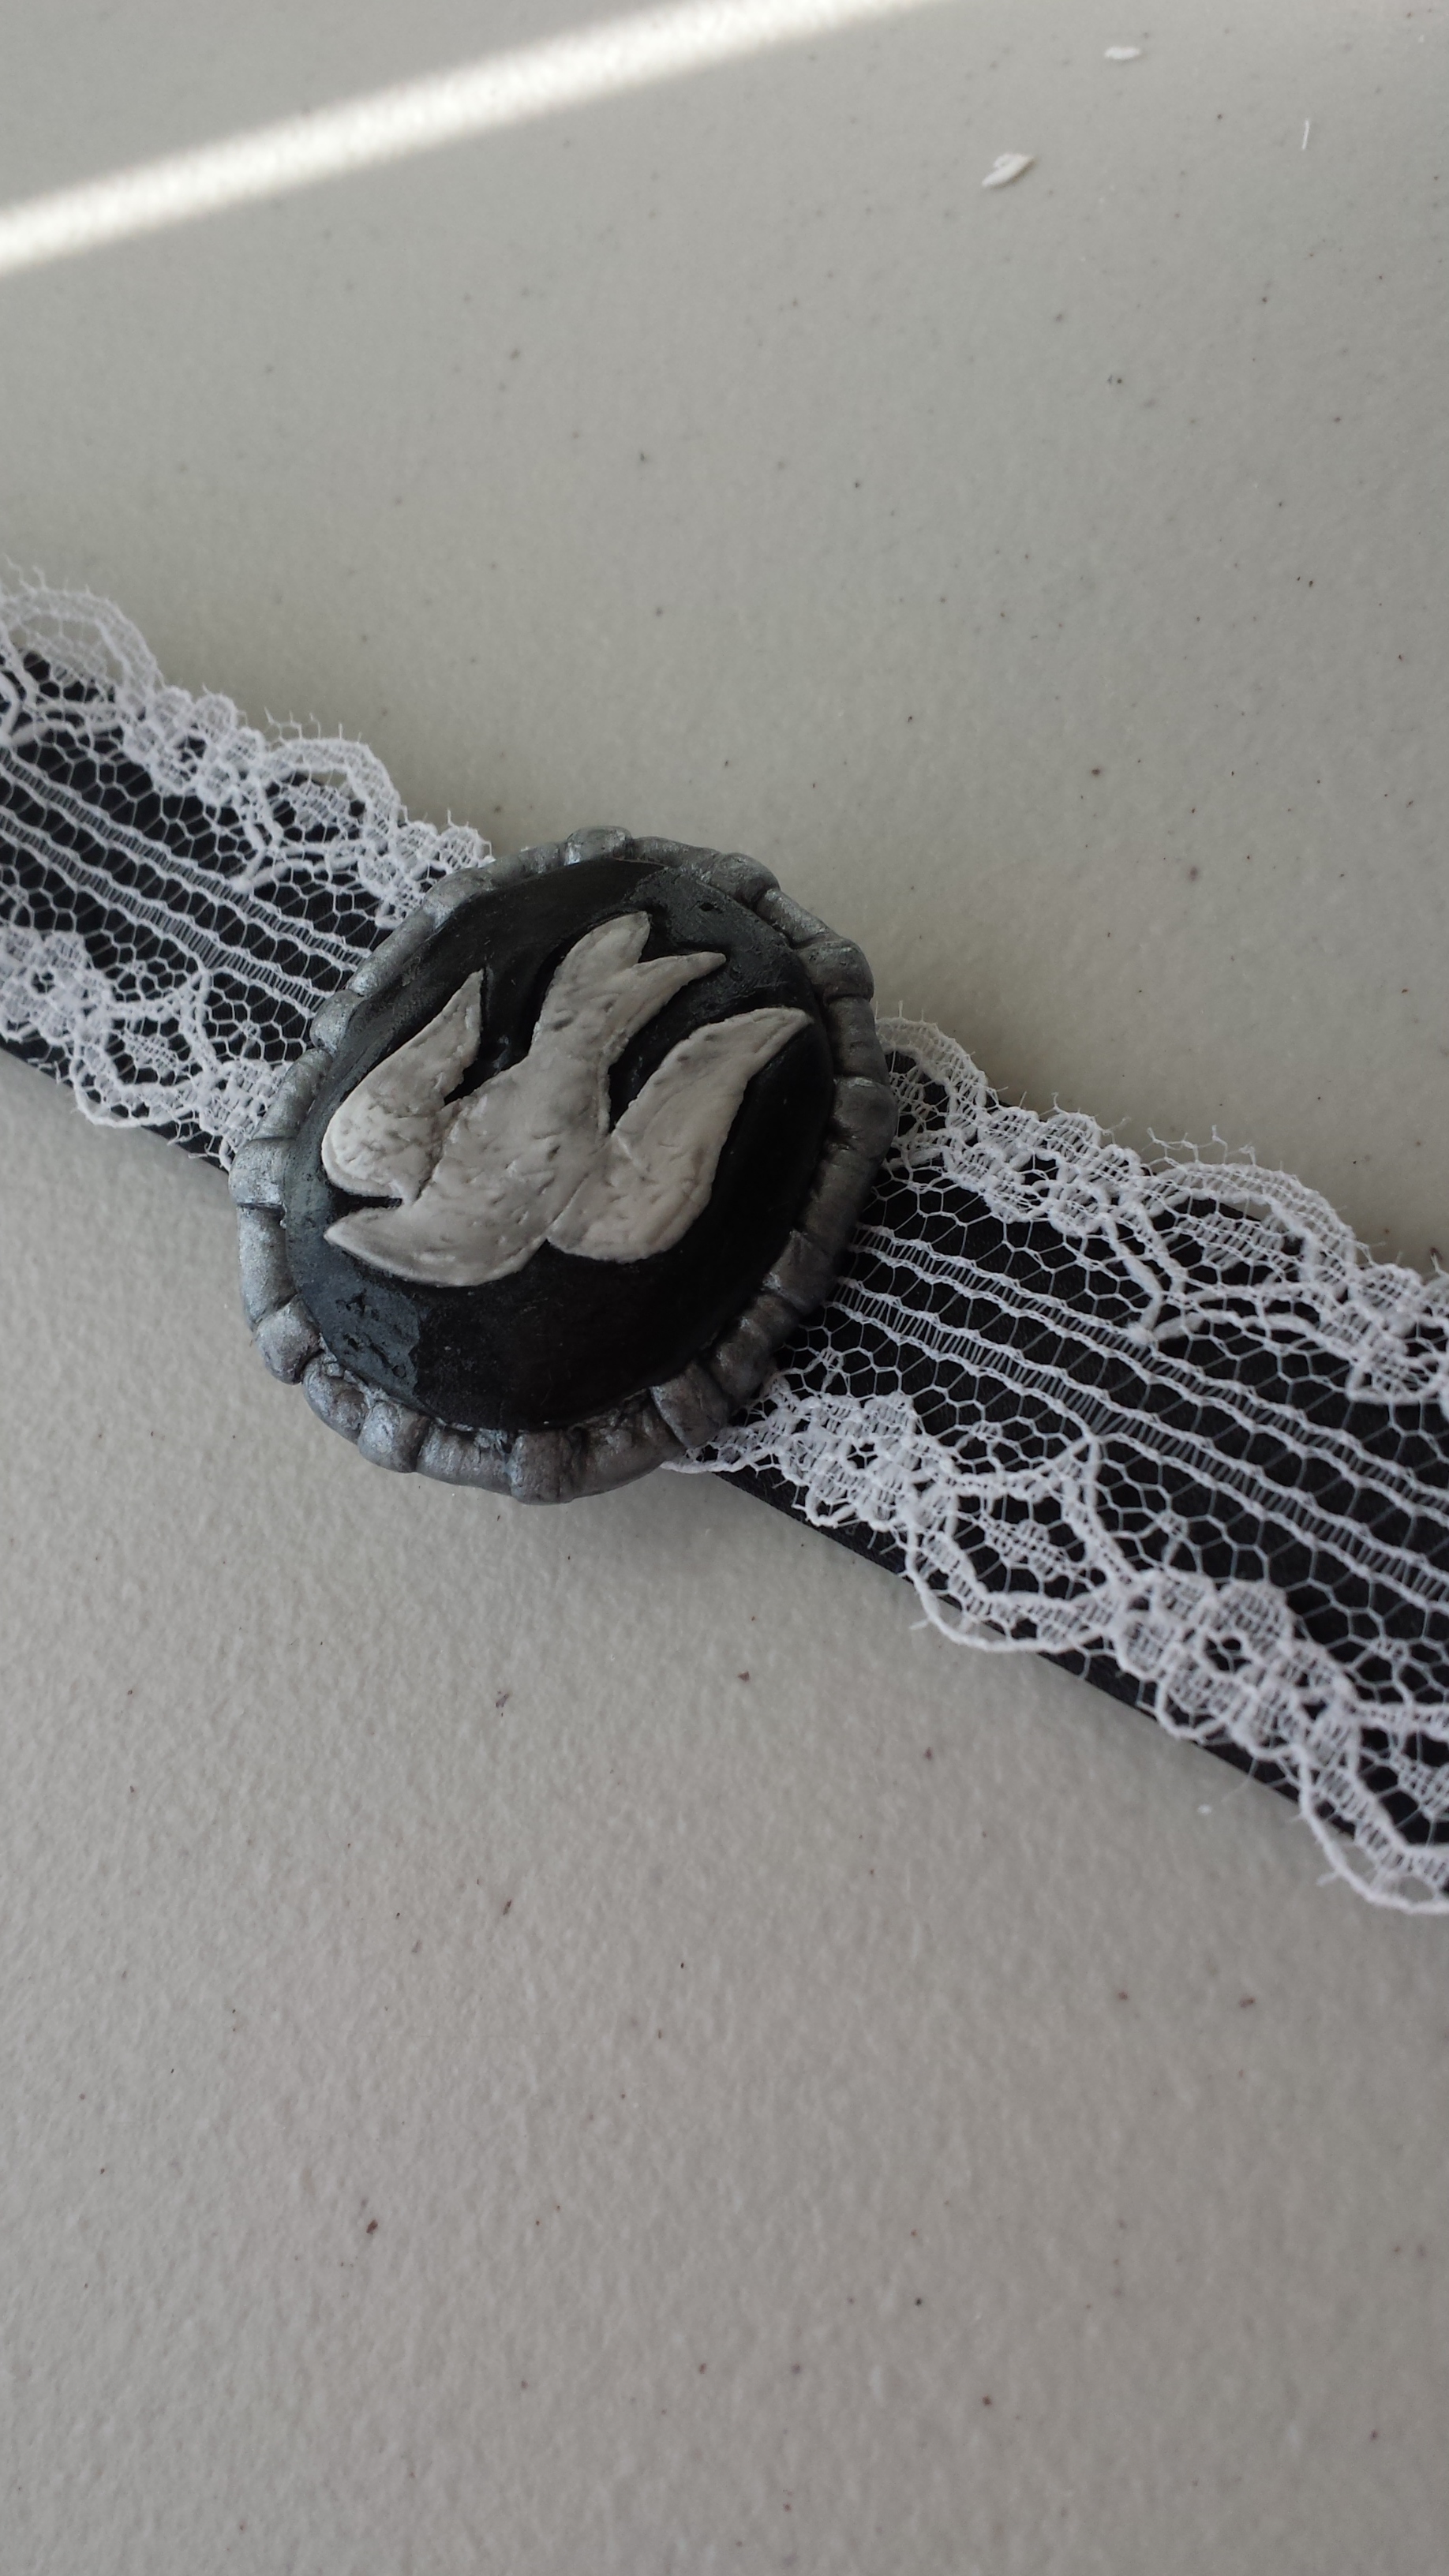
CHOKER
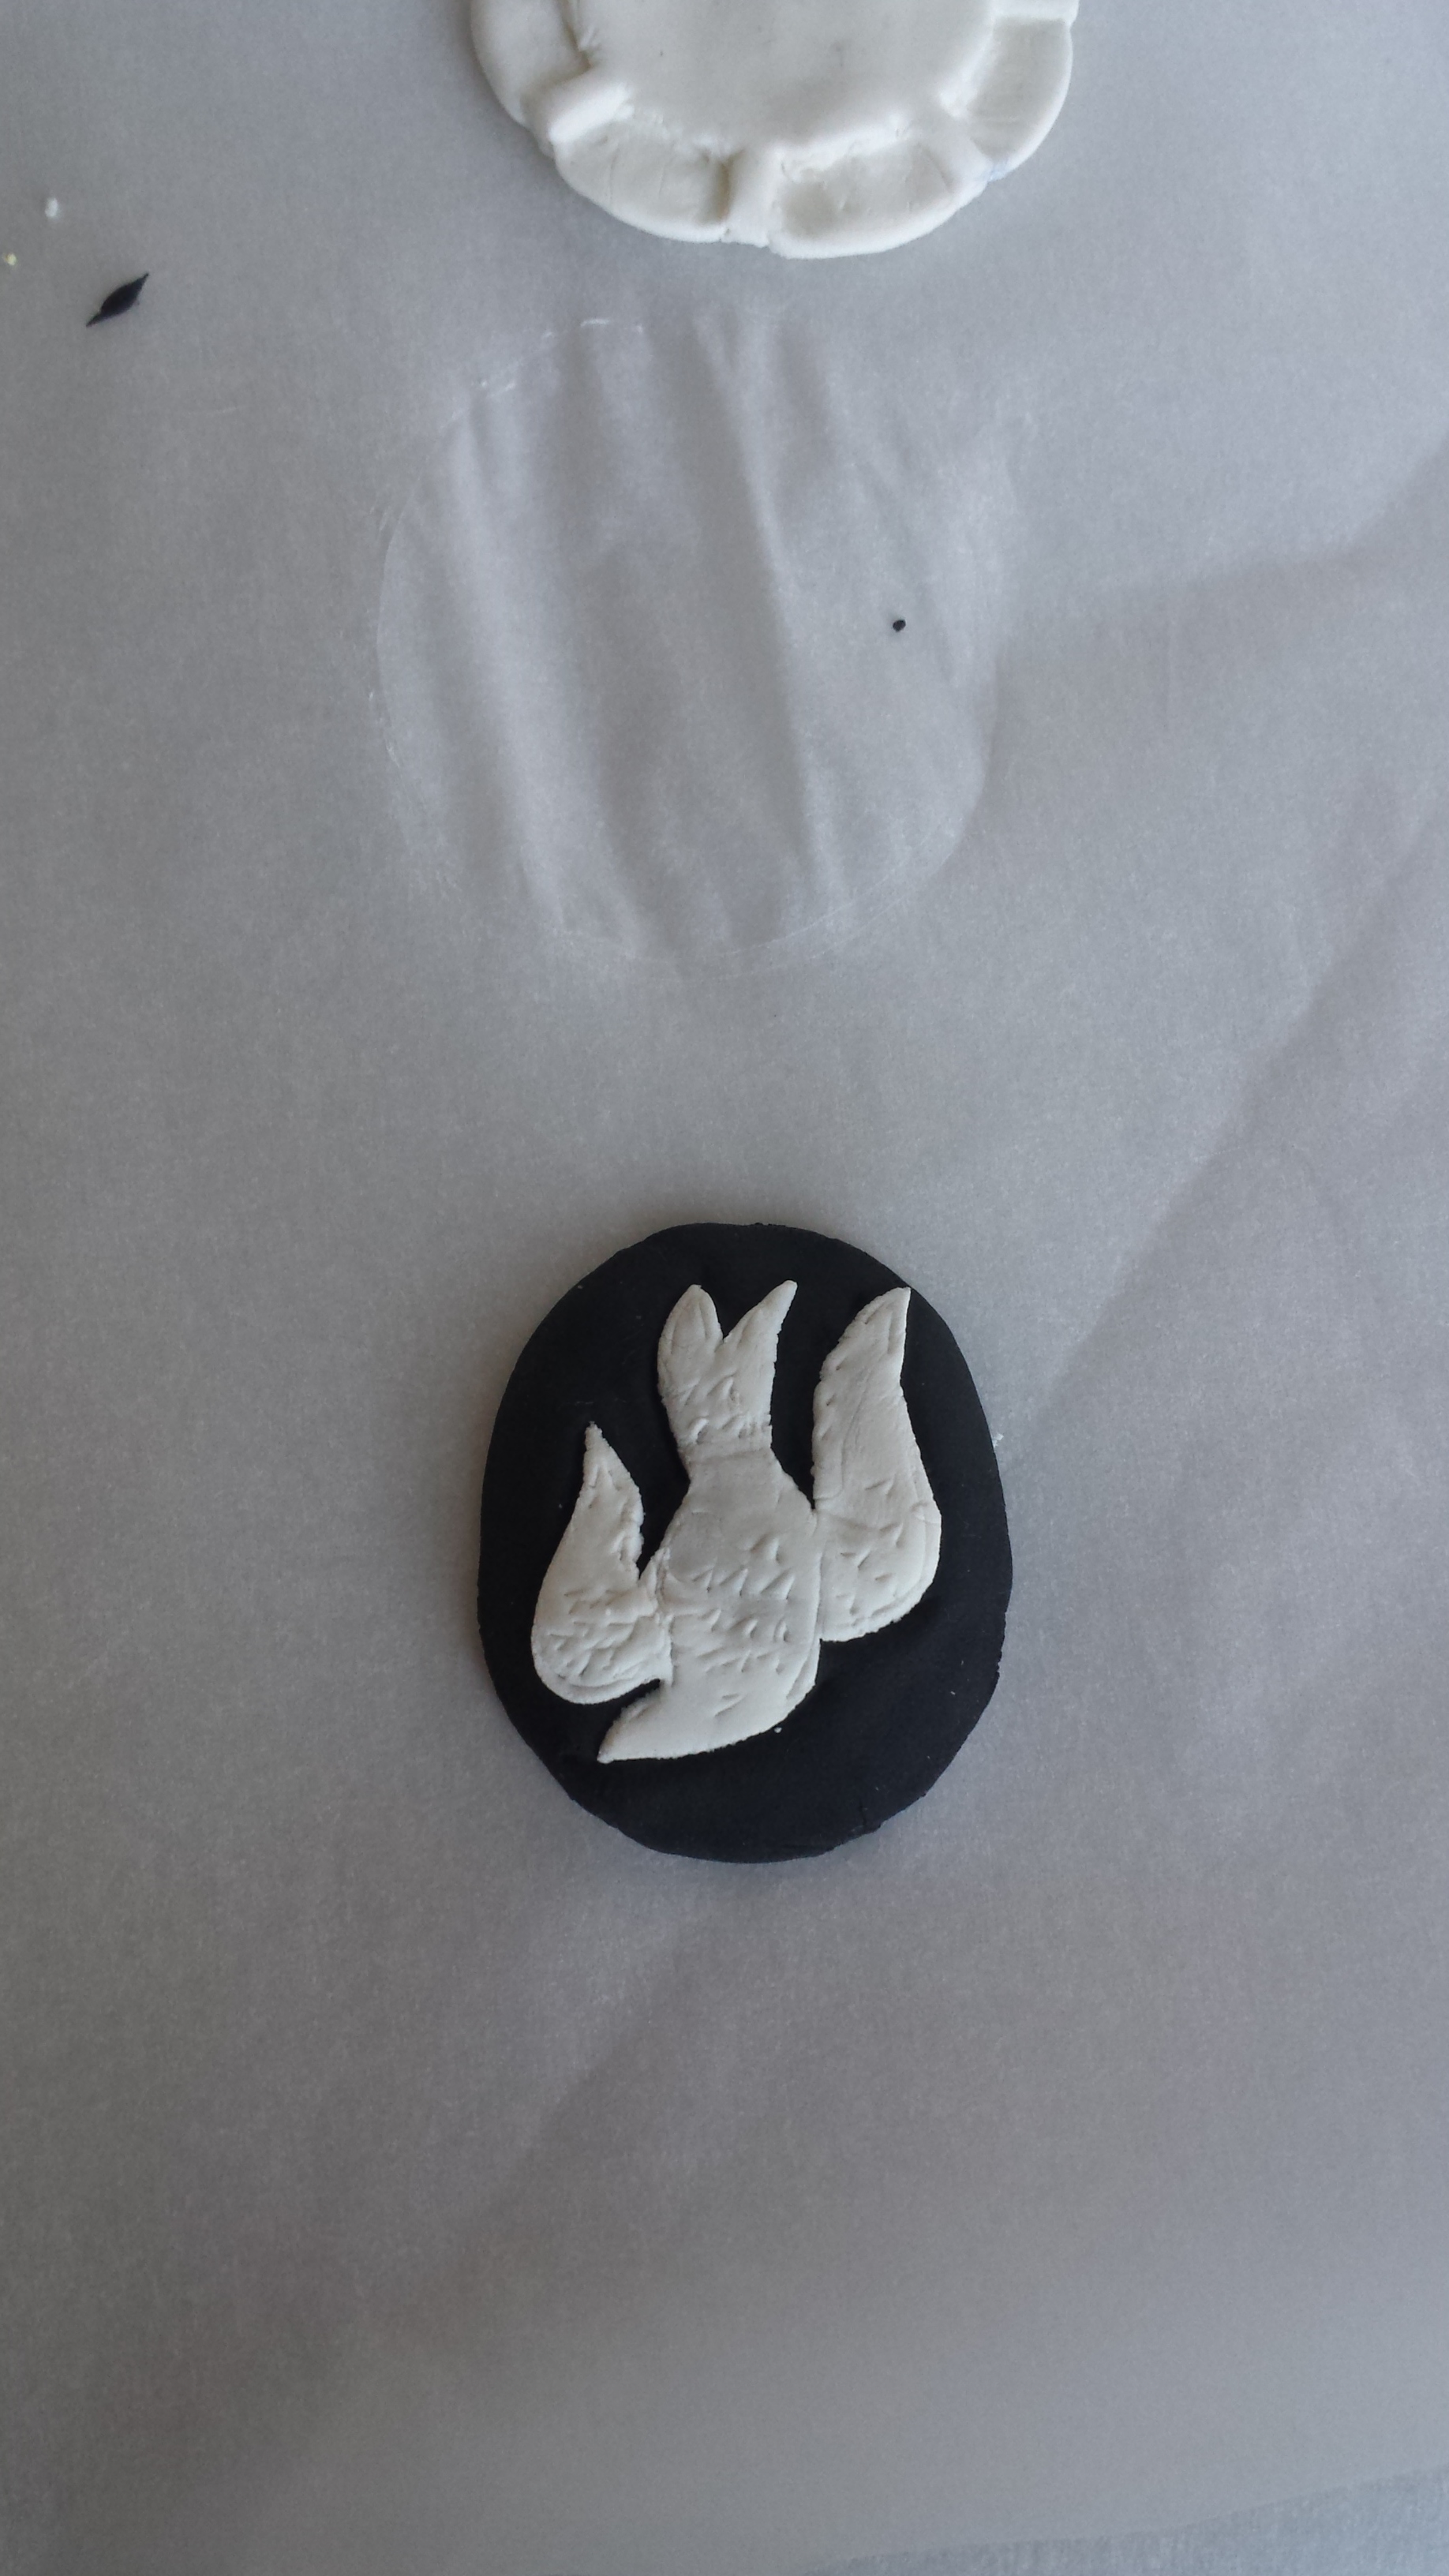
The choker was the next piece I needed to make. I couldn't decide if I wanted to buy the necklace online somewhere, or make my own. Well, I decided to go for the challenge and make it! Like in the game, I made the bird pendant (vs the cage). I used Black and White Crayola Model Magic (yay! KIDS STUFFFFF); I rolled out white model magic thinly, and then traced out the bird with an exacto knife. I used black model magic to create the base pendant, and then carefully slid the cut out bird on it. I then used white model magic to create the pendant edges, and painted that over with grey metallic paint. To create more of a vintage look, I used Mod Podge to not only seal the bird, but as I painted over it, some of the black ink from the black model magic was transferred over the white bird. So it gave it this nice old, vintagey look to it. The ribbon choker, I just took some lace and sewed it over thick black ribbon.

FINALE
AND... Here's the whole outfit, on me!
Photo by Elite Cosplay
www.elitecosplay.com
I wore this to more conventions than I have worn any other cosplay. I hope you enjoyed all the progress photos a long the way. Feel free to email me at riri@liftedgeek.com if you have any questions about what I've done!


