
Paper Armory: League of Legends Ragdoll Poppy Hammer Tutorial
header image photographed by Elite Cosplay
Written by Riri (@lillyums)
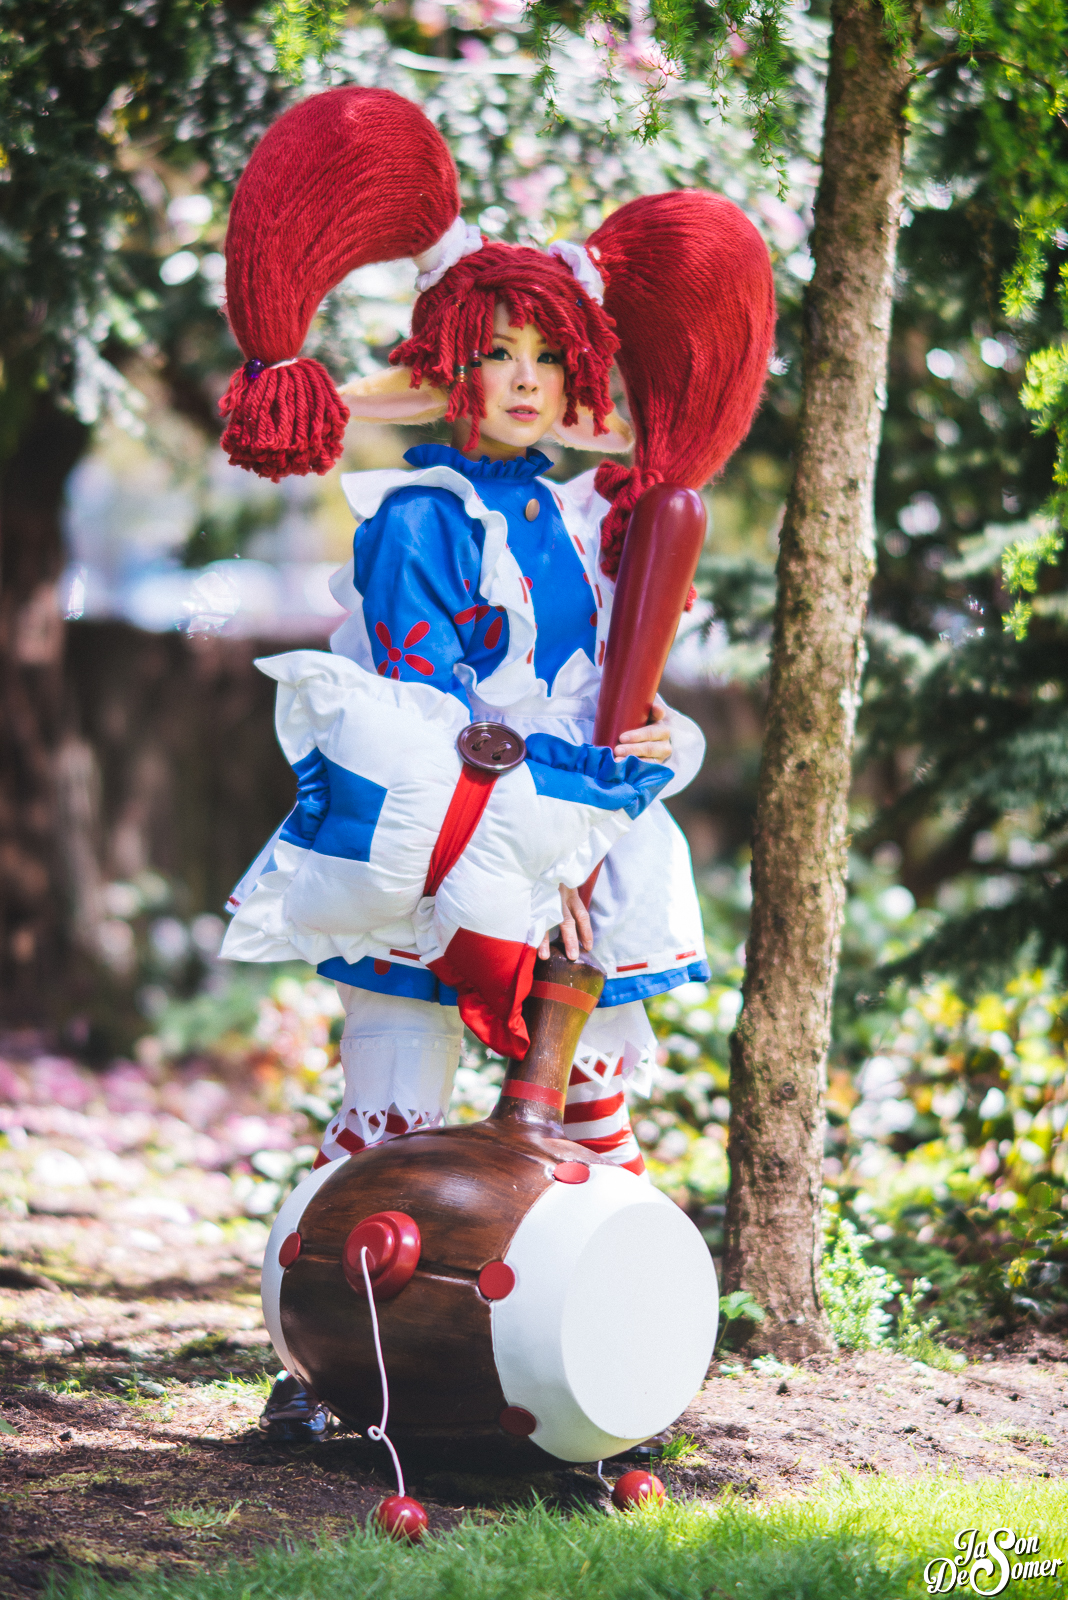
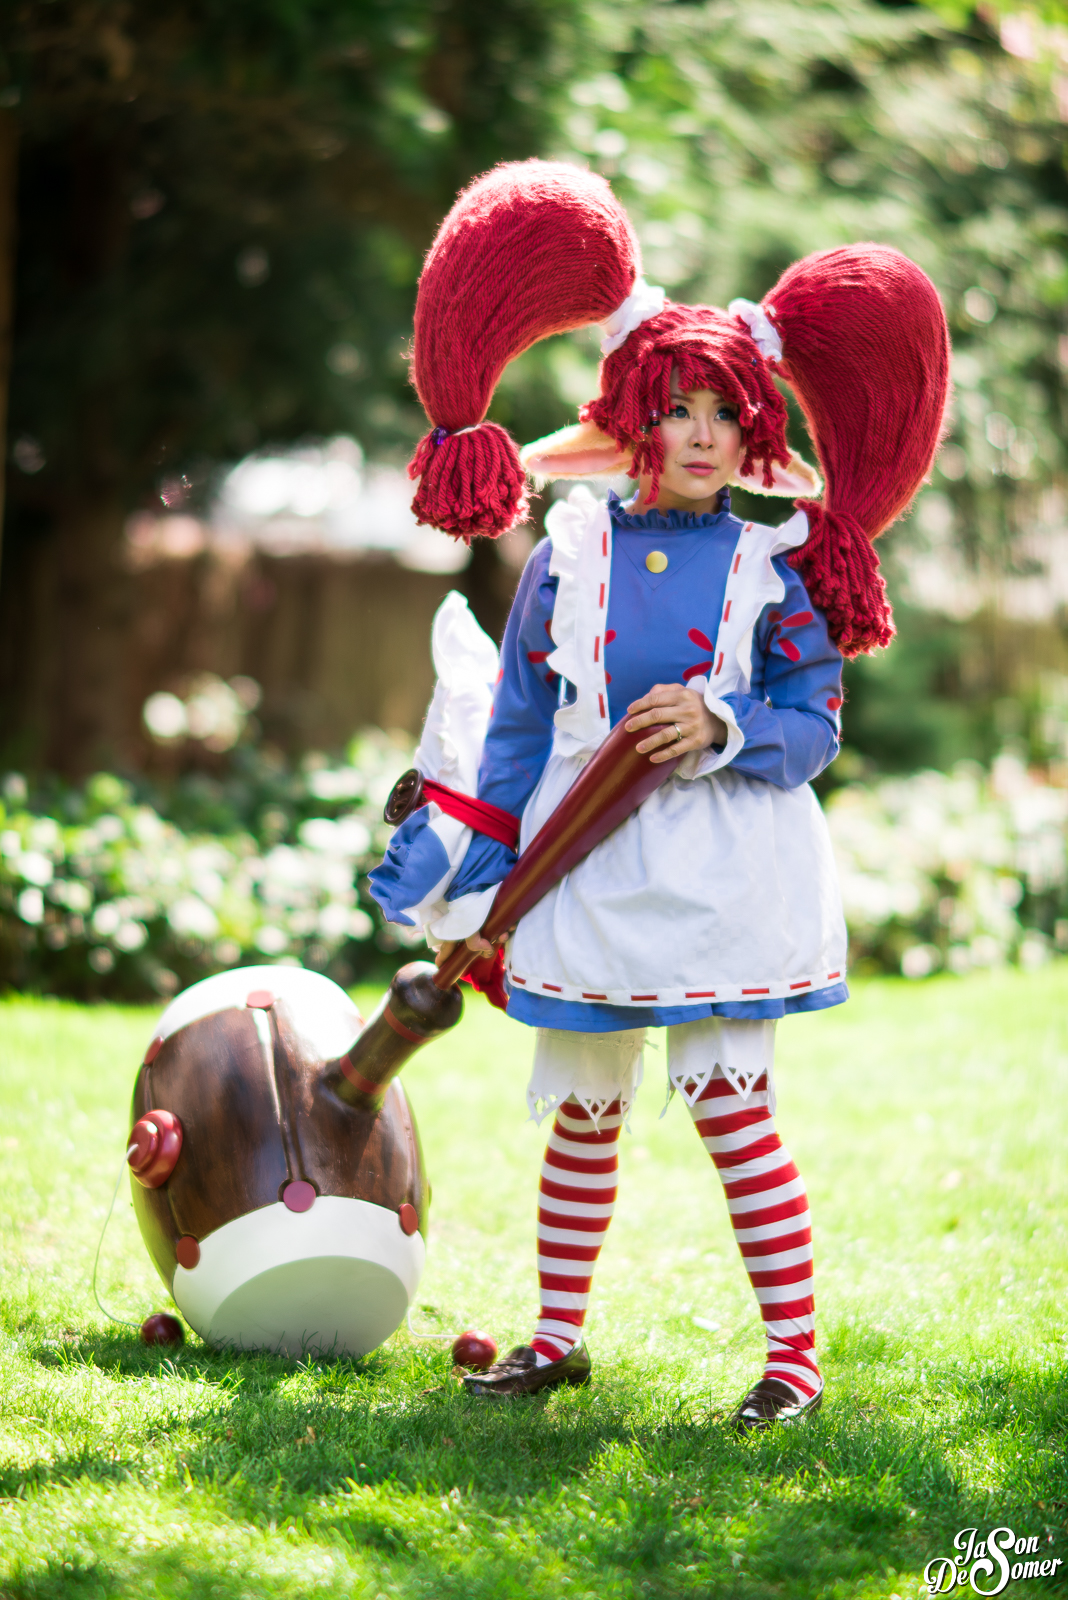
The first time I saw Poppy’s new Ragdoll Poppy skin, I knew I wanted to cosplay her. Mostly because I really wanted to make a wig out of yarn and a big ass hammer. I have always loved cosplaying skins and outfits that were more obscure; while there were many who did cosplay Ragdoll Poppy, only a few had cosplayed the original concept art designed by KNKL. In fact, during my search for reference photos, I came across KNKL’s DA and found the original design there. I loved the OD more than the design that made it to the game. However, I used both KNKL's and the splash art to help me design my cosplay overall, but used KNKL's design entirely for the hammer. I much liked the whirling drum.. hammer idea. Here were the three different hammer ideas:

original concept art by KNKL (Kienan Lafferty)

League of Legends Ragdoll Poppy splash art
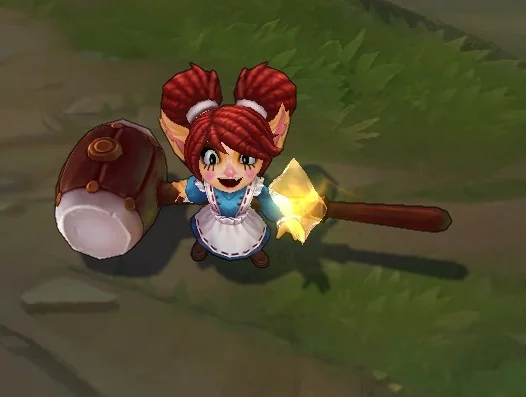
League of Legends Ragdoll Poppy in game skin
While I did make the whole outfit from head to toe, this tutorial will describe how to make the hammer only. All 8 lbs of it! It might have been 10 lbs...either way, carrying this baby was quite a work out for me especially in photoshoots where I had to hold it up until my biceps burned.
I realized in hindsight I probably could have constructed this a little bit better...scroll all the way down to the end of the article for my after thoughts on what I could have done differently. Hopefully you guys can read through this and that it can give you a little guidance on where and how to start.
Here are the materials that I used:
- 4 cans of expandable foam
- 9 packets of 16 oz Creative Paper Clay (also = 9 lbs)
- 1 long wooden dowel
- Insulation foam board
- Rope
- Two 3D printed spheres
- 100 – 220 grit sand paper
- EVA foam
- Paper mache materials: wallpaper paste, newspaper, masking tape
Everything else were paints, wood stains, and sealers.
The Foundation
First things first…I created the base out of insulation foam pieces to create the shape of the hammer around the wooden dowel. This area is probably where I should have constructed the shape of the hammer a little bit better. But, I went with it.

From top left and counter clockwise: create the foundation, fill with expandable foam, and then carve.
The remaining space was then filled with expandable foam and then carved and carved and carved! Yes, that is a kid's playpen. Perfect to keep all the shavings and foam in one place, especially in a small apartment. I created a hole on both sides of the hammer where I could insert the piece that will secure the rope in place for later.
Paper Mache and Reshaping
Like most expandable foam projects, you cover any large holes with masking tape and then paper mache. Instead of traditional paper mache paste, I ripped up newspaper squares and used wallpaper paste to lay on several layers all over.
Once all dried, I used Creative Paper Clay to cover the whole hammer, and reshaped where needed with sand paper. This process took many times, as I needed the “drum” sides to be as flat as possible, and rounded areas to be as round as possible. It was kind of lopsided initially, not something I was able to see right away until I layered the clay on and sanded it down. I felt around with my hands, layered on more clay, sanded, repeat.

From top right and clockwise: paper mache, paper clay, sand, and light sealant
About 9 lbs of clay later and a ton of clay particles everywhere… I was satisfied with the shape. This took me a little over a week to get right. After I was done, I ended up using this stuff called Sculpt & Coat to just lightly spread the product all over the hammer to just kind of "seal" it and remove all the loose clay particles. I wouldn't say that I put on enough for it to be a protectant from dings, but it would mildly protect from moisture at least. But it kind of helped me handle the hammer w/o getting white powder all over my clothes and hands.
Painting
For painting, I wanted the hammer to look like it was wood, but I didn't really want to use a wood grain tool to do that for some reason. After some thinking, I followed one tutorial online where I used 60 grain sand paper and just created a wood like texture. I painted the base a light brown color, and then painted on an actual wood stain. It turned out really well! I'm sure I could have done this using acrylic paint or something similar, but the way the wood stain applied was really great because I didn't want it to go on evenly - not that I know whether or not other types of paints could achieve the same effect, but that's what happened when I used the wood stain.

After painting the wood effect, then I finished off the rest of the hammer - matte white on the "drums," brick red on the handle and the brick red stripes on the shaft of the hammer. I sprayed a sealant all of the hammer last.
All the Small Stuff
Now all the rest of the parts of the hammer needed to be finished. The string and ball, base for the string and the ball, and the red discs. I 3D printed spheres with a small insert to glue the string into, and 3D printed two cylindrical pieces that would secure the end of the string into the hammer. The base for the string and the ball was made out of EVA foam and worbla. The wooden discs I bought from Etsy, and then everything was painted!

The string was secured through the cylindrical pieces, threaded through the base piece, and then finally the end of the rope hot glued to the insert in the ball. And yes, I did measure the string so that the balls would hit the center of the "drum" even though it can't actually be used like that :)
TADA!

After a little wear and tear, the hammer looked kind of even cooler during my photoshoot with Jason DeSomer Photography below.

Post Build Afterthoughts..
Everything came out pretty well, but of course this is only the largest prop (largest surface area at least...) that I've built out of five. After the fact...alternatively if I were to make this all over again, I would have stacked and glued several layers of pink insulation foam and gone from there. I was very well aware of this option from the start, but I was hesitant because I wasn't sure if the tools I had would be able to cut through so much foam. Of course, I own a heated foam cutter that I bought way later. I'm not sure if whether doing it this way would reduce the over all weight; the majority of the weight came from all the paperclay. Anyway, so I would probably recommend that route for myself for next time!
Hope you all enjoyed my Ragdoll Poppy hammer tutorial and that this could be useful for you with other similar hammer props out there. Here are a few photos of my cosplay below! If you like what you see, be sure to follow me on my Facebook page, Riri.


