Paper Armory: League of Legend's Winter Wonder Lulu Staff Tutorial
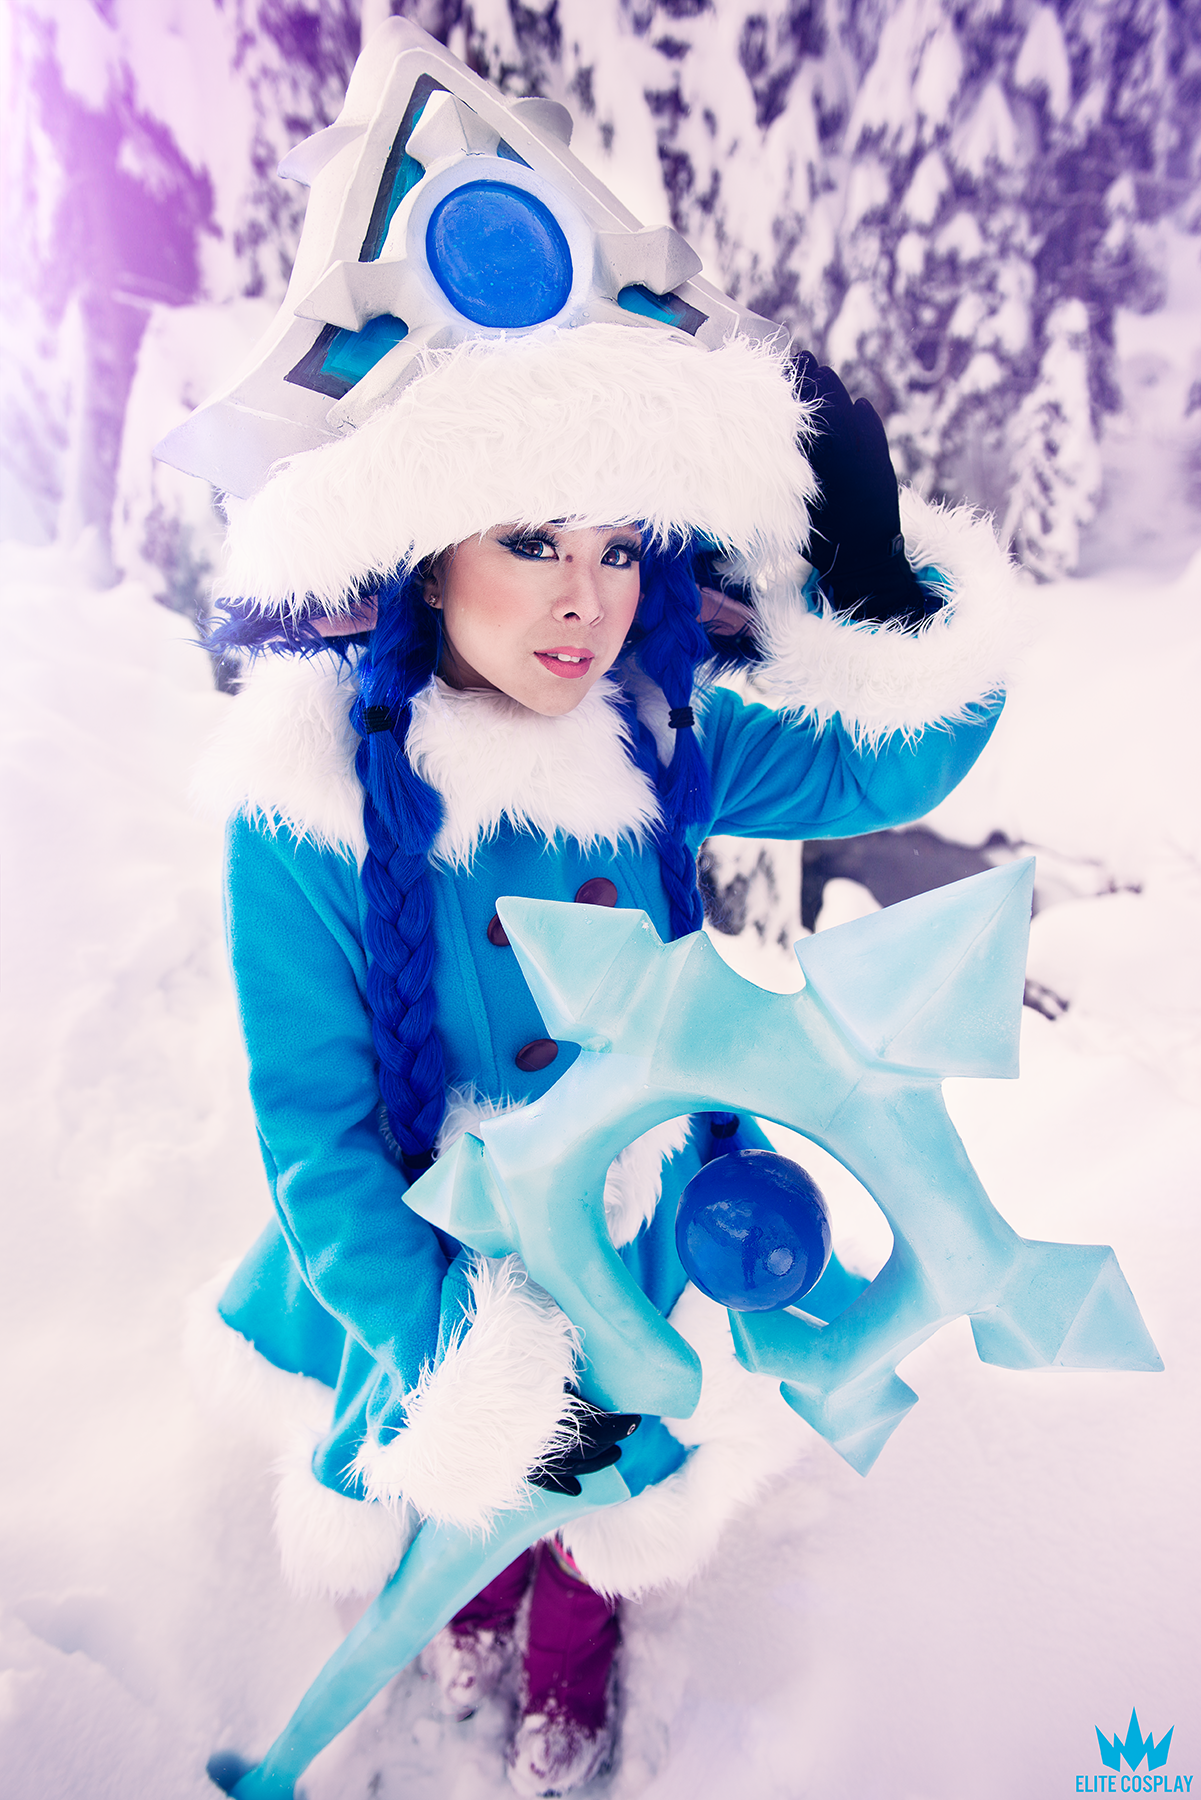
Header and feeder image credits go to Elite Cosplay
Written by Riri (@lillyums)
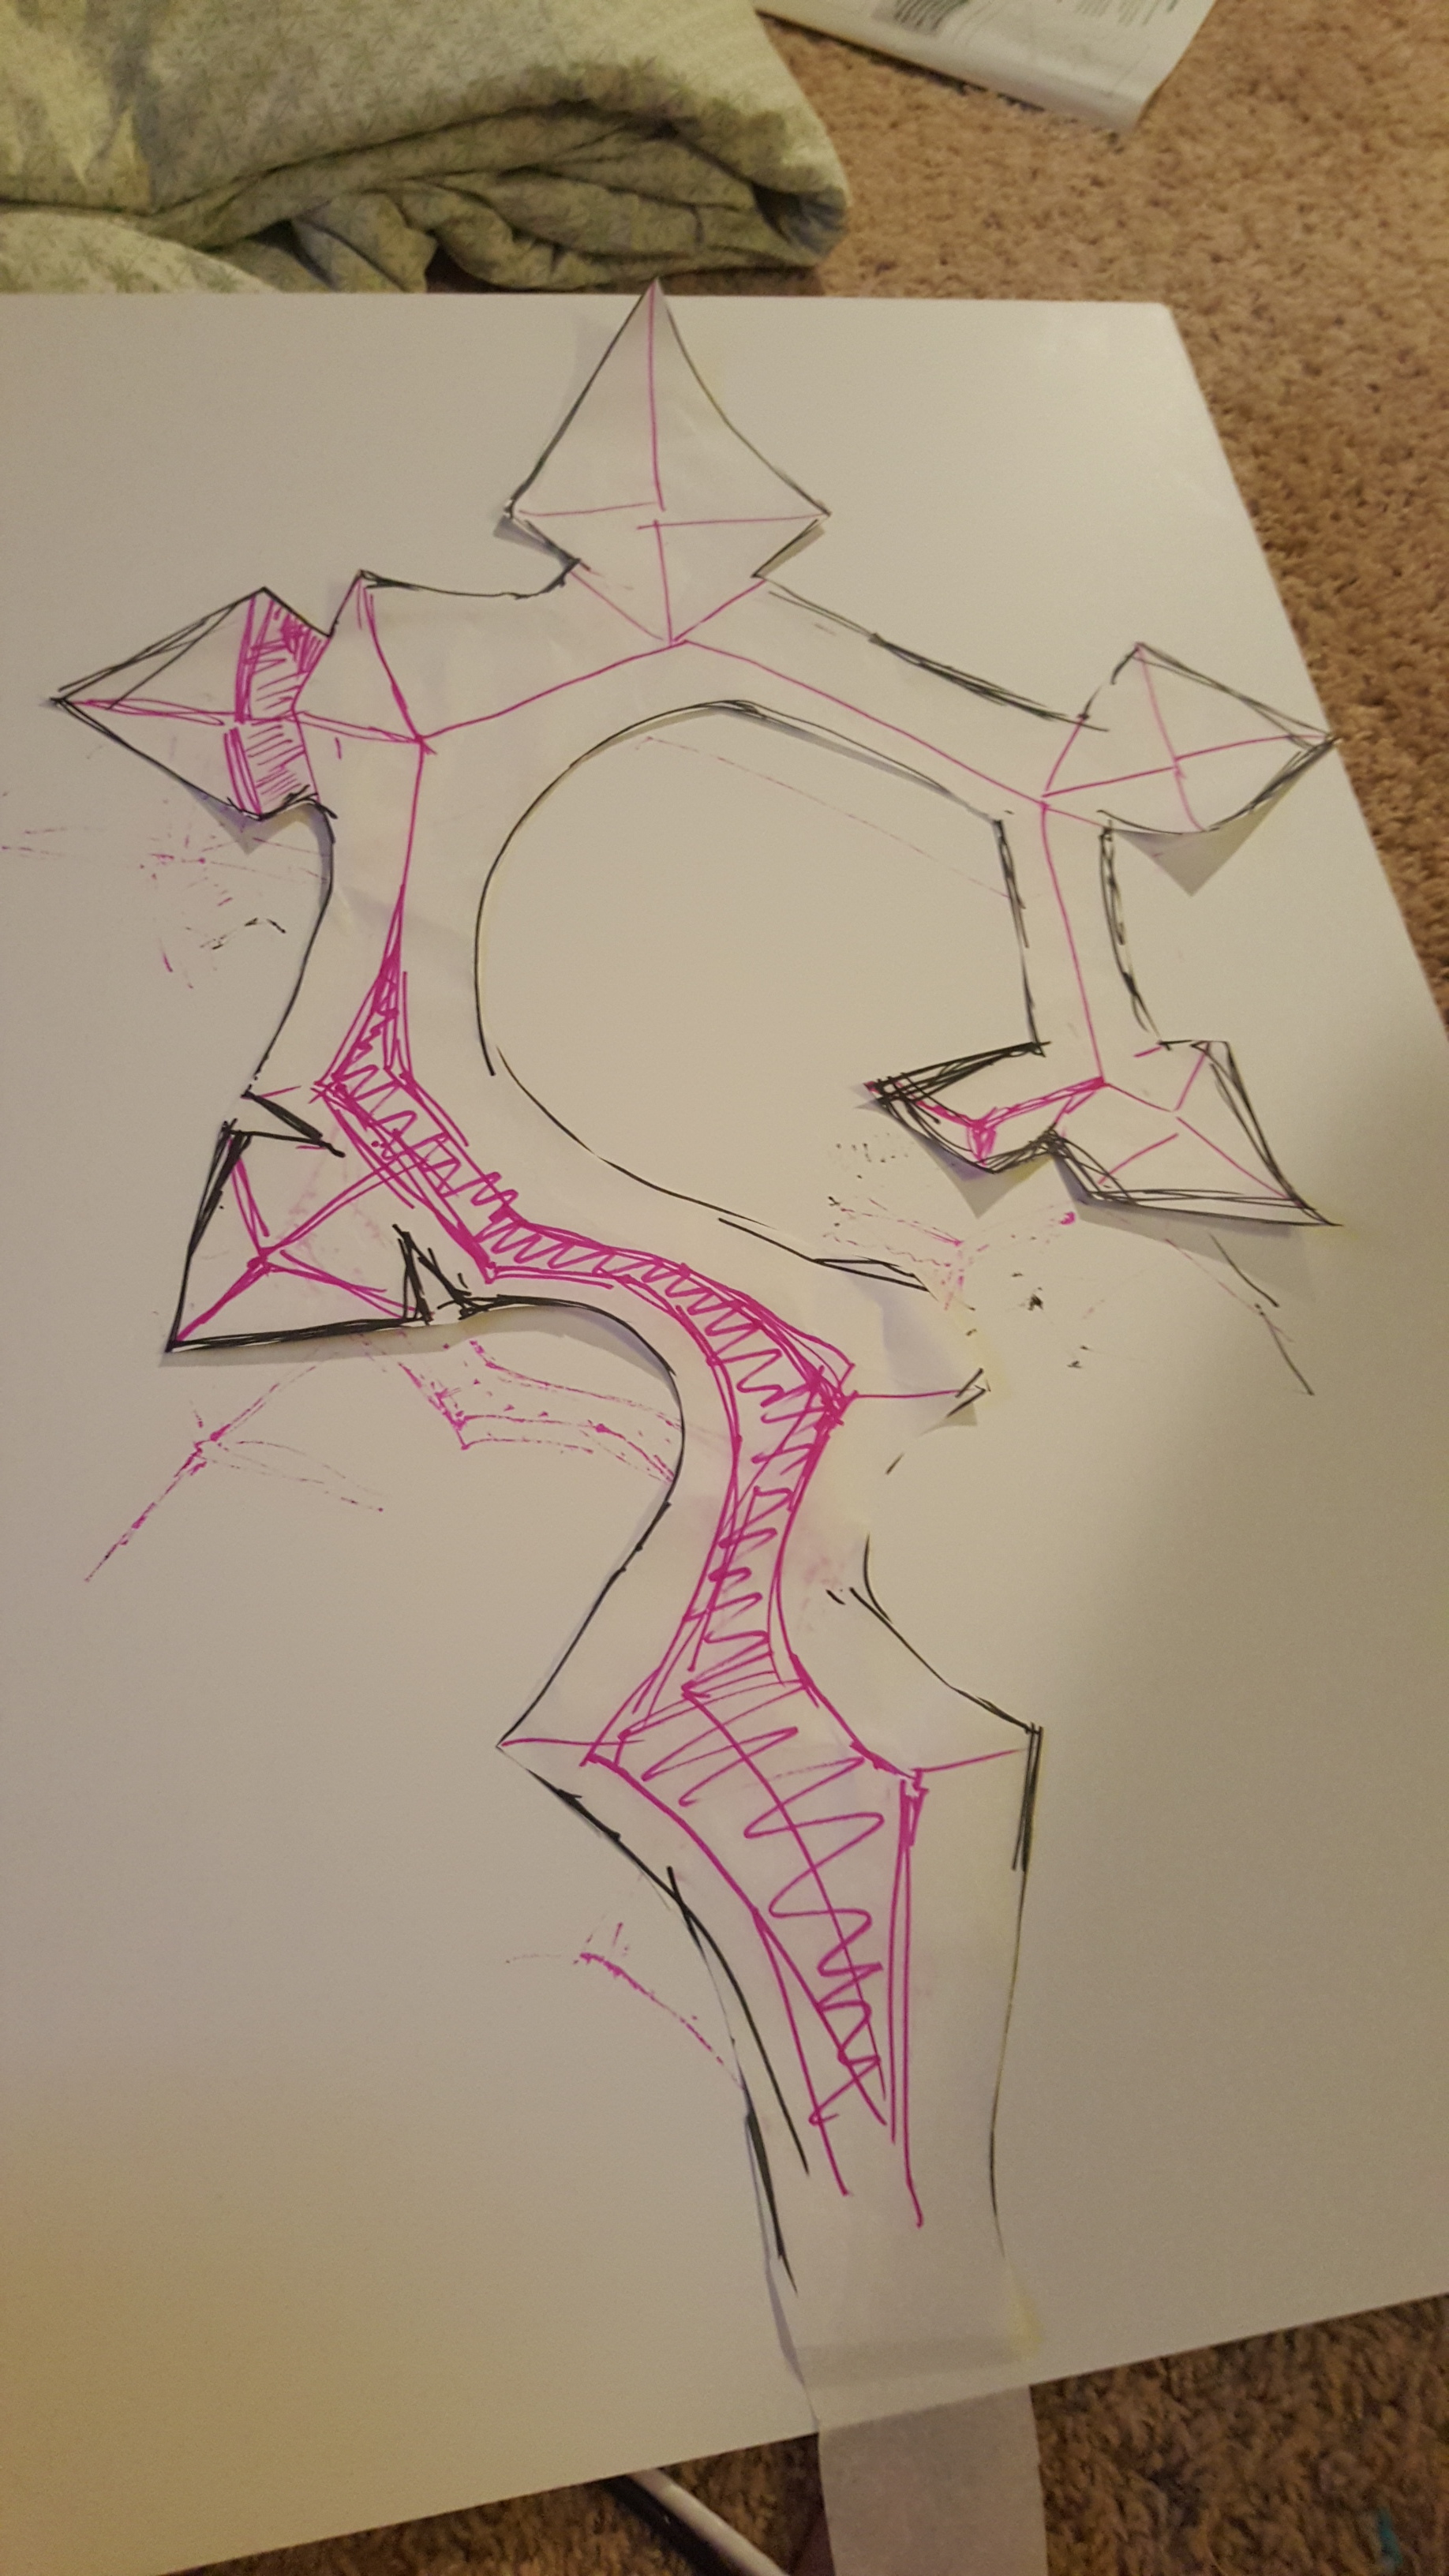
This last winter of 2015, I completed my first League of Legends cosplay. Back in the summer time, Riot announced they would be accepting winter themed cosplay submissions for their Snowdown Showdown cosplay gallery and I thought it was the perfect opportunity to make Winter Wonder Lulu. To start, you always want to gather your reference photos. This article will be covering how to make the staff.


Image from lolking.net
For me, the biggest challenge for this whole cosplay was the staff – I was never much of a prop maker, even though I have created some. It was always the last thing I’d make because it was the least favorable part to spend time on! Mostly because of the risks and TIME involved! Sewing can be done so quickly, but prop making? Lots of waiting depending on the application, lots of sanding, priming, waiting, painting, waiting…
Anyway, I decided I’d like to share how I made my Lulu staff. I loved the way this turned out, and so I wanted to share how I did it.
Here are the materials I used for the whole project:
- Foam core board
- PVC pipe
- Sharp utility knife
- Two cans of expandable foam
- Two 16 oz packages of Creative PaperClay
- Sandpaper – 220 and 400
- Newpaper
- Wallpaper paste
- White primer spray paint
- True blue spray paint
- Baby blue spray paint
- Satin Seal spray paint
- Pearly blue acrylic paint
- White acrylic paint
- Foam ball
- Modpodge
- Spray Gesso
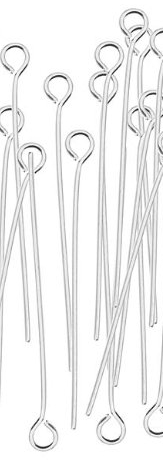
- 2 inch open eye pins (Amazon link )
- Very thin fishing line or transparent jewelry string
Let’s start with the base staff construction.
STAFF
The general outline for this staff is as follows:
- Base
- Expandable Foam
- Masking tape
- Papermache
- Paperclay
- Sand
- Sand
- Sand
- Paperclay touch up
- Primer
- Paint
- Seal
- Add the magical floating ball
To start, I drew the design of the staff out on the foam core board, and made sure it would be the size I want it to be. After cutting it out, I knew I couldn’t just work with a flat board – I added pieces of foam core board where needed to add those 3 dimensional details to help with the carving and sculpting process later. I glued the PVC pipe to the board as well.
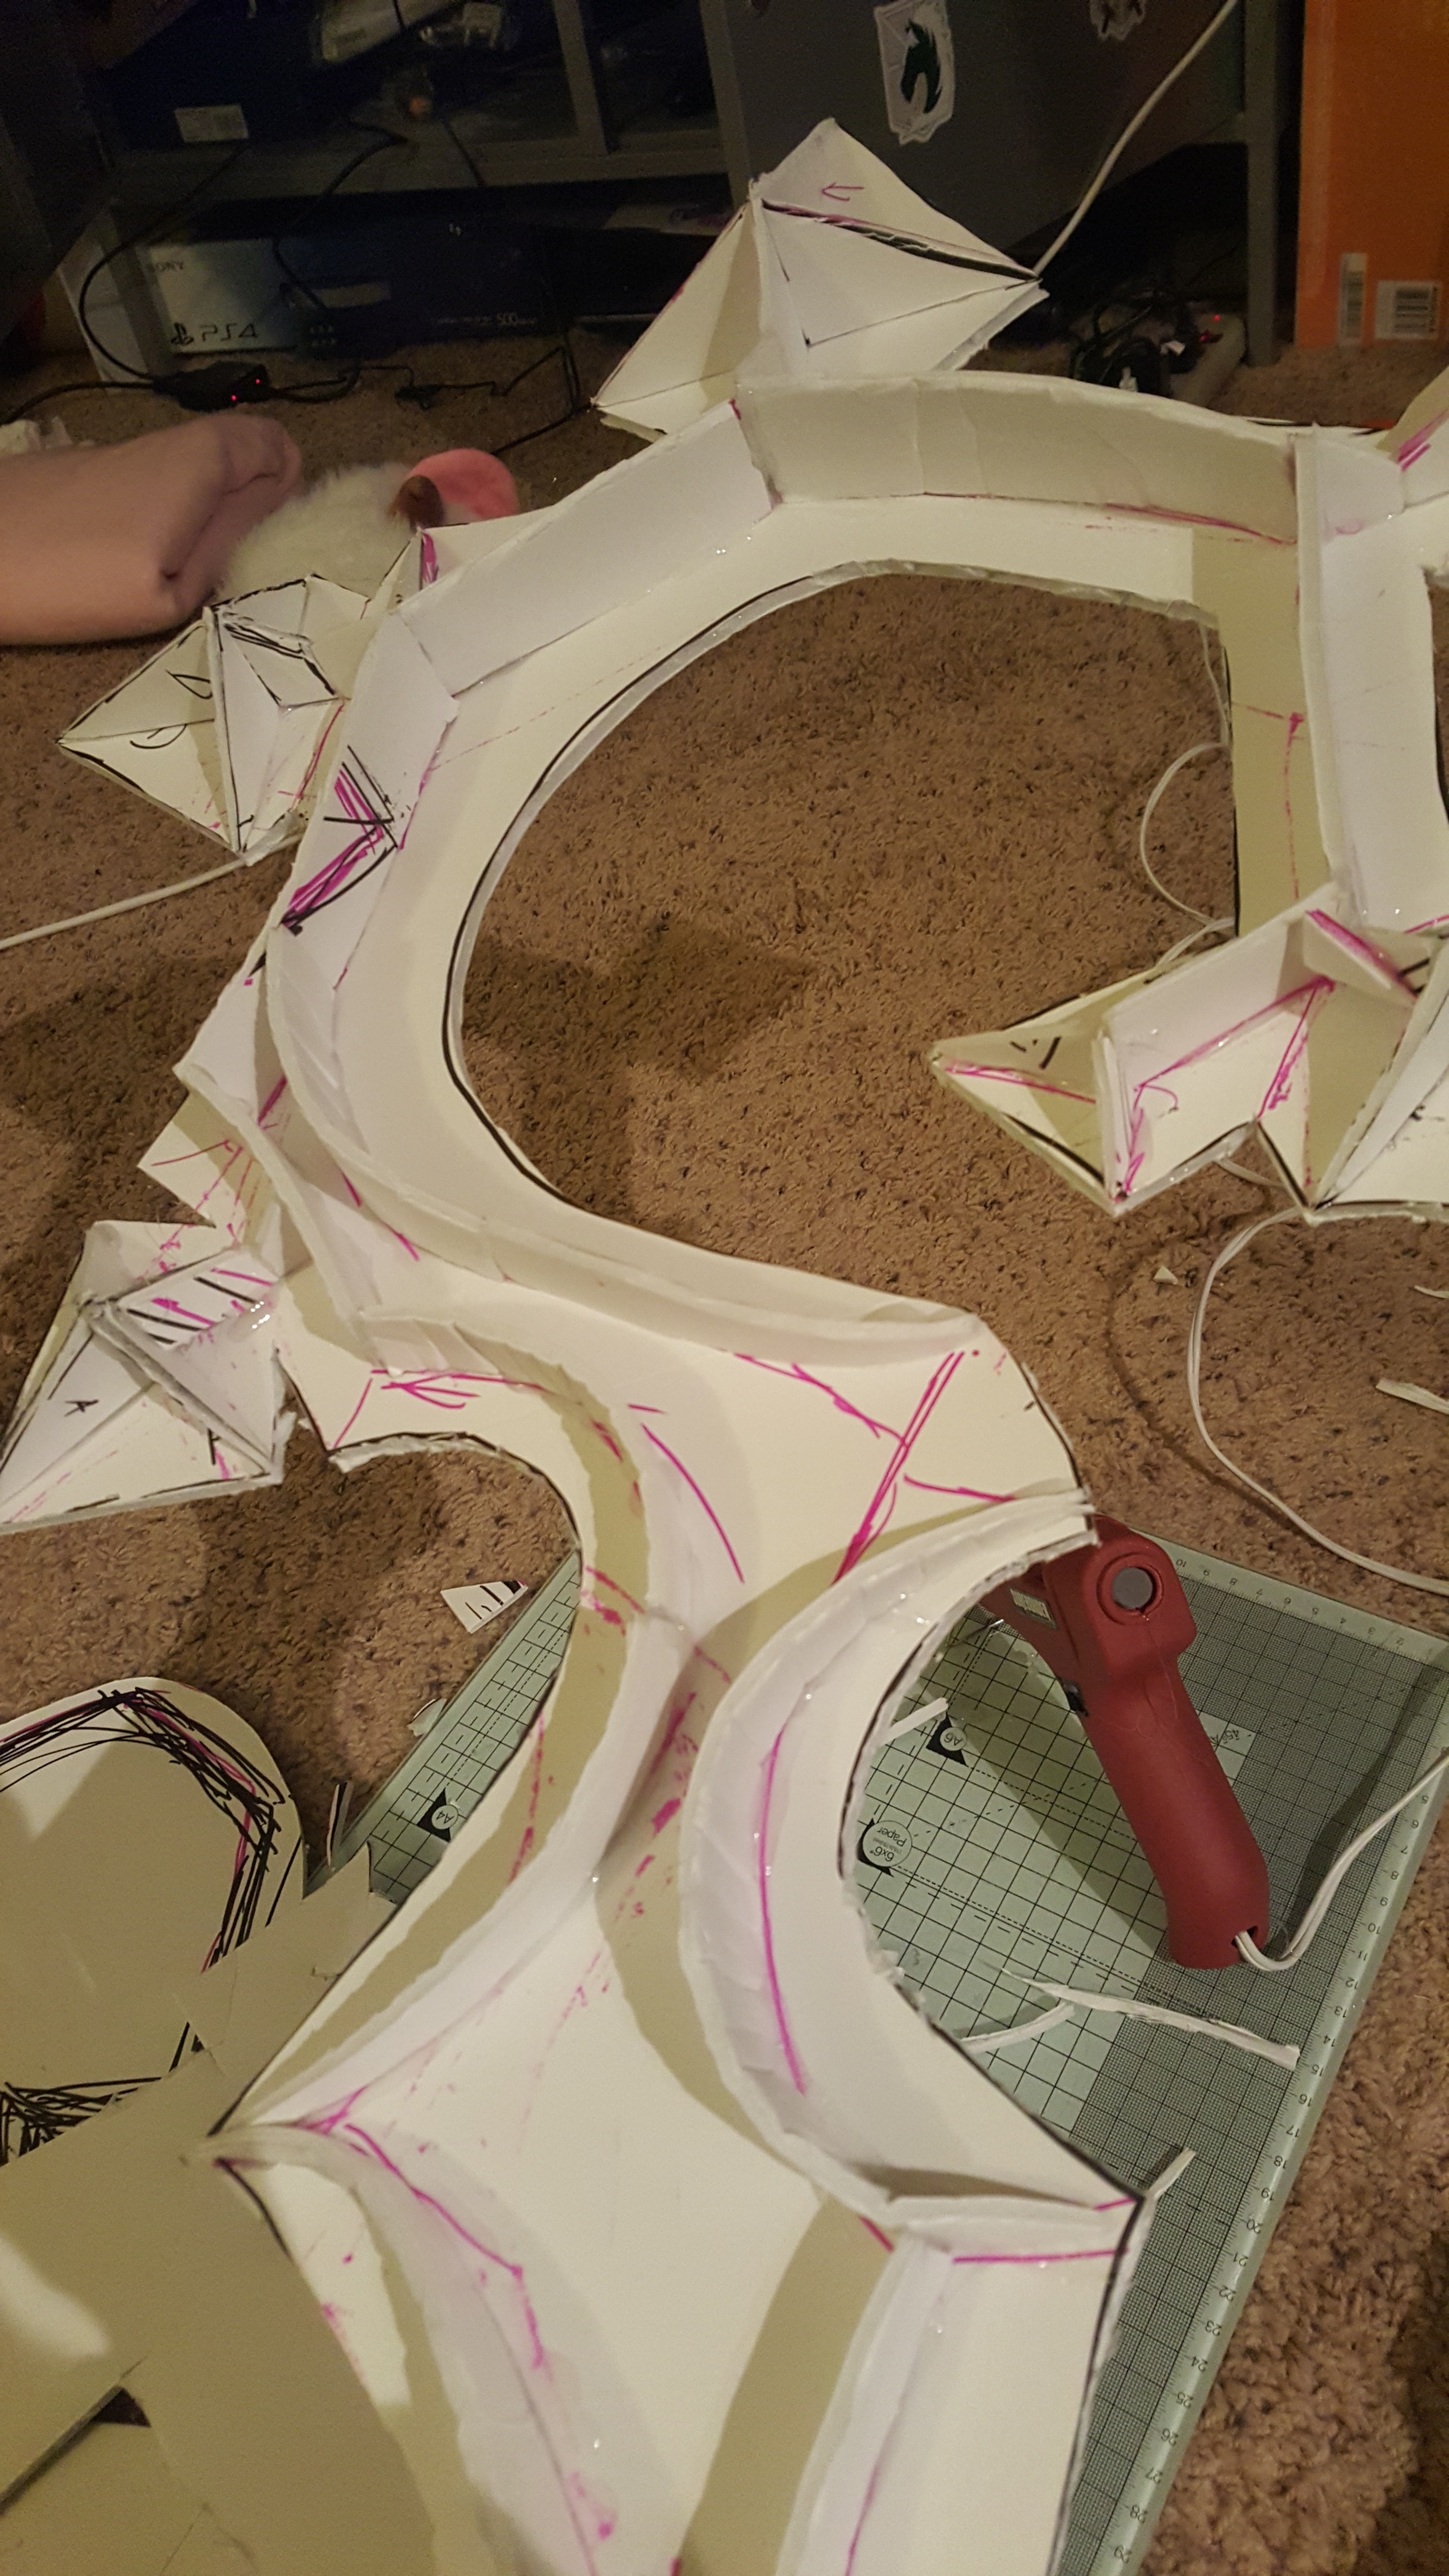
Now that this part was over, I had to fill in all the areas and the whole staff with expandable foam spray. It took an entire can to do both sides.
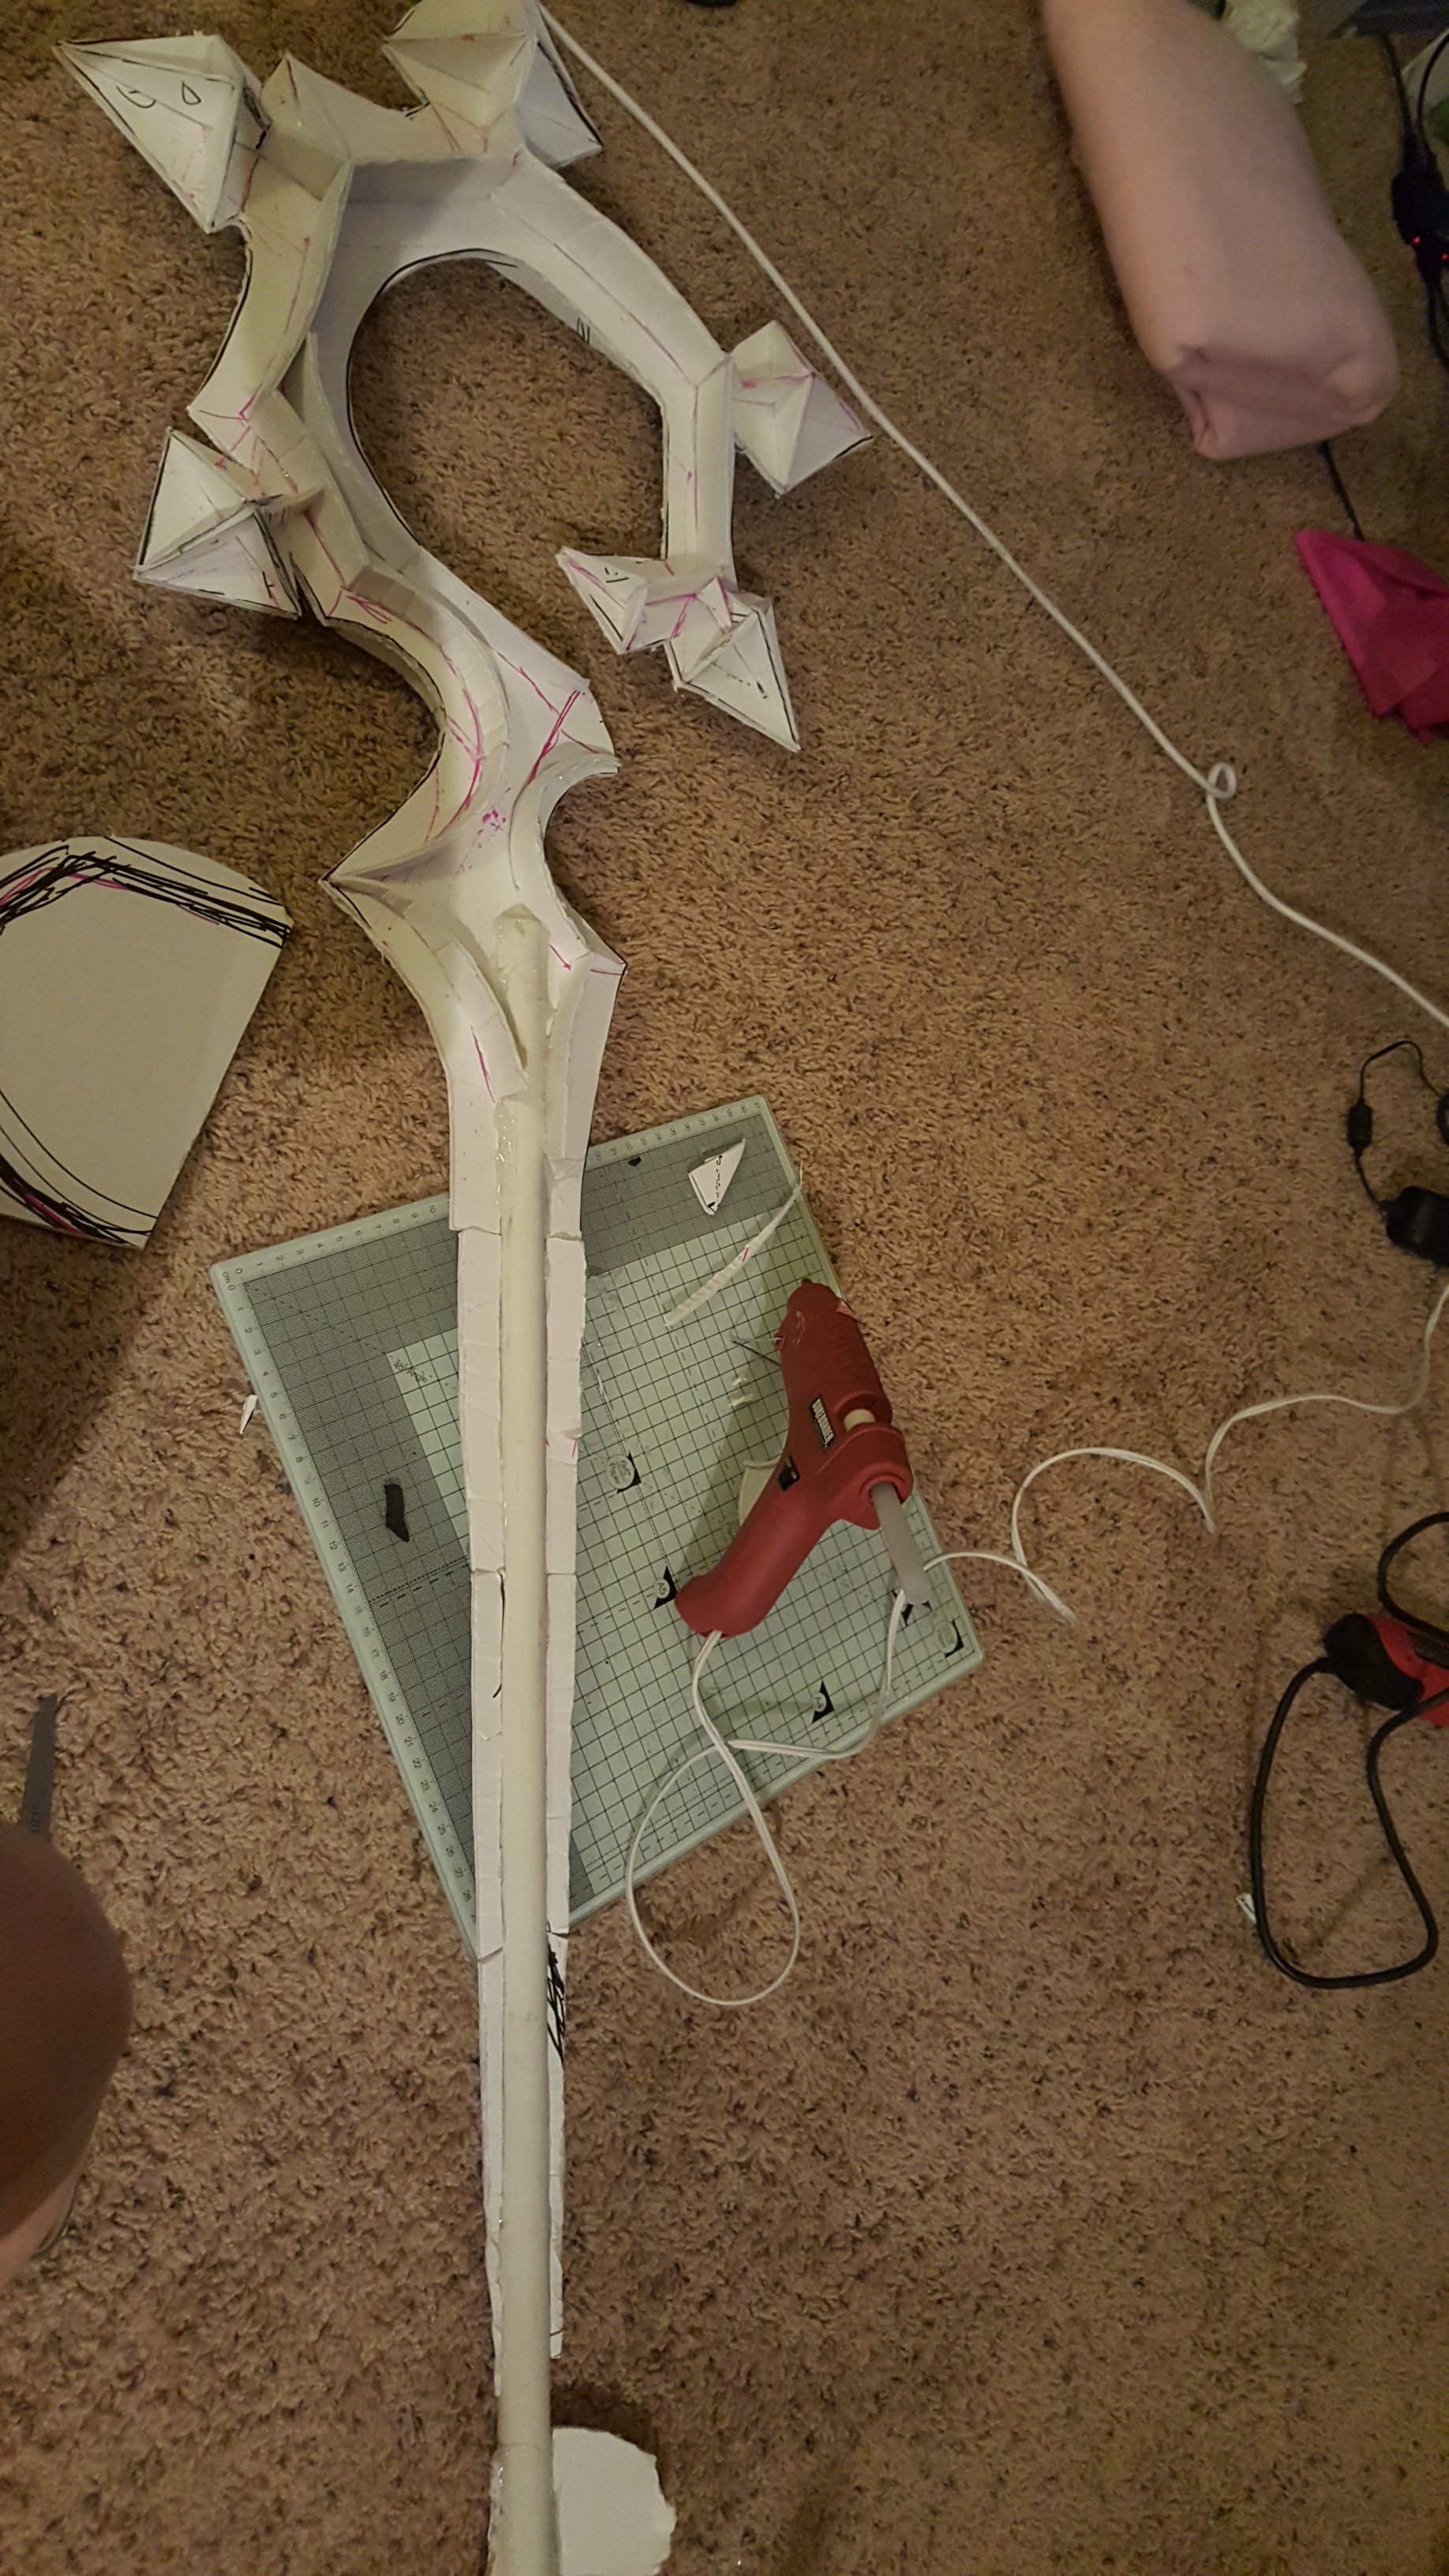
It’s carving time! I never liked doing this, but I think I made this easier on myself because of adding those extra pieces to create a 3D shape. So carve carve carve with the sharp utility knife!! Make sure you have extra blades because they can wear down real good. After that, I used the 2nd expandable foam can to fill in any areas where needed and recarved. Also, this step is SUPER MESSY. Foam pieces are EVERYWHERE.
The next step is commonly to use masking tape to cover the little holes from the foam. I covered the whole thing with masking tape, just a single layer was all I did. Next is papermache. People can do this in different ways but this time I chose to use wallpaper paste. I just didn’t really feel like working with flour and water. I diluted the wallpaper paste down with water, I thought it was best when I did 1:2 parts of paste:water. It would end up being slightly gelatinous and not extremely watered down. Anyway, for the newspaper strippings, I RIPPED them, not cut them. Ripping just gives less of a harsh outline of the pieces. I did two layers of newspapers at first and covered the whole thing, waited for it to dry completely before doing the next 2 layers of newspaper. So this is technically 4 layers of papermache really.
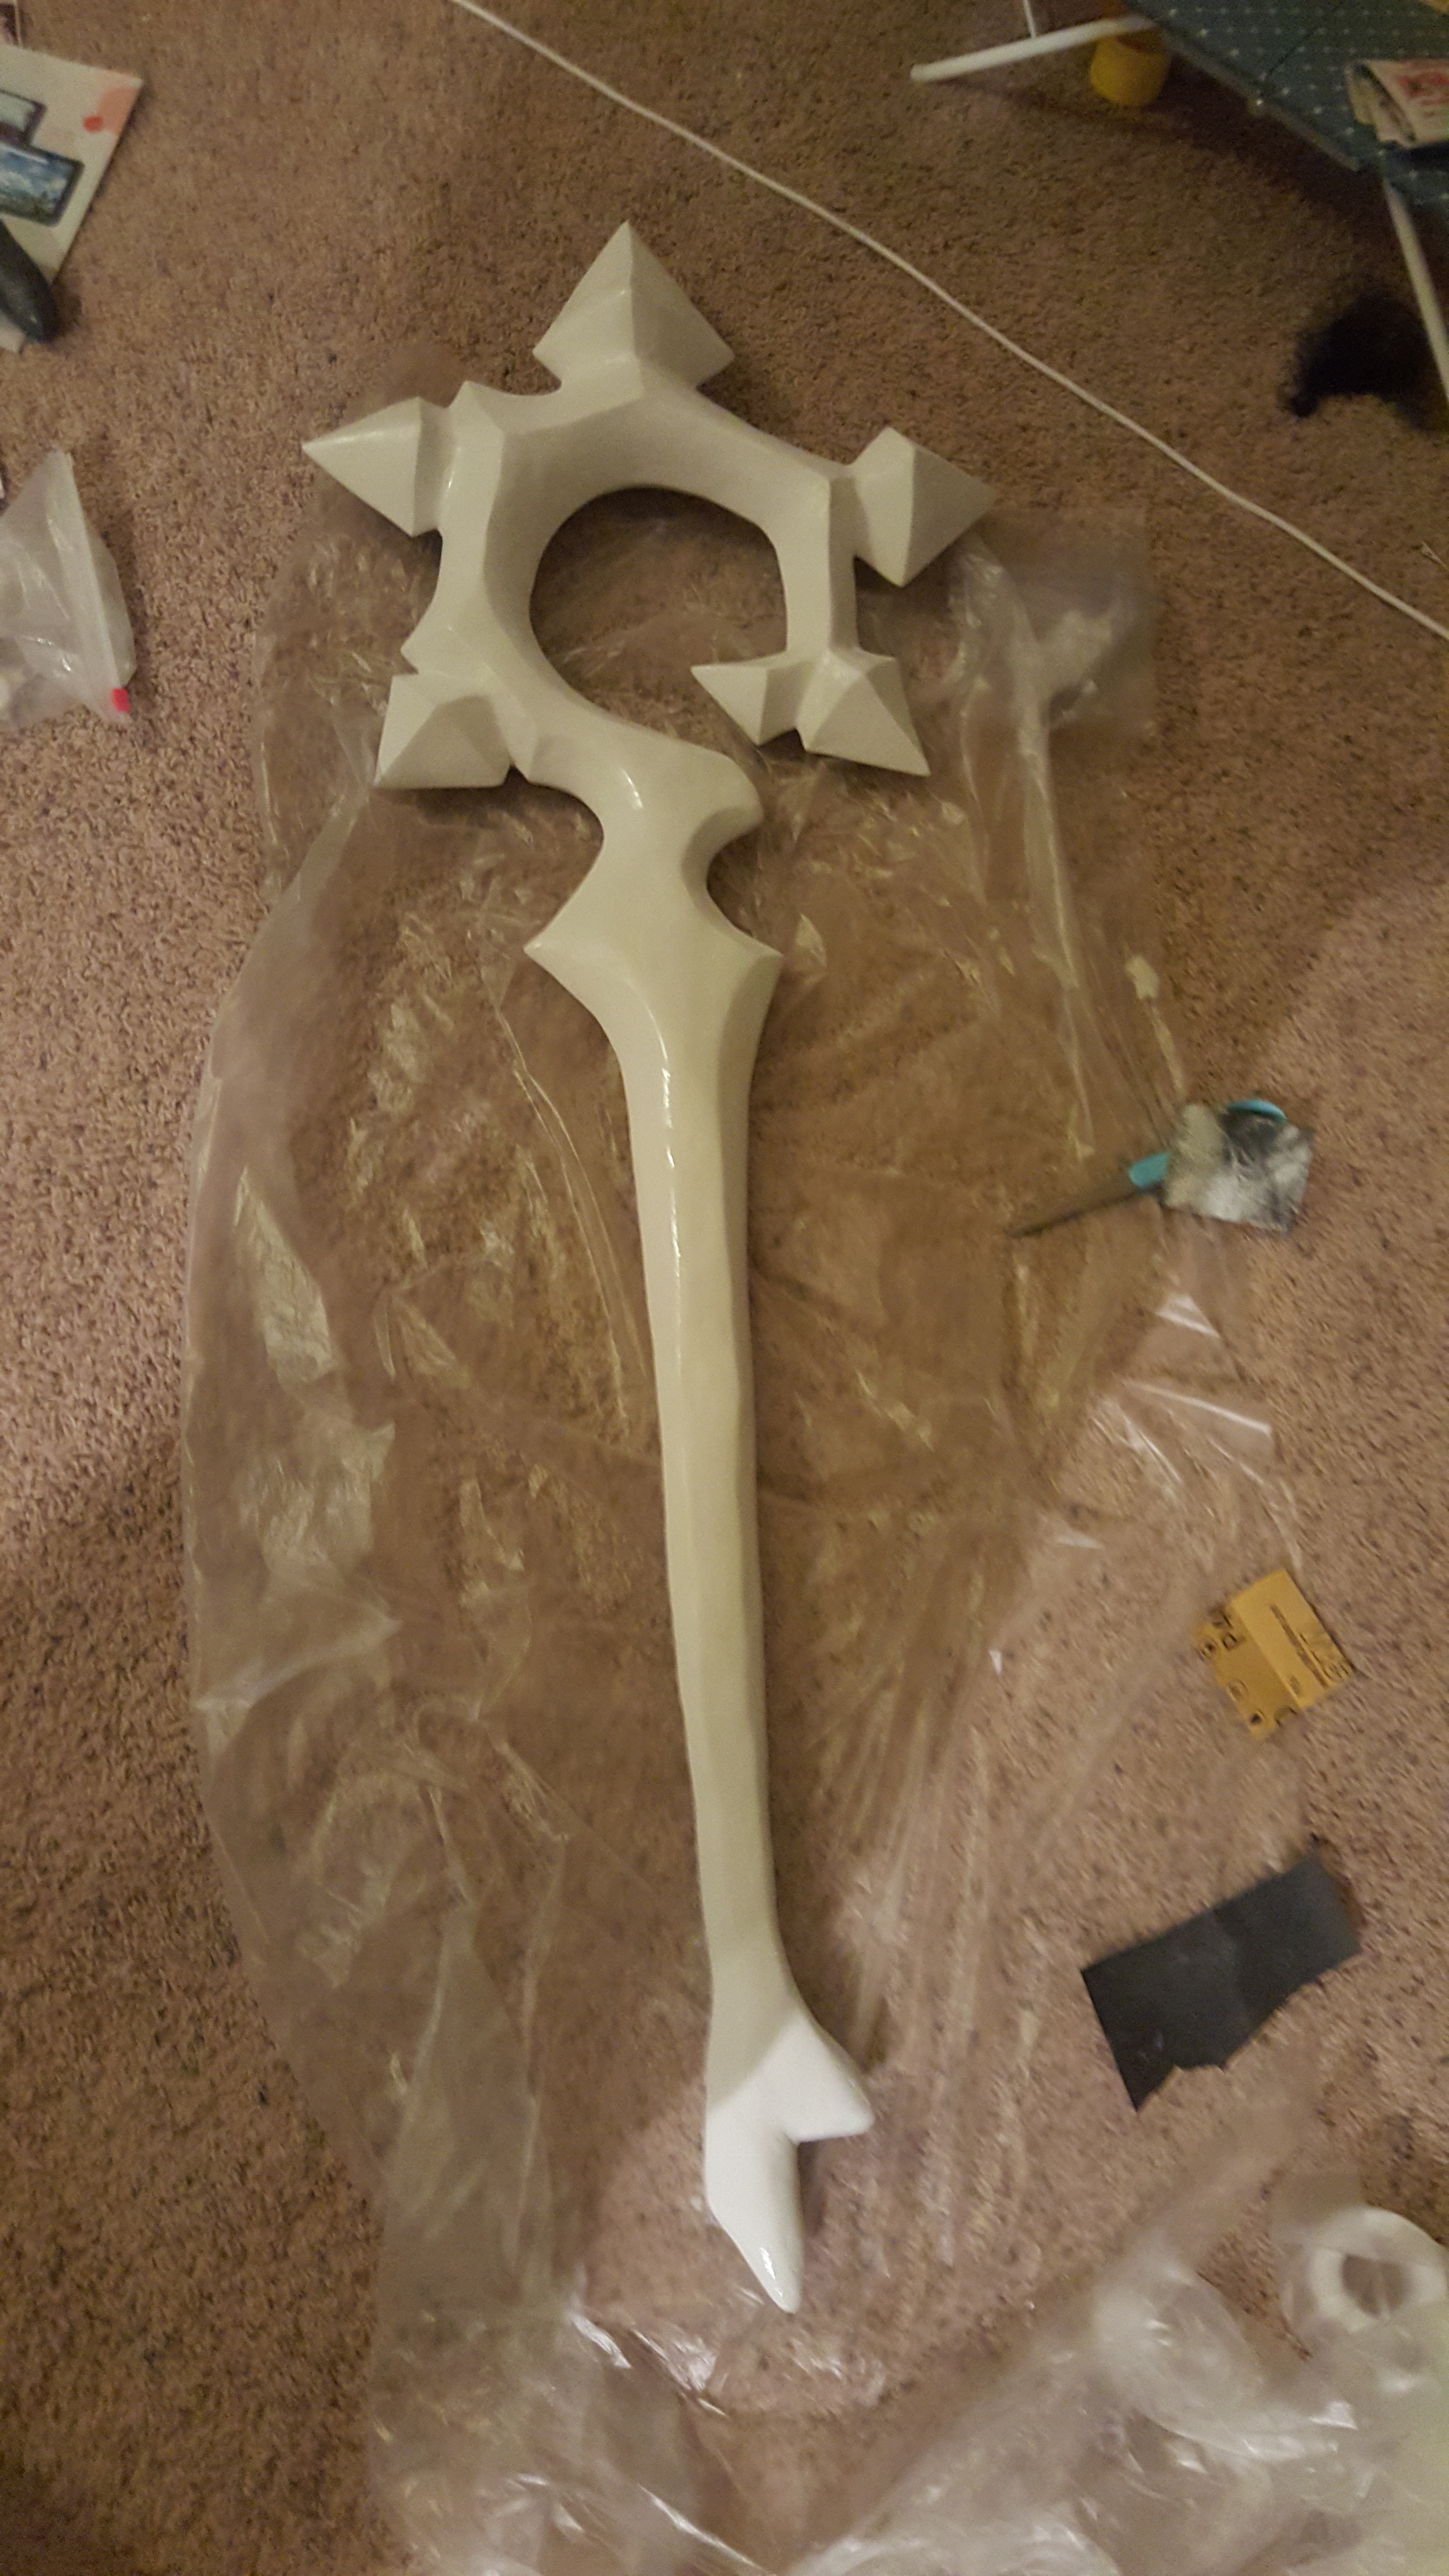
After that completely dried, I used Creative PaperClay to cover the whole thing with. I love this stuff, it might not be as durable like Apoxie Sculpt, but it’s cheaper and SO easy to sand afterwards. Once you’re at this step though, this is where you’ll start really sculpting the staff. Areas where you might have been uneven you want to use the paperclay to reshape those areas, and using water to smooth it out. In my case, the problem areas were the sides of the spikes because it was just not spikey or sharp. So I covered the whole thing with paper clay and allowed to dry overnight. This is important, because the next day there could be areas where it may crack- that’s ok, and that’s normal. You come back to it and add more paperclay to the cracked areas, and then let dry – this won’t take long.

Paperclay covered, and sanded down
After I covered the whole thing with paperclay, it was time to sand! I just took a 220 grit sandpaper and sanding was easy. Immediately I noticed areas where I needed to add more paperclay. So I added paperclay, and continued sanding the rest of the staff and revisit the touched up areas at a later time.
After I was satisfied, I primed the whole thing with white primer spray. One thing I absolutely need to add here is that after sanding, you absolutely need to white all the particles off. I didn’t really do this – kind of half-assed it honestly, and when I sprayed the spray paint on, you can see all the particles and it felt really coarse. It’s ok, you might not be able to get all the particles off even if you wiped it all off really well, - that’s what the 400 grit sandpaper was for. This is black sandpaper by the way – the wet or dry kind. I lightly used 400 grit sandpaper after the paint dried; one stroke fixed the problem right away. So I did that all over to remove the particles and then continued with another layer of primer. Then I followed it with baby blue spray paint.
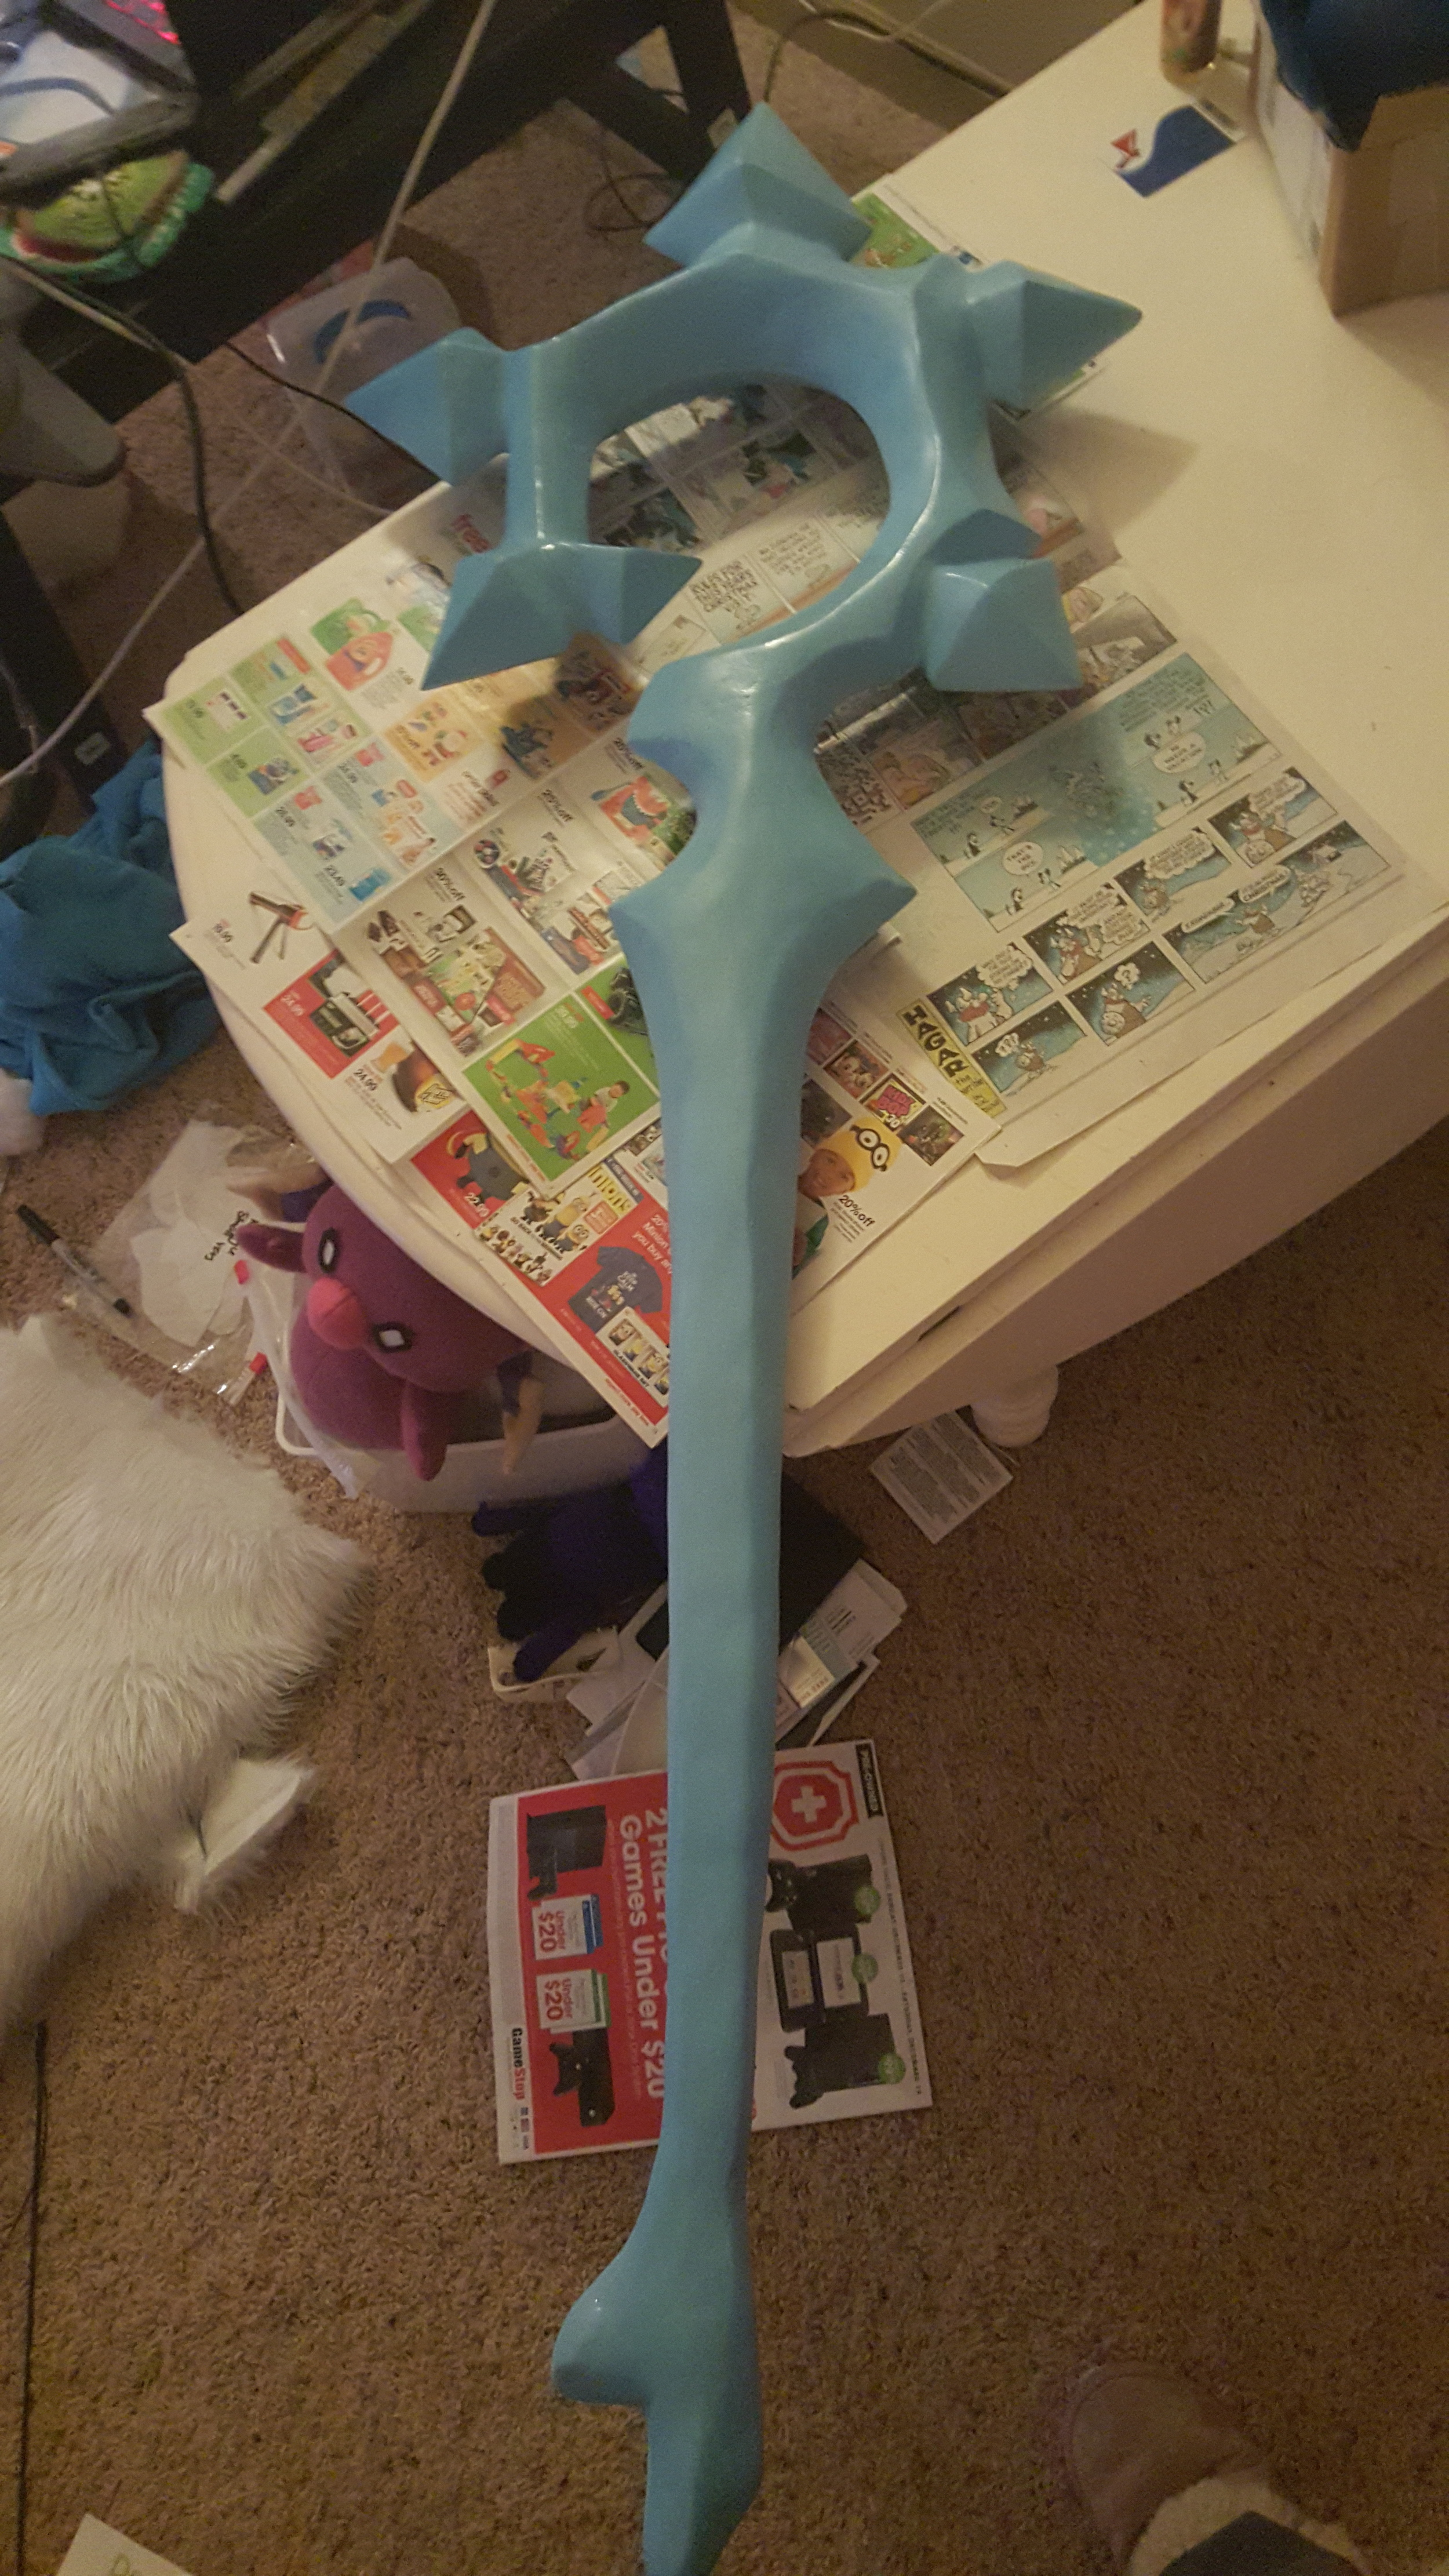
The next thing I did was that since I wanted to achieve a sheen/shimmer to the staff, I had pearly blue acrylic paint (Martha Stewart brand) and I airbrushed the entire staff over the baby blue to get that look. The pearly blue was VERY sheer, but it deposited a beautiful pearly sheen to the whole staff.

Contouring details
Next, you’ll notice that there are contoured areas on the reference image on the staff where it is white. Taking white acrylic paint (also Martha Stewart brand), I airbrushed all those corners and edges where it should be white. I was pretty satisfied with the paint job – so I sealed it with Satin sealant spray paint.
ALMOST DONE!
Next is the This damn ball – how do we make it float? Well first let’s paint it.
BALL
I got this foam ball, and I knew I didn’t want to spend too much time on this, it has to be simple right? Yes it actually was. I stuck a hard piece of wire (probably a thin but strong wire at around 20 gauge or higher) on opposite ends of the ball so that I can have the wire ends support the ball on something for the painting process. I sealed the entire foam ball with modpodge before spraying spray gesso and using some regular gesso paint to fill in uneven areas. Spray paint will dissolve foam, so that’s why I used modpodge. I did spray gesso because like I said, I didn’t want to spend too much time sanding a small ball – but I did layer on some thick gesso paint where needed and did sand a little bit to ensure the surface was smooth. After that, I sprayed on the true blue spray paint, sealed with gloss sealant (I wanted this shinnyyy!) and that was it!
Next, I had found these in the jewelry section of Walmart. 2inch open eye pins. I took out those supporting wires in the ball, added superglue to the ends, and pushed them into the holes all the way. Likewise, I located the area where I wanted the transparent string to support the ball in the inner side of the staff – I added superglue to the ends of the eye pin and pushed them in there. It wasn’t as hard as I thought it would be either, since I used paperclay. So if you have a ton of money and you wanted to use Apoxie Sculpt or anything else that cures super hard, then this push pin method probably wouldn’t work.
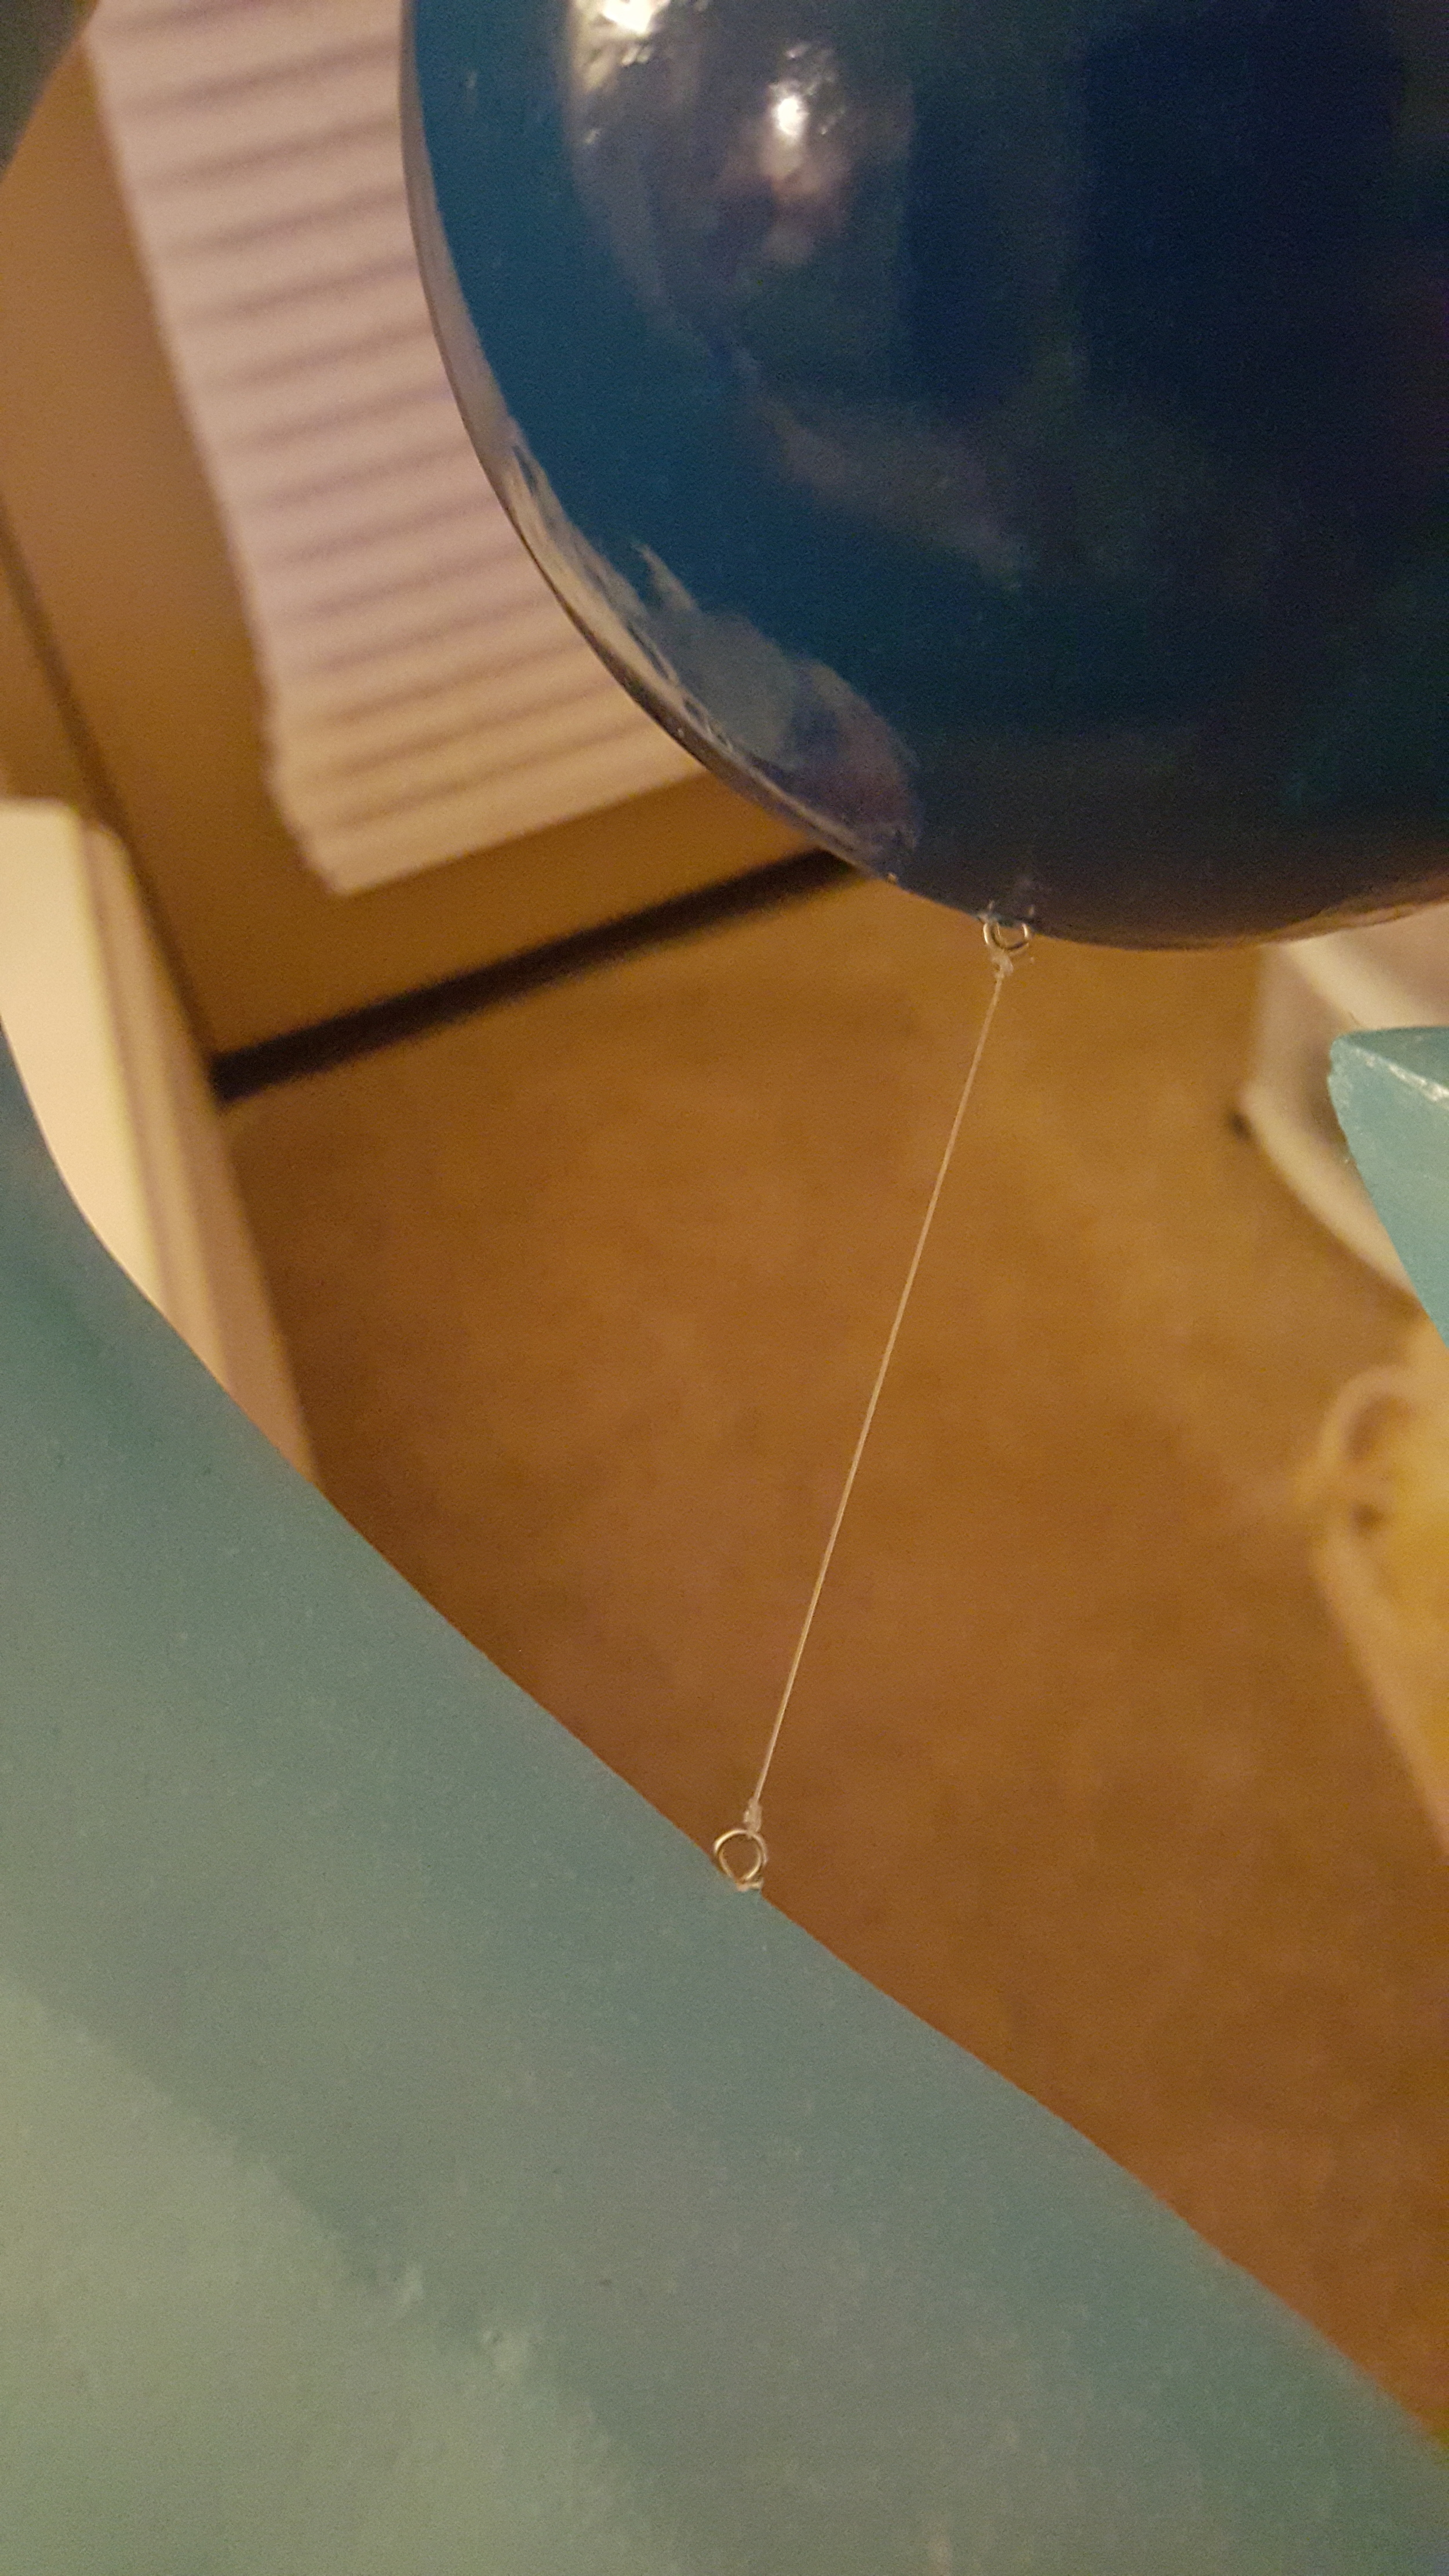
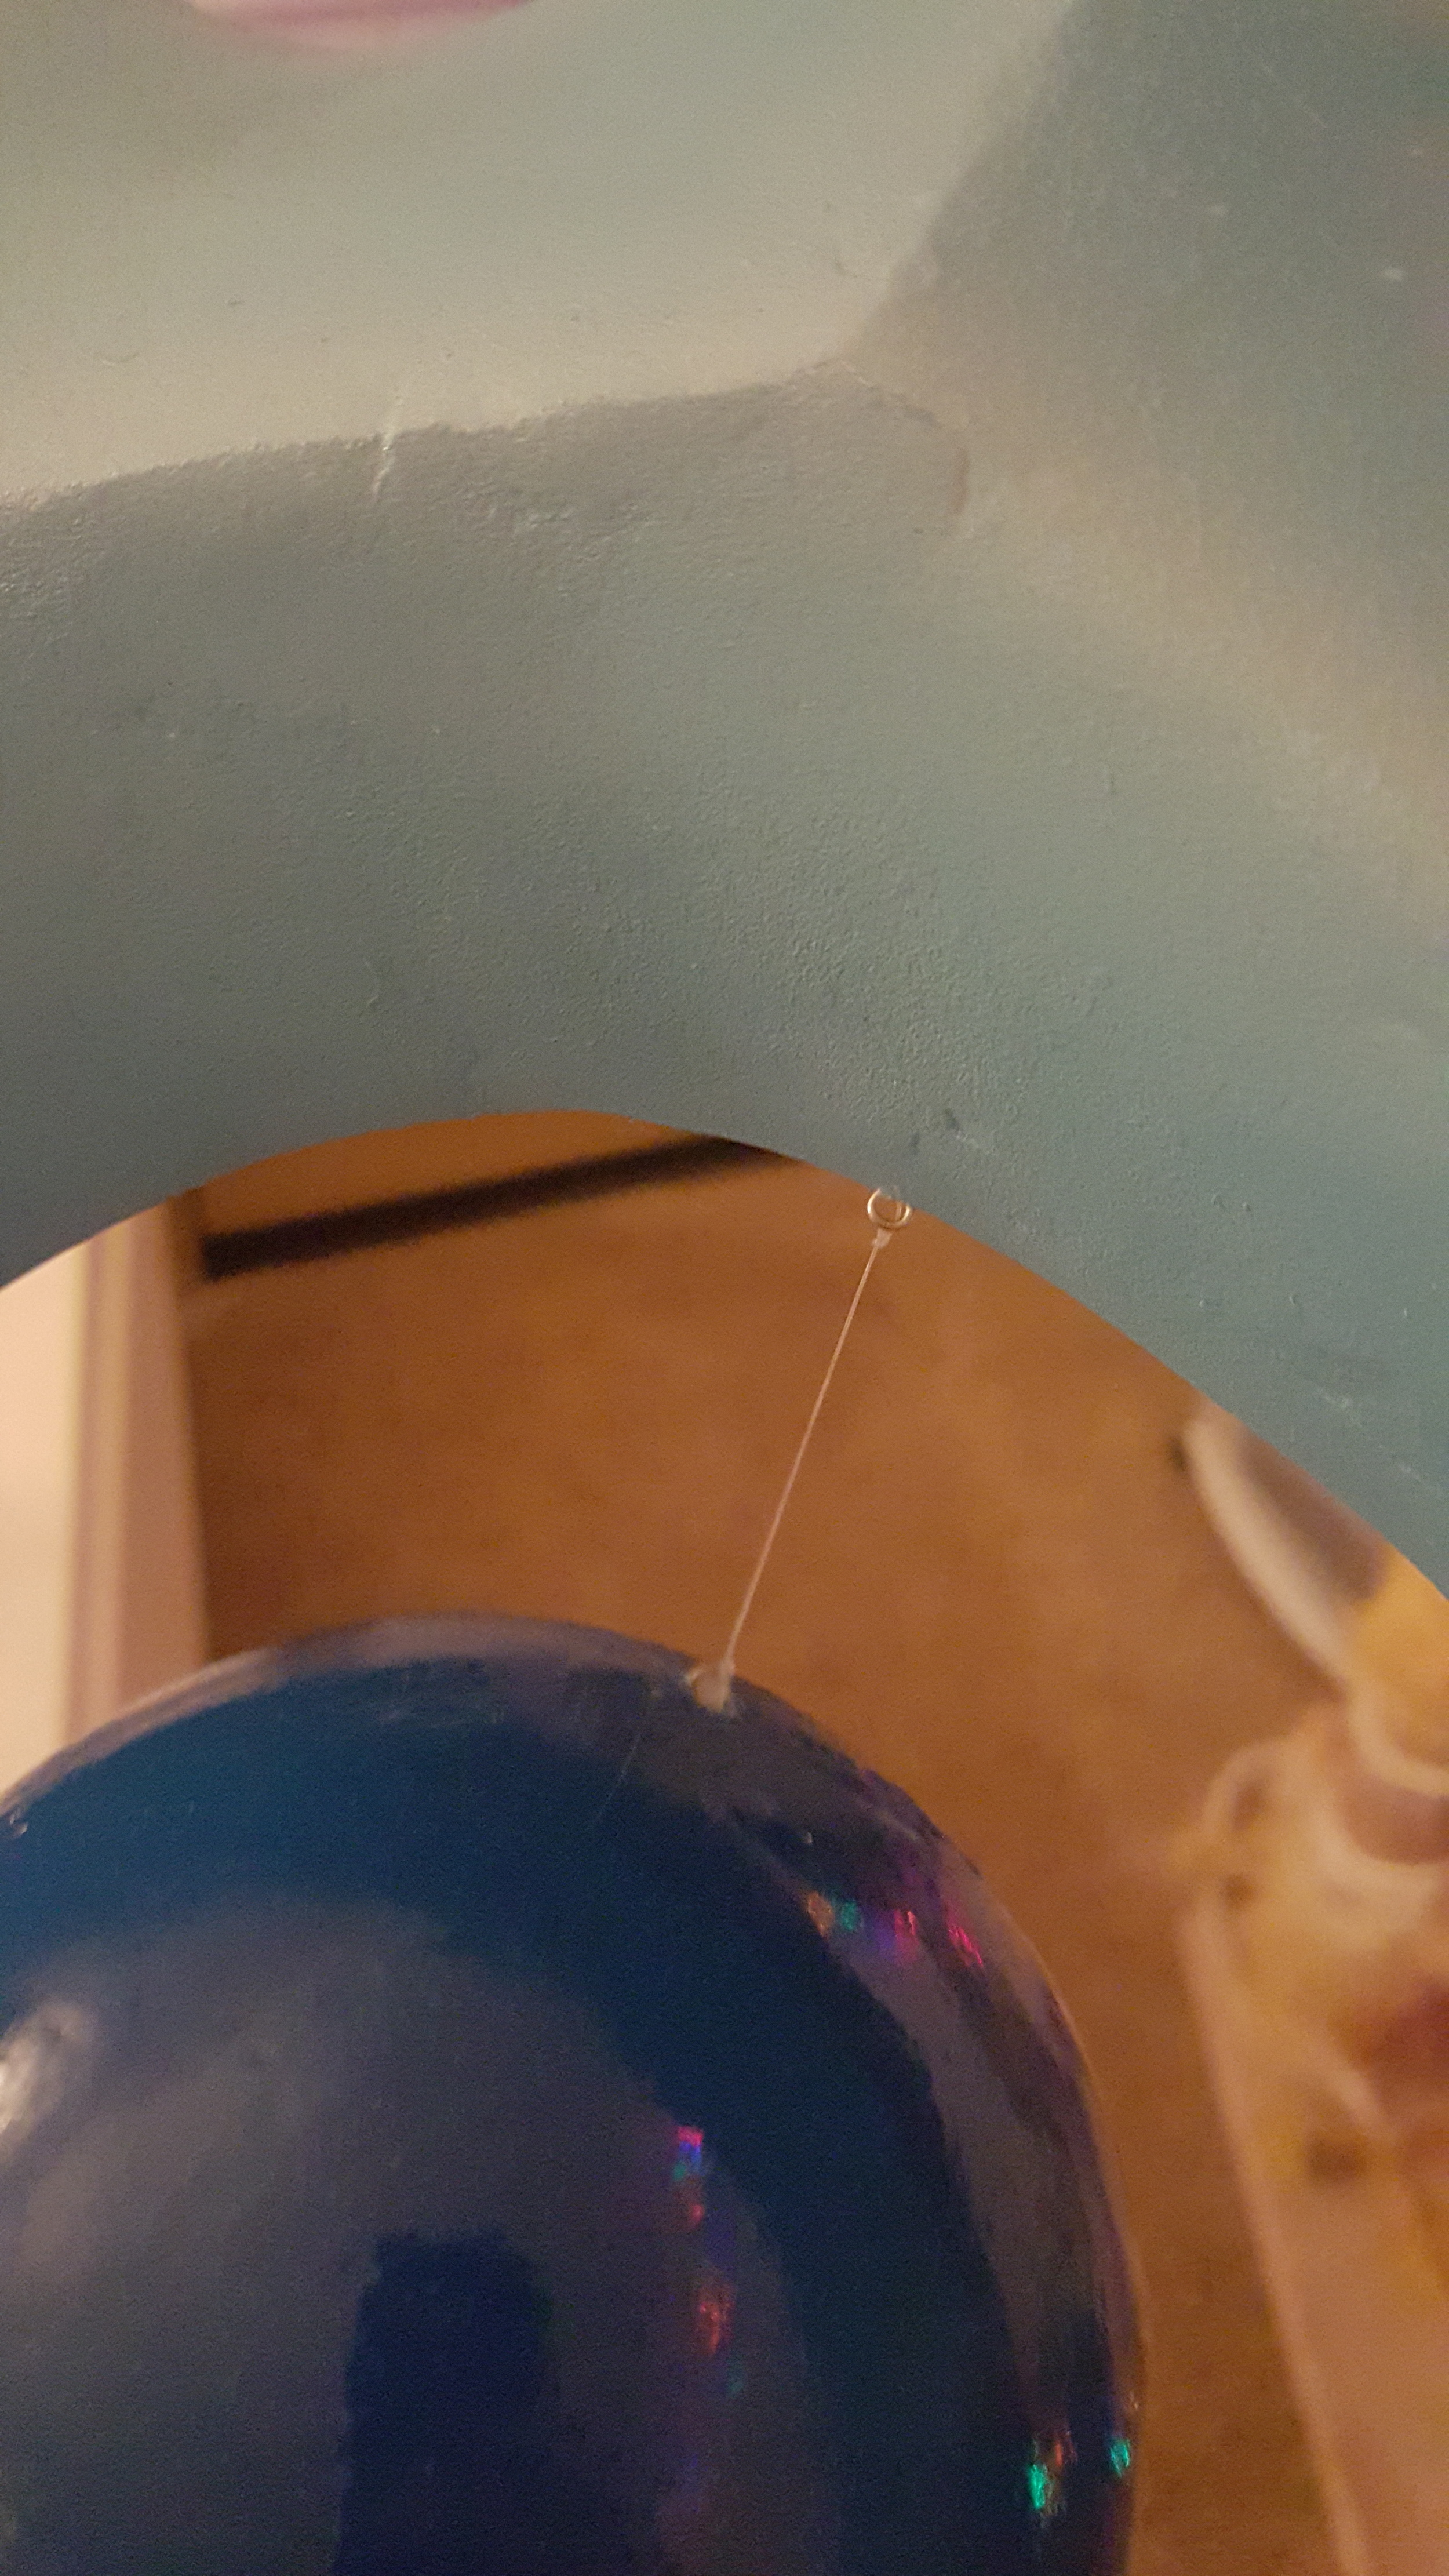
I used transparent jewelry string because it was thin – I think a fishing line as thin as this would have been stronger, but this is what I was able to find that was cheap. I looped them through the eye holes in the ball, and tied to eye hold in the inner rim of the staff. Likewise, did the same to the other end of the ball, to the opposite end of the inner rim.
And that was it! In the end I was incredibly satisfied with this staff, especially the end result of the painting. The ball did break on me once because I played the staff on a pleathery seat overnight and the ball was sticky to the seat – so when I lifted the staff, it wanted to stick to the seat and the strings snapped. So always bring an extra thing of string with you if you’re bringing this to a convention!

Hope you enjoyed my tutorial on how I made the Lulu Winter Wonder staff! Check out these photos of my full cosplay taken by Elite Cosplay, as well as my FB page.