Under the Needle: Seong Mina (Soul Caliber IV)

written by Miss Marquin (@MissMarquin)
Seong Mina is the one character that I want to cosplay literally every version of. It was only a matter of time before I took the plunge and cranked out her SCIV version. This costume was made about two years ago, but it still remains one of my most challenging to date. I had to learn a lot of new techiniques, work with some really nasty fabric and went way out of my comfort zone to make it look as pretty as I possibly could.
I’m excited to share my journey with you!
Soul Calibur Costumes are tricky. They usually are very intricate and have a lot of details. Much of the problem with making a costume from this game though, is that references are extremely hard to find. SC is notorious for having Art book art and concept art that are completely different from the in-game renders. I had intended on this costume being a ‘contest piece’, meaning that I planned on competing in a contest with it. This meant that I wanted to be as accurate as I possibly could!
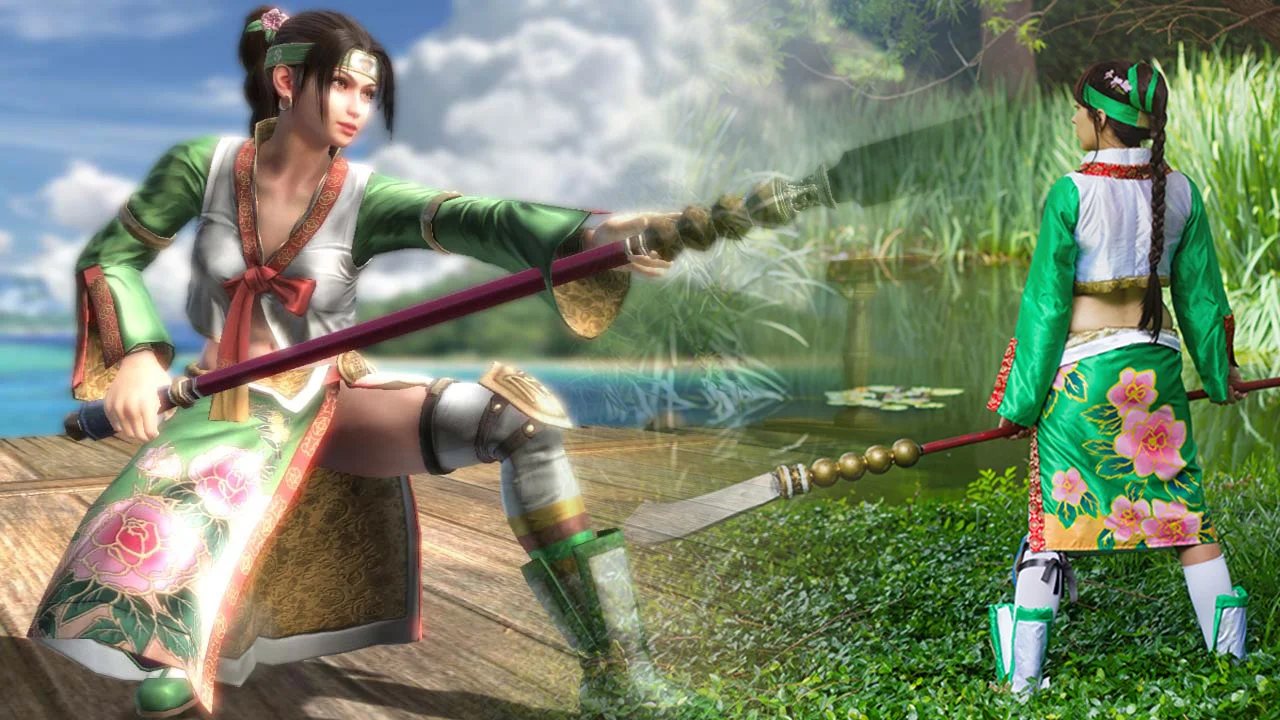
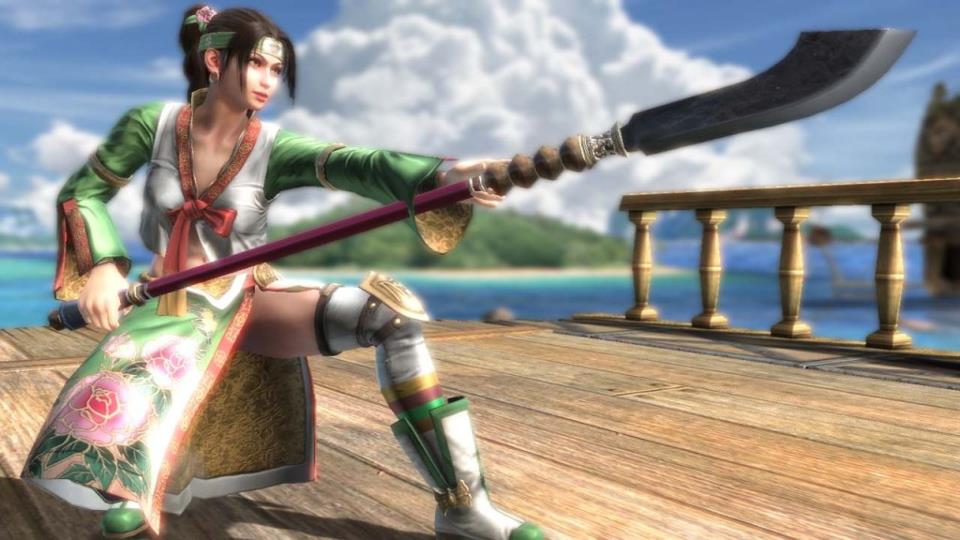
I went on a long hunt for good references. The actual concept art doesn’t really show you much of the costume, so I ended up getting lucky and finding a gold mine of screen captures from the actual game, showing all sides of her costume fairly well!
(click to enlarge) download a zip file of images HERE


This is one of those costumes that you can’t really alter an existing pattern for, so I ended up drafting my own. I was on a tight budget though, so I couldn’t afford cheap fabric (nor did I have any laying around) to make a mock-up with, so I ended up drafting my pattern with the actual fabric for the costume. I lucked out and didn’t really have to fix anything.

For the white and green, I went with a polyester sateen. Seong Mina is Korean, so I figured that she would wear something similar to a brocade, but I couldn’t find one that was plain enough and didn’t have a lot of crazy designs on it. I also knew that I wanted to stay away from satin, because it has a tendency to look very cheap and gross under camera flash. The Polyester Sateen had a bit of smooth shininess to it, but still looked nice enough when it came down to it. For the red parts and the gold lining, I went with a nice brocade—not real silk, but silky to the touch.
The downside to this these types of fabric is that they fray TERRIBLY and you can’t really iron them. Or wash them. So that meant this costume would be doomed to being wrinkly unless cared for and could never really be washed (only ‘febreezed’).
The top was fairly straight forward. I patterned out a simple shirt, making the sleeves green and that body white. The sleeves were lined with the gold brocade, so that you could see the inside through the wrist slits. Once I ensured that the length was what I needed (when I lifted my arms, my hoohaas wouldn’t show), I cut a slit down the front and hemmed it all. I didn’t have a serger yet, so I fray-checked all of the seams on the inside so they wouldn’t fray much farther down the road.
The collar took a few tries. The scalloped shape was hard to get even and no matter what kind of interfacing I used, it wasn’t stiff enough to sit up on its own. Eventually, I ended up using craft foam. I cut two pieces of fabric in the scallop-shape—in gold and white—and sewed the scalloped edges together to create a ‘sock’. I stuck the craft foam in there and then hot glued the fabric to the craft foam, to ensure it wouldn’t shift. Later on, I would regret this, since you can see the hot-glue lines. T_T I sewed the collar into the shirt and the craft foam was stiff enough to keep it stiff!
The collar took a few tries...
I cut a long red strip and hemmed it...
I cut another super long strip to make the knotted bow...
Then I cut a long red strip and hemmed it by folding over the edges. I topstitched it around the collar, covering the seam where it met the shirt. Then I cut another super long strip to make the knotted bow, which I just hand sewed at the top of the slit in the shirt.
The skirt was a big rectangle, with the green fabric on one side and the gold brocade lining the other. I made my own trim with the white and red fabric, sewing around the skirt to cover the raw edges. The red side is on the outside and the white is on the inside. The skirt fastens with Velcro, as well as a separate tie around the waist. Both of these ensure that I can wear it low on my hips, without the fear of it flapping open or falling off. The top part actually folds over the sash, to show the inner gold lining.
The skirt was a big rectangle...
went out of my comfort zone with painting...
I really went out of my comfort zone with painting the skirt. I’m not much of an artist anymore and there was really no way to ‘practice’ painting these flowers. I was REALLY nervous, because if I messed one up, I would have to start all over from scratch. I went with Tulip brand fabric paint in white, pink, dark pink, dark green and gold. The flowers were carefully layered with different colors and I used gold to ‘line’ the petals and leaves. Almost all of the colors required two-coats, since the fabric would just SOAK the paint right up. The gold needed four or five coats, because it was SO thin. The painting on the skirt took about two weeks of painting on and off.
wig a cheap wig that I bought at a beauty shop...
The wig a cheap wig that I bought at a beauty shop. Not my favorite place to buy wigs and this one wasn’t heat resistant, which made style it a bit of a challenge. I pulled it into a ponytail and bought a ponytail clip from Arda, which I clipped right into the wig. I glued in the green straps and a few sakura blossoms and that was that!
The boots were a challenge. Sewing boot covers is one of my LEAST favorite things to do, but I had a bit of trouble finding a base shoe that looked similar to her boots, without spending a ton of money. I found a pair of cheapish Men’s (curse my huge feet) rain boots. Downside was that they were water proof, so gluing stuff to them never lasted long. Over the time I wore this costume, I had to constantly re-glue pieces to the boots.
Using an exacto knife, I cut out the slits in the side. I used craft foam to reinforce the insides of the boot, so the rubber wouldn’t fall over limp. Once this was down, I covered the boots with the fabric and glued it to place, using a combo of hot glue and silicone caulk. The gold part was craft foam with hot glue for the details, painted gold! The knee-plate is also made of craft foam and just ties around the knee.
I cut out the slits in the side...
Over the course of all four Seong Mina cosplays that I’ve made, I’ve had about six or seven different polearms. This one is the latest incarnation and has lasted the longest. It’s a combination of quite a few materials and LOTS of glue. Lots. The pole is PVC and the blade was a base of insulation foam. It was covered with styrene and then painted. The part right under the blade is insulation foam covered in worbla, and then painted. The gold balls are plastic balls that I cut holes into. The PVC pipe feeds up through the pole and then is glued into place with silicone caulk and hot glue. The Blade and the butt of the polearm actually screw off for easier transportation!
This version of Seong Mina remains one of my favorite costumes to date! I’ve worn her many a time and will keep her around for a while yet! The contest that I entered with my friends went so well… WE ENDED UP SNAGGING THIRD PLACE BEST IN SHOW! This remains my only cosplay contest award to date! :D
photo credits: Ken AD
Make sure to also check me out on Facebook and also read my Just Call Me Senpai column if you'd like to ask me any cosplay related questions.